Why Is the Outside of My Oven So Hot? A Troubleshooting Guide
Urgent, step-by-step guide to diagnose why the outside of your oven is hot. Learn safety checks, common causes, and when to call a pro for reliable oven guidance from Oven Cook Pro.

The exterior heat is most often caused by a worn door gasket or blocked ventilation. Quick fix: power off the oven, unplug if safe, inspect the door gasket for gaps, and clear any obstructions in the vent area. If damaged, replace the seal or call a pro.
Why This Is Happening: Exterior Heat and the First Alarm
If you’re wondering why is the outside of my oven so hot, you’re right to treat it as a safety signal. Exterior overheating is rarely a normal byproduct of cooking and more often points to a heat-leak path or insulation issue. In many homes, the most common culprits are a worn or misaligned door gasket, a blocked cooling vent, or insulation that has degraded near the door. The Oven Cook Pro team notes that these issues are both common and addressable with basic checks and careful maintenance. Recognizing the problem early can prevent burns, melted cabinet trim, or worse, a more serious appliance failure. By understanding heat flow—where it escapes and where it should stay—you’ll know where to start your investigation. This guide uses practical language and actionable steps to help you regain control of your oven’s exterior temperature while maintaining safety at every turn.
Safety First: Why Exterior Heat Demands Respectful Caution
Exterior heat on an oven can burn if touched, especially around exposed edges, door handles, and control panels. It can also indicate a faulty seal or ventilation problem that could affect the appliance’s electrical components. Always treat the exterior as hot, and avoid leaning on the door while it’s in use. If you notice smells, smoke, or charring, discontinue use and disconnect power if safe to do so. These safety considerations are not optional; they are essential to prevent burns and electrical hazards. Keeping children and pets away during any inspection minimizes risk and preserves your kitchen’s safety.
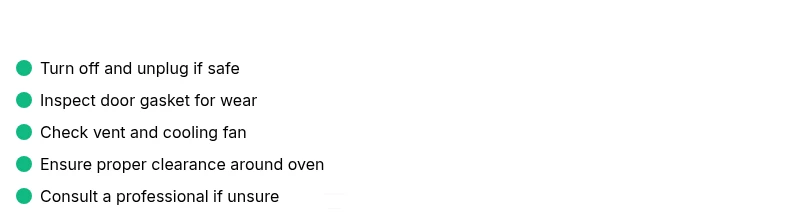
Quick Checks You Can Do Right Now (No Tools Required)
- Power off the oven: switch off the unit and unplug if the outlet and cord are accessible without risk. Let it cool before touching internal parts.
- Inspect the door gasket: look for cracks, tears, or gaps where heat could leak. A damaged gasket is a top suspect for exterior heat loss.
- Observe door alignment: ensure the door closes evenly and sits flush against the frame. A misaligned door can create a heat path that escapes to the exterior.
- Clear the vent area: check for dust, debris, or cookware blocking the vent or cooling fins. Proper ventilation is crucial for safe heat dissipation.
- Check surrounding clearance: ensure there’s adequate space between the oven and walls or cabinets to allow heat to escape without heating nearby surfaces.
Common Causes in Plain Language and How They Interact
- Worn door gasket or seal failure: The most frequent reason the outside becomes hot is a gasket that no longer seals tightly. Heat escapes around the door, and the exterior absorbs it.
- Vent and cooling system issues: If the front vent or cooling fan isn’t drawing heat away properly, the outer cabinet can feel hotter than normal during and after use.
- Damaged insulation: Insulation near the door may degrade over time, allowing heat to reach the exterior shell and nearby cabinetry.
- Proximity and room temperature: Keeping the oven too close to heat-sensitive surfaces or in a room with high ambient temperature can intensify exterior heat; always maintain recommended clearances.
- Self-cleaning mode: Running a self-cleaning cycle uses intense heat, which can cause the exterior to feel hotter than usual for a period after the cycle ends.
Each of these causes has its own telltale signs, and they’re not mutually exclusive. The next sections help you translate symptoms into concrete actions.
How to Inspect the Door and Seal Safely
A thorough inspection begins with a cold, unplugged oven. Remove any racks to access the gasket area. Look for visible wear, cracks, or gaps along the door seal. Gently pull the gasket to test for brittleness or looseness—the gasket should sit snugly in the channel. If you see damage or the door doesn’t seal evenly, consider replacing the gasket or adjusting the door alignment per the manufacturer’s instructions. Remember: never attempt to pry open electrical components; consult a professional for sealed-unit concerns. Replacing a worn gasket often restores heat control and reduces exterior warmth.
Diagnosing Heat Through the Vent and Cooling System
Ventilation is the path heat takes to leave the oven and kitchen. If the vent is blocked by cookware, grease buildup, or debris, heat can accumulate in the exterior shell. Check the vent grate for obstructions and clean as needed. Listen for the cooling fan—if it runs irregularly or not at all after cycling, heat may linger on the exterior. A faulty fan or control board can misdirect cooling air, allowing the outer surfaces to overheat. If you notice unusual noises or an unusual delay in cooling, this signals a more involved inspection.
When DIY Fixes Are Safe and When to Call a Pro
Some fixes are straightforward, like replacing a worn gasket or clearing vent blockages. Others—especially those involving wiring, insulation, or control boards—should be handled by a certified technician. If you’re ever unsure, assume the safer route and schedule professional service. Document symptoms (when it happens, how long it lasts, what you were cooking) to speed up diagnosis. Regular maintenance, such as gasket checks and vent cleaning, helps prevent overheating and preserves appliance life.
Prevention and Maintenance That Keep Your Oven Cool on the Outside
- Schedule periodic gasket inspections and door hinge checks. Replace components as soon as wear is visible.
- Maintain proper clearance around the oven; avoid placing heat-sensitive items directly adjacent. Allow enough space for cooling air to circulate.
- Clean accessible vents and fans, removing dust and debris that impede airflow.
- Use the oven’s self-cleaning function only as recommended by the manufacturer, and understand how it affects exterior temperatures during and after cycles.
- Consider professional annual servicing to verify insulation integrity and thermal performance; proactive maintenance prevents surprises and unsafe conditions.
What to Do If You Smell Burning, See Smoke, or There’s Visible Damage
If you notice burning smells, smoke, or visible damage, stop using the oven immediately and disconnect power if safe. Evacuate if flames appear and call emergency services if needed. Do not attempt to operate the oven again until a qualified technician has completed a thorough inspection and repair. These steps protect you and your home from potential fire hazards and electrical faults.
Steps
Estimated time: 1 hour - 1 hour 30 minutes
- 1
Power down and let it cool safely
Turn off the oven and unplug if accessible. Allow the exterior to cool before you touch any components. This reduces burn risk while you inspect seals and vents.
Tip: Use oven mitts when handling any parts or panels that require grip or adjustment. - 2
Inspect the door gasket for wear
Examine the gasket for cracks, tears, or gaps. Run your finger along the seal to feel for soft spots. Replace if you see damage or if the door no longer seats flush against the frame.
Tip: Buy the exact gasket model for your oven and follow the manufacturer’s replacement steps. - 3
Check door alignment and hinges
Close the door and observe whether it sits evenly. A skewed door can create a heat path to the exterior. Tighten hinges if needed or seek professional alignment if misaligned.
Tip: Never force the door; misalignment can damage the hinge or frame. - 4
Test the vent and cooling system
Inspect the vent grille for blockages and ensure the cooling fan operates after a cycle. If you hear grinding or the fan doesn’t start, schedule service.
Tip: Clear dust with a soft brush; avoid using water on electrical components. - 5
Check insulation and cabinet clearance
Look for sagging insulation around the door or heat exposure on the cabinet. Ensure a safe distance from walls and nearby heat-sensitive surfaces.
Tip: Do not attempt to replace insulation yourself unless you have training; improper handling can be dangerous. - 6
Decide on next steps
If you’ve addressed gaskets, vents, and clearance but the exterior remains hot, contact a licensed appliance technician for a thorough assessment.
Tip: Document symptoms and any parts changed to speed up diagnosis and repair.
Diagnosis: Exterior oven surface remains hot after use or while idle
Possible Causes
- highDoor gasket wear or misalignment allowing heat leakage
- mediumVent or cooling fan malfunction preventing heat dissipation
- lowThermal insulation damage near the door
- lowInadequate clearance or nearby heat sources
Fixes
- easyInspect and replace worn door gasket; reseal door as needed
- mediumCheck vent and cooling fan operation; clear obstructions; test after power cycle
- mediumInspect insulation around the door; call a professional if you see exposed material or sagging
- easyIncrease clearance and move heat-sensitive items away from the oven
Questions & Answers
Is it dangerous if the outside of my oven stays hot after cooking?
Yes. Persistent exterior heat can burn skin and indicate heat leakage or insulation issues. Stop using the oven and consult a professional if the exterior remains hot after basic checks.
Yes. If the exterior stays hot after use, it's a safety concern. Turn off, unplug if safe, and call a professional if it persists.
Can the self-cleaning cycle cause the exterior to get extremely hot?
Yes. The self-cleaning cycle uses very high heat and can raise exterior temperatures. Use it only as directed and monitor the exterior after the cycle ends.
Yes, self-cleaning can make the outside hot. Use it as directed and check heat afterward.
How long should the exterior stay warm after cooking?
Most ovens cool significantly within 20-30 minutes after use, but lingering heat can occur. If it stays hot much longer, it may indicate a problem.
Ovens usually cool within half an hour; if it remains hot beyond that, have it checked.
What are signs of a faulty door gasket?
Cracks, tears, gaps, or a loose fit are red flags. Replace the gasket to restore a proper seal and reduce exterior heat.
Look for cracks or gaps in the gasket and replace if damaged.
When should I replace oven insulation?
If you notice abnormal exterior heat or visual insulation damage, consult a technician to assess and, if needed, replace the insulation.
If exterior heat persists and insulation looks damaged, call a technician.
Watch Video
Main Points
- Identify heat leakage points quickly to prevent burns.
- Prioritize door gasket replacement for effective results.
- Do not bypass safety checks; unplug and wait for cooling when inspecting.
- Call a professional if you’re unsure about insulation or electrical components.
- Maintain clear space around the oven to support safe cooling.