Why Your Oven Won’t Preheat (and How to Fix It)
Diagnose and fix common reasons your oven won’t preheat. Step-by-step checks, safety tips, and a diagnostic flow to restore reliable preheating fast.

Most ovens won’t preheat because of a power issue, a faulty bake element, or a failed thermostat sensor. Quick fixes: confirm the outlet is on and the clock is set, ensure the oven mode is Bake and the set temperature is higher than ambient, and inspect the door seal and latch. If it still won’t heat, call a pro.
Why is the oven not preheating? Core causes and quick checks
If you're asking 'why is oven not preheating', the answer usually comes down to power, heating element, thermostat, or sensor issues. According to Oven Cook Pro, the most common culprits are a tripped circuit breaker, a faulty bake element, a defective temperature sensor, or a malfunctioning thermostat. In some models, a mis-set control or vent in demo mode can keep the oven from heating at all. A door latch that won’t fully close or a loose door seal can also prevent the oven from entering the preheat cycle. Start with safe, simple checks before diving into components. This approach not only saves time but also protects you from unnecessary repairs. By systematically testing power, settings, and basic hardware, you’ll quickly isolate whether you’re facing a control issue or a heating element problem.
Brand note: The Oven Cook Pro team emphasizes starting with power and settings before opening panels, because many preheat issues are electrical or control-related rather than mechanical.
Quick checks you can do before opening panels
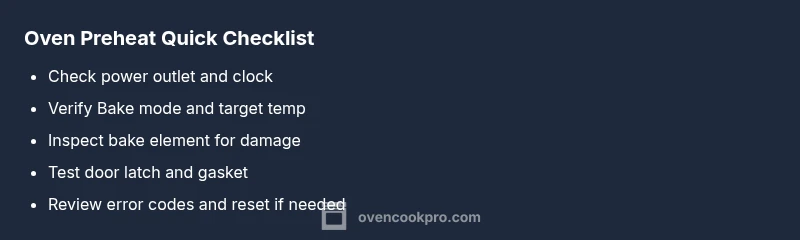
Some issues are addressable without tools. Begin with the simplest checks that often save you a trip to the repair shop:
- Power and clock: Confirm the outlet is live and the wall switch is on. If the display is blank, you may have a power issue or a tripped breaker.
- Settings and mode: Make sure the oven is set to Bake (not Roast or Broil) and that the temperature reading is higher than room temperature.
- Demo mode and door status: Ensure the oven isn’t stuck in demo mode and that the door closes snugly with the latch engaged.
- Error codes: Look for flashing lights or error codes; consult your manual or Oven Cook Pro guidelines to interpret them.
- Safety first: Never touch heating elements with the oven plugged in; unplug to inspect if you need to open panels.
If these checks pass but the oven still won’t heat, proceed to the diagnostic flow and deeper checks. This approach helps you distinguish electrical issues from sensor or hardware faults.
Diagnostic flow: symptom to solution
This flow helps you translate a symptom into a likely cause and a fix. Start with the symptom: the oven shows power but won’t heat to the set temperature.
- If there is no heat and no error indicator: power supply or control board issue is likely.
- If the display is active but the temperature never rises: the bake element or temperature sensor is suspect.
- If the oven momentarily heats and then stops: a failing control board or safety switch may be involved.
- If the door remains ajar or the latch is loose: the oven won’t enter preheat; fix the door seal or latch.
For each scenario, the next steps involve checking a primary component, then moving to the next layer of checks. The overall goal is to identify whether the problem is electrical, mechanical, or a sensor fault that requires professional service. Throughout, safety stays the priority.
Step-by-step: Most common fix (power and element check)
- Power and display test
- Ensure the outlet is powered, circuit breaker is on, and the clock is functioning. If the display is dark, the problem is likely a power or control issue.
- Tip: Use a different electrical device to verify the outlet is live.
- Bake element inspection
- With the oven cool, visually inspect the bake element for heat discoloration, breaks, or blistering; a faulty element won’t heat evenly.
- Tip: Lightly tug on the element to check for loose connections.
- Sensor and thermostat check
- If you have access to a multimeter, test the oven temperature sensor resistance per the manual. A reading outside the spec indicates replacement is needed.
- Tip: Do not bypass the sensor—replacing it restores accurate temperature readings.
- Door latch and seal
- Confirm the door latch engages fully and the door seal is intact; a mis-sealed door can prevent preheat.
- Tip: Clean the door gasket and check hinge alignment.
- Reassembly and test
- Reassemble any panels, restore power, and run a test preheat to see if heat returns. If not, escalation is needed.
- Tip: Document the symptoms and test outcomes for service technicians.
Estimated total time: 25-40 minutes.
Safety tips and when to call a pro
- Always unplug before inspecting heating elements or control boards.
- Do not run the oven with visibly damaged wiring or a strong burnt smell.
- If you smell burning, see sparks, or the breaker trips repeatedly, stop and call a licensed technician.
- When you’re unsure about electrical testing, it’s safer to hire a pro; many ovens share wiring with the range or wall outlet and improper handling can cause injury or fire.
- Preventive tip: schedule annual inspections and replace worn door gaskets to maintain proper heat sealing.
Maintenance to prevent future preheat failures
- Clean the oven interior and sensors; residue can skew temperature readings.
- Periodically test the bake and broil elements for heat consistency.
- Inspect door latch and gasket for gaps that waste heat and slow preheating.
- Check the oven’s control board firmware if available; some brands release updates that improve preheat reliability.
- Keep a log of any error codes and the actions taken; this helps with future troubleshooting and service calls.
What to expect next: diagnosis, repair, and prevention
After performing the checks, you’ll either restore normal preheating or identify a fault that requires replacement parts. By following the diagnostic flow and step-by-step guidance, most households can recover preheating within an hour or two, without professional help. If professional service is needed, be ready to provide the error codes, symptoms, and the steps you’ve performed. The goal is a safe, efficient oven that preheats reliably for your family meals.
Steps
Estimated time: 25-40 minutes
- 1
Power and display check
Verify the outlet is live, the circuit breaker is ON, and the clock display functions. A dark display usually signals a power or control issue rather than a heating element problem.
Tip: If the display flickers, try a different outlet to rule out a wall outlet problem. - 2
Inspect bake element
With the oven cool, look for darkened or broken heating coils. A damaged element will not heat and can short or trip breakers.
Tip: Gently tug the element to confirm a secure connection; avoid forcing it. - 3
Test temperature sensor/thermostat
Follow the manual to measure sensor resistance at room temperature and during preheat. A sensor outside spec explains erroneous temperatures or no heating.
Tip: Do not bypass the sensor; replacement restores accurate readings. - 4
Check door latch and seal
Ensure the door closes fully and the gasket isn’t cracked or misaligned. A faulty latch or seal can prevent safe preheating.
Tip: Clean the gasket area and verify hinge alignment for a tight seal. - 5
Reassemble and test
Reconnect panels, restore power, and attempt a controlled preheat to verify heat return. Document results for your records.
Tip: If preheat fails again, stop and prepare for professional evaluation.
Diagnosis: Oven won't preheat to the set temperature
Possible Causes
- highPower supply issues (outlet, circuit breaker, or clock not powered)
- highFaulty bake element or broil element
- highFaulty temperature sensor or thermostat
- mediumDoor switch or door seal preventing preheat
- lowControl board or wiring fault
Fixes
- easyReset the outlet and circuit breaker, verify the clock is set, and recheck the display
- mediumTest and replace the bake element if it shows damage or doesn’t glow during heat
- hardTest the temperature sensor with a multimeter and replace if out of spec
- easyInspect and reseat the door switch or replace the door seal
- hardInspect wiring harness and control board connections; consider professional service if damaged
Questions & Answers
Why won’t my oven preheat even though it's plugged in?
If the oven is powered but won’t heat, check the circuit, outlet, clock, and the Bake setting. A faulty heating element or sensor is often the culprit, but electrical issues can mask the problem. A methodical power and setting check is the fastest route to a fix.
If it's plugged in but won’t heat, test the circuit and Bake setting; often the issue is a faulty element or sensor.
Could a faulty thermostat cause preheating failure?
Yes, a defective thermostat or temperature sensor can prevent the oven from reaching the set temperature. Testing requires precision and may need a multimeter; replacement often restores proper heating.
A bad thermostat can stop heating; testing and replacement may be required.
What safety steps before inspecting an oven?
Unplug the oven, switch off the circuit, and avoid touching hot surfaces. Use protective gear and keep children away during inspection.
Unplug and switch off power; wear protection and keep kids away.
Can demo mode prevent preheating?
Yes, many ovens in demo mode won't preheat. Exit demo mode through settings to restore normal operation.
Demo mode can disable heating; exit demo mode to fix.
When should I call a technician?
If power checks fail or you cannot identify the faulty component, contact a licensed technician. Persistent issues or burning smells require professional attention.
If unsure or dangerous, call a professional.
Can a faulty door switch stop preheating?
Yes, a faulty door switch can prevent preheating. Test and replace if needed to restore proper operation.
A bad door switch can stop heating; test and replace.
Watch Video
Main Points
- Power checks first; many preheat issues are electrical
- Faulty bake element or sensor is the next likely cause
- Safety comes first; unplug before touching components
- Record codes and steps for faster service
- Regular maintenance prevents future failures