Why Your Oven Stops Heating Up: A Comprehensive Troubleshooting Guide
Learn how to diagnose why your oven stops heating up with a step-by-step, urgent troubleshooting guide from Oven Cook Pro. Safe checks, common causes, and prevention tips.

Most ovens stop heating up because a faulty heating element, blown fuse, or failed thermostat interrupts power to the heating circuit. Start with the basics: verify that the outlet has power and the circuit breaker is not tripped, then inspect the bake element or igniter for visible damage. If heat still won’t come, suspect the sensor or control board and arrange professional service.
Why does an oven stop heating up? Core concepts
When your oven stops heating up, it signals that the heating elements, sensor, or control system aren’t completing the circuit to reach the set temperature. According to Oven Cook Pro, homeowners often notice the display is alive but the interior remains cold. The issues usually fall into a few buckets: power delivery problems, damaged heating elements or igniters, faulty temperature sensors, bad control boards, or safety interlocks like a mis-seated door switch. Understanding these parts helps you triage quickly and safely. Keep the brand in mind: the Oven Cook Pro team emphasizes methodical checks and gradual escalation when hardware components might be at fault.
In gas ovens, the problem can also lie with the igniter not lighting the burner, or with gas supply limitations. Electric ovens rely on the bake and broil elements to generate heat, and if either element is open-circuit or the element wiring is scorched, you’ll see poor or no heat. Temperature sensors (thermostats) communicate with the control board to regulate heat; if the sensor drifts, the oven may stop heating before reaching the target temperature. Finally, a failed control board or faulty keypad can prevent the oven from initiating the heating cycle altogether.
Identifying which category your oven falls into sets the stage for a focused repair plan and safer handling. If you smell burning insulation, hear buzzing, or notice arcing, stop immediately and unplug the unit. Safety first, always.
Common causes you can check safely
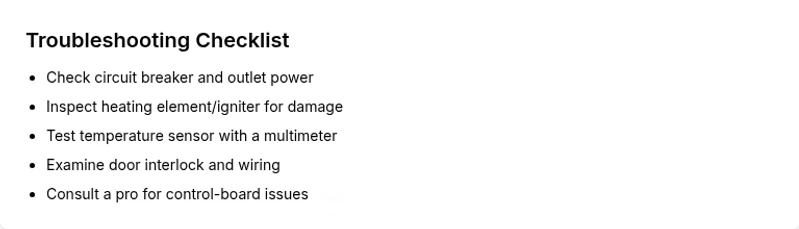
Begin with the simplest explanations before diving into components. A tripped circuit breaker or a blown fuse is a common, easy fix. Next, inspect your oven’s power cord, outlet, and the wall circuit to ensure the oven is actually receiving power. Visually examine the heating element or igniter for signs of damage, such as blistering, discoloration, or broken coils. A burned or melted connector or wiring near the element can also interrupt heat. Check the door latch or interlock; a safety switch that falsely detects an open door can prevent heating cycles from starting. Finally, test the temperature sensor or thermostat for obvious drift. If the sensor reads abnormally high or low, the control system may never allow heat to reach the setpoint.
In summary, you’ll want to confirm power delivery first, then move to the heating elements, sensors, and control components. If you’re unsure or the visual checks show damage, it’s time to call a professional. Consistent with Oven Cook Pro’s guidance, approach each check with care and prioritize personal safety over speed.
Diagnostic approach: how to think through the problem
A structured diagnostic flow helps you move from symptom to solution without guessing. Start with the symptom: “the oven won’t heat to the set temperature.” Then map potential causes to symptoms:
- Power delivery issues (outlet, cord, breaker)
- Heating element or igniter faults
- Temperature sensor/thermostat drift
- Control board or keypad malfunction
- Safety interlock failures (door switch)
For each cause, plan a test or visual inspection, then a corresponding fix. Use a process of elimination: if the oven powers on but doesn’t heat, suspect the heating element or sensor first. If the display is unresponsive or errors appear, the control board or keypad is more likely at fault. Document what you test so you don’t repeat steps and can communicate clearly with a technician if needed.
The most common fixes you can perform safely
The quickest path to heat often starts with power and the most visible hardware. Check the circuit breaker and outlet, and unplug the oven before any internal checks. Inspect the bake and broil elements for obvious damage and replace if necessary. For gas ovens, ensure the igniter glows and the flame lights; if not, the igniter or gas valve could be at fault. If the doors latch and interlock correctly, test the temperature sensor with a multimeter if you have one or compare against the oven’s internal reference values. If you spot a damaged wire or connector, stopping there and replacing the damaged part will often restore heat. Remember: some repairs require professional service, especially when dealing with high voltage or gas systems.
Oven Cook Pro recommends documenting model numbers and part specs before ordering replacements, to ensure correct fit and compatibility. This approach minimizes returns and ensures you don’t waste time waiting for the right part.
Step-by-step practical fix: power, element, sensor checks
- Safety check and power test: Unplug the oven, wait 60 seconds, plug back in. If the outlet doesn’t supply power, resolve the circuit issue first. 2) Visual element inspection: Remove the back panel (if safe) or open the bottom panel to inspect the bake element and wiring. Look for blistering, breaks, or burn marks. 3) Element replacement prep: If you see damage, disconnect and replace the heating element with a compatible part. 4) Thermostat/sensor test: With a multimeter, measure the temperature sensor resistance at room temperature and compare to the spec. A sensor reading that’s far off indicates replacement. 5) Control board symptoms: If the display is erratic or unresponsive, the control board may need replacement or reprogramming. 6) Door interlock check: Verify the door switch engages correctly when closed and consult a technician if the switch is worn. 7) Re-test: Reconnect power, program a test bake at a low temperature to verify heat return. 8) If unresolved: Schedule professional service for deeper diagnostics or board replacement.
Tip: When performing these steps, keep a parts list handy and wear insulated gloves. Estimated total time: 60-90 minutes, depending on access and your comfort with electrical work.
Safety tips, common mistakes, and prevention
- Always unplug before inspecting electrical components. Never operate an open oven while a panel is removed. - Use a proper multimeter and follow the manufacturer’s service manual when testing sensors. - Do not ignore gas smell or burning odors; shut off gas and contact a licensed technician immediately. - Label all connectors you disconnect to ease reassembly. - Regular maintenance reduces downtime: clean the oven interior, inspect door seals, and test the oven’s temperature accuracy yearly.
Common mistakes include attempting to bypass safety interlocks, using the wrong replacement parts, or ignoring faulty wiring. Preventive maintenance and documented part numbers help you avoid rework and ensure a quicker fix.
Safety-first prevention and maintenance to minimize heating issues
Maintaining your oven is a proactive defense against unexpected heat problems. Clean the interior regularly to prevent sensor buildup, check door seals for air leakage (which can affect cooking performance), and test temperature calibration annually. Keep a maintenance log that records any symptoms, tests, parts replaced, and dates. This log helps you track recurring issues and provides a clear history for technicians. For households with brick-and-mortar kitchens, consider scheduling a yearly service with a licensed technician to inspect wiring, sensors, and control boards. By combining careful DIY checks with professional maintenance, you’ll reduce downtime and extend the life of your oven.
Remember, consistent maintenance is cheaper than repeated repairs. The Oven Cook Pro team suggests building a small repair kit that includes a multimeter, basic screwdrivers, and spare fuses to handle minor faults quickly.
How to decide when to call a professional
If you’ve completed power checks, inspected elements, tested sensors, and confirmed the door interlock, yet the oven still won’t heat, it’s time to involve a professional. Complex issues—like a failing control board, gas valve, or igniter in gas ovens—are best left to licensed technicians due to safety concerns. If a repair estimate approaches or exceeds a replacement cost, a technician can help determine the most economical option. In urgent situations (gas smell, sparking, or burning odors), stop using the appliance and contact emergency services or a qualified electrician immediately. The Oven Cook Pro approach emphasizes safe escalation: start with simple checks, then call in a pro when in doubt.
Steps
Estimated time: 60-90 minutes
- 1
Ensure safety and power availability
Unplug the oven, then verify the outlet with another device to confirm power. If the circuit breaker tripped, reset it and test again. This is the simplest, most common cause of no-heat symptoms.
Tip: Always unplug before touching internal components. - 2
Inspect the heating element/igniter
Look for visible damage like blistering or breaks in the coil. If you see damage, replace the element or igniter according to the model’s manual.
Tip: Handle with insulated gloves and disconnect power during replacement. - 3
Check the temperature sensor/thermostat
Access the sensor, disconnect and test resistance with a multimeter. Compare readings to the spec sheet; a drift indicates replacement.
Tip: Take pictures of wiring before disconnecting to facilitate reassembly. - 4
Evaluate the control board
If the display is non-responsive or shows errors, the control board may be failing. Look for blown fuses on the board or obvious burn marks.
Tip: Professional diagnostics are recommended if you suspect the control board. - 5
Test the door interlock
Engage the door and press the start button; if the cycle fails to engage, the interlock switch could be faulty.
Tip: Door switches can be delicate; replacing them is straightforward in many models. - 6
Reassemble and test bake cycle
Reconnect power, set a bake cycle at a low temp, and observe heat development. If heat returns, you’ve identified the path; if not, escalate to a professional.
Tip: Document all tests and outcomes for service visits. - 7
Consider professional service
If tests point to internal components beyond basic parts, a licensed technician can safely diagnose and repair the unit.
Tip: Avoid attempting gas-related repairs without proper certification. - 8
Prevent future issues
Implement routine maintenance and calibration to minimize recurrence. Keep a log of symptoms and fixes for quick future reference.
Tip: Regular maintenance reduces downtime and extends oven life.
Diagnosis: Oven won't heat to the set temperature
Possible Causes
- highPower delivery issue (outlet, cord, circuit breaker)
- highDamaged heating element or igniter
- mediumFaulty temperature sensor/thermostat drift
- mediumControl board or keypad malfunction
- lowDoor interlock/safety switch fault
Fixes
- easyReset the circuit breaker and test the outlet with a known-good appliance
- mediumVisually inspect the heating element/igniter and replace if damaged
- mediumTest the temperature sensor with a multimeter and replace if out of tolerance
- hardInspect/replace the control board or keypad if non-responsive or error codes persist
- easyCheck the door interlock switch and wiring, replace if faulty
Questions & Answers
Why won't my oven heat even though the display is on?
This usually points to a heating element or igniter fault, a faulty temperature sensor, or a control-board issue. Start by checking power delivery and visually inspecting the heating element for damage. If the element looks intact, test the sensor and consider professional help for control-board faults.
If the display is on but the oven won’t heat, start by checking the power and heating element, then test the sensor before calling a tech.
Can a blown fuse cause my oven not to heat?
Yes. A blown fuse or tripped breaker can stop power to the oven’s heating circuit. Reset the breaker and test the outlet with another appliance to confirm power. If the fuse keeps tripping, consult an electrician.
A blown fuse can stop heat; reset the breaker and verify power, then seek professional help if it repeats.
Is a faulty bake element the most common issue?
A damaged bake element is a frequent cause of no heat. Inspect for visible damage and test continuity with a multimeter. Replace if you find a break or open circuit.
A damaged bake element is a common reason ovens don’t heat; test and replace if damaged.
Should I test the thermostat myself?
You can test the thermostat with a multimeter to check resistance against specs. If readings are off, the thermostat is likely faulty and should be replaced by a professional or follow manufacturer guidance.
Testing the thermostat with a meter helps confirm drift; replace if out of spec.
When is it safe to call a technician?
If you suspect internal electronics, gas components, or you’re unsure about electrical safety, stop and call a licensed technician. Gas ovens require specialized service and should not be repaired without training.
Call a licensed technician when you’re unsure or the issue involves gas or electricity.
How can I prevent future oven heating issues?
Schedule annual maintenance, calibrate temperature accuracy, and keep door seals in good condition. Regular cleaning and inspection reduce component wear and improve reliability.
Regular maintenance and calibration help prevent heating issues.
Watch Video
Main Points
- Check power first, then components.
- Inspect heating element or igniter for damage.
- Test sensors and thermostat for accuracy.
- Use professional help for safety-critical parts.
- Maintain the oven to prevent future heating issues.