When Your Oven Stops Working: A Home Troubleshooting Guide
Facing an oven that won’t heat? This urgent troubleshooting guide helps homeowners diagnose power, fuse, element, and control issues, with a clear flow, safety tips, and step-by-step fixes.

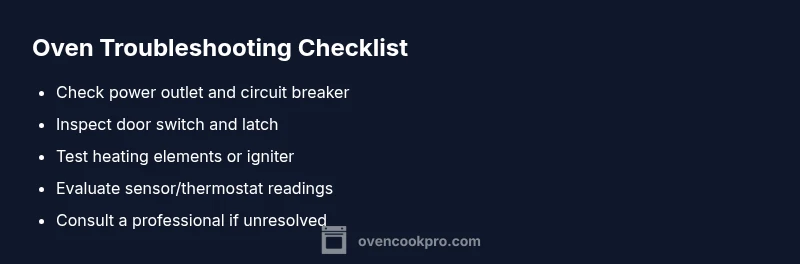
According to Oven Cook Pro, the most likely reason your oven stops working is a power issue or a blown fuse. Start by checking the outlet and breaker, then confirm the clock is on and the door switch isn't stuck. If power is fine, inspect heating elements and control board.
Overview: when your oven stops working
If your oven suddenly goes dark or fails to heat, it’s understandably alarming. The immediate goal is to restore heat safely while avoiding further damage. The situation can manifest as no power to the display, no heat after turning on, uneven temperatures, or an error code flashing on the panel. In many homes, the root cause is easier to identify than you might think, and several fixes are doable without professional help—so long as you follow safety steps. This guide is written for homeowners who want a reliable, methodical approach to diagnose the issue, perform safe checks, and decide when a technician is necessary. According to Oven Cook Pro, begin with power and safety checks, then proceed to component tests. By staying organized, you can often revive operation or determine if professional service is required. The keyword when oven stops working captures a broad set of symptoms, but the solution usually starts with simple power-confirming checks before moving to heating elements, sensors, or control boards.
Quick diagnostic checklist you can trust
When your oven stops working, a structured checklist helps you avoid wasted effort. Start with the basics: confirm the oven is plugged in, verify the outlet has power, and reset any tripped circuit breakers or blown fuses. Check the display for a clock or error code; a dead display often signals power or controller issues rather than a heating failure. If you’re dealing with a gas oven, listen for a clicking sound from the igniter; if absent, the igniter may be the culprit. Inspect the door latch or switch if the oven won’t start; a faulty switch can prevent heating even when power is present. Safety first: if any step feels risky, pause and call a professional. Oven Cook Pro emphasizes documenting symptoms and noting any recent changes (new breaker trips, new appliances, or recent remodeling) to speed up a repair.
Common causes and likelihood
- Power issue (outlet, cord, or plug) — high
- Tripped circuit breaker or blown fuse — high
- Faulty bake/broil element or igniter — medium
- Faulty temperature sensor or thermostat — medium
- Control board or display failure — low
Identifying the right cause is a matter of testing successive layers. Start with the power supply and breaker status, then confirm the display responds when you press a command. If the clock can power on yet the oven won’t heat, you’re most likely seeing a heating element or sensor fault. If nothing responds visually, the control board or wiring could be at fault. Remember to consult your appliance’s model-specific manual for wiring diagrams and safety cautions. The key is to confirm power first, then isolate components one at a time.
Step-by-step troubleshooting flow you can follow
This section expands the diagnostic flow from symptom to solution with practical checks you can perform safely. Begin with the simplest power verification, then proceed to controlled component testing. If any step reveals a live component or damaged wiring, stop and call a technician. If you identify a likely failed part, replace it with a compatible unit and test again. Keep a log of symptoms and dates of attempts to help the technician.
Safety, maintenance, and prevention to avoid future outages
Regular maintenance reduces the chance of sudden outages when you need the oven most. Clean the oven interior, check door seals, and replace worn gaskets to maintain efficient heating. Schedule annual inspections of wiring, terminals, and the master control. Use surge protectors or dedicated circuits for large appliances to guard against accidental power surges. If you detect warm or burning smells, unusual noises, or intermittent failures, stop using the oven immediately and consult a professional. A proactive approach keeps your oven reliable and minimizes emergency repairs.
Keep an outage log and plan for replacement parts
Creating a simple outage log helps you track patterns: dates of trips, temperatures that spike or drop, and any error codes shown. When you notice repeated issues, consult the service manual and local technicians about common failure points for your model. Maintain an inventory of essential spare parts (fuse, relay, bake element) for quick replacements if you have the right skills. This habit not only speeds up repairs but also informs budgeting for potential replacements, especially on aging units where reliability declines over time.
Steps
Estimated time: 30-60 minutes
- 1
Ensure power safety and isolation
Unplug the unit and switch off the dedicated circuit if accessible. For gas ovens, turn off the gas supply and ventilate the area. Verify there is no power at the outlet before touching any internal components.
Tip: Use dry hands and stand on a non-conductive mat. - 2
Check power and breakers
Inspect the outlet with a voltmeter or a simple tester. If the breaker trips or the fuse blows repeatedly, there may be an underlying overload or a short in the oven's power circuit.
Tip: If the breaker trips, do not reset repeatedly; investigate potential causes first. - 3
Test the display and clock
Reconnect power and observe whether the digital display or clock lights up. If nothing appears, power delivery to the control board is compromised and further tests are needed.
Tip: Note any error codes shown on the display for later reference. - 4
Inspect the door switch/hinge
A faulty door switch can prevent heating without obvious signs. Open/close the door firmly and listen for the switch click. Replace if the switch fails to engage.
Tip: Securely reseat wires if you see loose connections. - 5
Assess heating elements or igniter
For electric ovens, check bake and broil elements for visible breaks or blistering. For gas ovens, verify the igniter glows and heats within 90 seconds; a weak or non-glowing igniter is a common failure.
Tip: Never touch hot elements; allow cooling and handle with insulated tools. - 6
Evaluate sensor and control board
Test the temperature sensor with a multimeter against the specification. If readings are out of range, replace the sensor. If the control board shows signs of damage, plan for professional replacement.
Tip: Keep model number handy to source correct parts. - 7
Test after replacements
Reconnect power, set a test temperature, and monitor the oven for proper heating. Check for error codes and verify even heat across multiple cycles to ensure a stable repair.
Tip: Document results to guide future maintenance. - 8
When to call a professional
If you cannot restore power, the oven still won’t heat after basic tests, or you encounter unfamiliar wiring or gas work, contact a licensed technician. Professional service protects your safety and ensures correct repair.
Tip: Request a written estimate and warranty details before work begins.
Diagnosis: Oven won't heat or display is unresponsive
Possible Causes
- highPower issue (outlet, cord, or plug)
- highTripped circuit breaker or blown fuse
- mediumFaulty bake/broil element or igniter
- mediumFaulty temperature sensor or thermostat
- lowControl board or display failure
Fixes
- easyCheck that the oven is properly plugged in and the outlet has power; try a different device in the same outlet to confirm power
- easyReset the circuit breaker or replace a blown fuse; restore power and re-test the oven
- mediumTest and, if needed, replace the bake/broil element or igniter according to the model's service manual
- mediumTest the temperature sensor/thermostat with a multimeter and replace if readings are out of spec
- hardInspect internal wiring and the control board; if a fault is found, schedule professional service
Questions & Answers
What is the most common reason an oven stops heating?
Power issues and tripped breakers are the most frequent culprits when an oven stops heating. If the display is dark, verify power first before testing components.
Most ovens stop heating due to power issues or tripped breakers; start with power checks before testing components.
Should I unplug the oven to troubleshoot?
Yes. Always unplug or disconnect power before inspecting electrical components. For gas ovens, shut off the gas supply and ventilate the area before any checks.
Yes—disconnect power first and keep safety as your priority.
Can a faulty bake element stop heating?
Yes. A damaged bake or broil element can prevent the oven from heating correctly. Inspect for visible damage and test with a multimeter or replace if needed.
A faulty bake element can stop heating; inspect and replace if needed.
When should I call a professional for an oven issue?
If the oven has no power after basic checks, shows persistent faults, or involves gas line work or complex wiring, contact a licensed technician.
Call a professional if basic checks don’t restore function or if gas/complex wiring is involved.
Is it safe to test wiring myself?
Electrical testing can be dangerous. If you’re not trained, avoid testing internal wiring and contact a pro to prevent shocks or fires.
Electrical work is risky; don’t test live wiring—call a professional.
How can I prevent future oven outages?
Perform regular maintenance, replace worn parts, and use dedicated circuits. Keep logs of issues and address mild signs early to avoid major failures.
Do regular maintenance and use dedicated circuits to prevent future outages.
Watch Video
Main Points
- Check power first, then breaker status.
- Most outages start with the power and control basics.
- Test heating elements and sensors methodically.
- Document symptoms to guide repairs.
- Call a professional when uncertain or unsafe.