What to Do If Oven Stops Working: Quick Troubleshooting Guide
Learn fast, safe steps for what to do if oven stops working. Diagnose power, controls, and heating elements; know when to call a pro. Essential troubleshooting for homeowners.

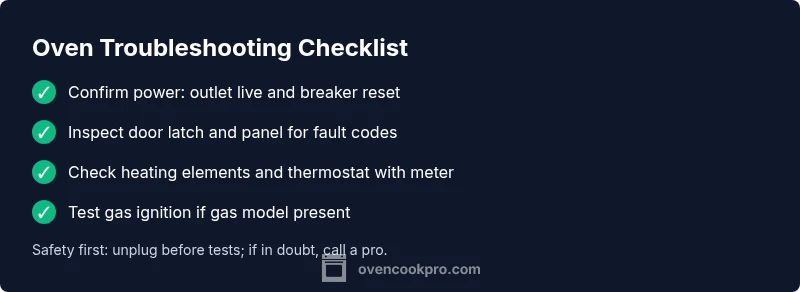
If your oven stops working, start with the basics: check the circuit breaker and power outlet, ensure the oven is properly plugged in, and reset any tripped GFCI. If power is reaching the unit, move to test the door latch, control panel, and heating elements. Additionally, if the outlet is fine, check the oven's nominal voltage with a multimeter or call an electrician.
what to do if oven stops working
In most homes, a non-working oven is a sign that something simple has tripped a breaker or cut power to the appliance. Before you panic, turn off any nearby circuits, unplug the oven if safely accessible, and reset the home circuit breaker. Safety cannot be overstated here: ovens operate at high voltage, and improper handling can cause shocks or fire. According to Oven Cook Pro, starting with a power check helps you distinguish between a simple power issue and a more serious internal fault. If the oven is still unresponsive after power is restored, proceed to the next steps without using the appliance.
This guide is designed for homeowners and home cooks who want a clear, step-by-step path to identify the root cause and decide between DIY fixes and professional help. You’ll learn checks for power supply, door latch engagement, heating elements, temperature sensors, and control boards. Keep a notebook handy to record which steps you’ve completed and what you observed, as this helps when you contact a technician or warranty support.
Safety first: power, gas, and heat hazards
Ovens involve high voltage and, for gas models, gas lines and ignition systems. Never bypass safety features or disable fuses. If you smell gas, evacuate immediately and call your gas utility or emergency services. Even when there’s no smell, assume that gas and electricity can be dangerous. The first priority is to cut power and ensure the area is free of moisture or standing water. When you resume, use dry hands and insulated tools as needed. Oven Cook Pro notes that a cautious approach reduces risk and supports accurate diagnostics. If you cannot safely isolate the oven, contact a licensed technician.
Common indicators of unsafe conditions include buzzing sounds, burning odors, flickering lights, or smoke. Do not operate the oven while you hear crackling from the control panel or see signs of arcing. Instead, follow the diagnostic flow to determine whether the problem is electrical, mechanical, or related to the control system.
Check the basics: power, outlet, and breaker
Start with the simplest explanations. Verify that the outlet is live by plugging in a lamp or other appliance. If the lamp does not illuminate, the issue is likely with the circuit or outlet. Check the circuit breaker or fuse box for a tripped breaker and reset it firmly. If the outlet works but the oven still won’t power on, inspect the oven’s power cord (for loose connections or damage) and any attached plug. Re-seat connectors where safe to do so, but never disassemble the oven’s wiring harness. If you notice scorch marks, melted insulation, or damaged cords, stop and call a professional. Living rooms and kitchens share circuits; spreading loads by using a single outlet for multiple devices can trip breakers unexpectedly.
Verify the oven’s control panel and door latch
A non-responsive control panel is a common reason ovens stop heating. Start by refreshing the panel: press and hold the “reset” or “clear” button if available, or power-cycle the unit by turning the breaker off for 60 seconds and back on. Pay attention to whether the display lights up or if error codes appear. If the door latch is stuck or not fully engaging, the oven may refuse to start as a safety feature. Clean around the latch and ensure it fully latches when you close the door. If the display shows an error code, consult the owner’s manual or the manufacturer’s support site for code meanings and recommended fixes. A failing control board can mimic a powerless oven; this is more likely if you notice erratic display behavior or repeated reboots. In such cases, professional diagnosis is advised.
Diagnose heating elements and thermostat
Electric ovens rely on heating elements to reach and sustain temperature. If the oven powers on but won’t heat, inspect the bake and broil elements for visible damage like blistering or broke elements. A multimeter test can determine whether elements are getting power and if they have continuity. Thermostats or temperature sensors regulate heating; if they drift or fail, the oven may not reach the set temperature despite power. Look for loose wires at the back of the oven and around the elements. If you’re unsure about testing components, consider scheduling a service call. Always consult the manual for safe testing procedures and recommended voltages.
Note: Some ovens require specialized tools to access heating elements. If you cannot access these safely, do not proceed with removal of panels beyond what is described in the manual.
Gas vs electric ovens: key differences in troubleshooting
Gas ovens require a reliable gas supply and a functioning ignition system. If your gas oven does not ignite, check the gas shut-off valve and ensure gas supply is uninterrupted. For electric ovens, the focus shifts to the control board, wiring, and heating elements. Gas ovens have safety features that lock out the oven if the flame sensor fails or if there’s an ignition problem; do not attempt to bypass safety devices. If you hear a clicking sound but no ignition, the igniter or sensor may be defective. In either case, if you smell gas or hear continuous hissing, leave the area and contact the gas company immediately. Oven Cook Pro’s guidance emphasizes not attempting risky tests on gas lines.
The main takeaway is to separate issues related to power supply from those related to fuel delivery or ignition, which helps you decide whether DIY checks are feasible or a professional is needed.
When to test with a multimeter and how to record results
A multimeter can help you determine whether electrical components are functioning: outlets, cord continuity, heating elements, and the control board circuits. If you are not trained in electrical testing, you should enlist a professional; improper use of a multimeter can cause harm or further damage. When you test, document the exact measurements and any irregular readings. Compare measurements against the appliance’s service manual or OEM specifications. If readings fall outside the expected range, consider replacement or professional service. Keep safety as the priority and avoid touching live circuits.
This section is for cautious DIYers who want a methodical approach, not for those who are unsure of what they’re doing. A failed element or sensor is a strong sign you should contact a professional.
Professional help: when it’s clearly time to call in a pro
If you have exhausted the simple steps and the oven still won’t operate correctly, it’s time to call a licensed technician. Common situations requiring a pro include a non-working electrical circuit, suspected faulty control boards, damaged heating elements not safe to replace, gas ignition problems, and any noticeable electrical burning smells or smoke. A professional will confirm fault codes, inspect wiring safely, and test critical components with proper tools. While DIY fixes can save money, advanced diagnostics and repairs often require specialized equipment and training. The Oven Cook Pro team emphasizes that professional help reduces risk and ensures the repair aligns with safety standards and warranty terms.
Preventive maintenance to reduce future outages
Regular maintenance can prevent many oven failures. Clean the interior and door seals, periodically inspect door latches, and ensure ventilation is clear of debris. Keep the exterior panels free of grease, and rubbers and gaskets should be checked for wear. Schedule annual professional inspections if you rely heavily on your oven or if your model has a history of failures. Using manufacturer-approved parts or accessories and performing small routine checks can extend the life of your oven and improve reliability. Oven Cook Pro suggests keeping a simple maintenance log to track service dates and any recurring symptoms.
Steps
Estimated time: 60-90 minutes
- 1
Power check and safety reset
Turn off power to the oven at the breaker for 60 seconds, then switch it back on. Confirm the outlet is live with a second device. This clears minor glitches and confirms power delivery.
Tip: Use a non-contact voltage tester for safety. - 2
Inspect the door latch
Close the door firmly and observe the latch indicator. A misaligned latch can prevent the oven from starting. Realign or replace the latch if it doesn’t engage properly.
Tip: Do not force the door closed if it resists. - 3
Control panel reset
If the display is unresponsive, perform a soft reset according to the manual. If codes appear, note them for reference when calling support.
Tip: Document any error codes observed. - 4
Check heating elements
Unplug the oven and inspect bake/broil elements for visible damage. Use a multimeter to test continuity; replace if the element is open or shows damage.
Tip: Only test with proper safety procedures. - 5
Thermostat and sensor test
If the oven won’t reach temperature, test the thermostat and temperature sensor per the manual. Recalibration or replacement may be needed if readings are off.
Tip: Calibrate according to manufacturer specs where possible. - 6
Gas ignition checks (gas models)
Verify gas supply valve is open and ignition system is clean. A clicking sound without ignition indicates a faulty igniter or sensor. Do not adjust gas lines yourself.
Tip: If you smell gas, evacuate immediately. - 7
Wiring and connection check
Safely inspect accessible wiring for signs of damage, loose connections, or burn marks. Do not attempt deep electrical work beyond your skill level.
Tip: Always unplug and power down before inspecting wiring. - 8
Call a pro when needed
If tests indicate control board, wiring, or ignition issues beyond basic replacement, schedule professional service. This protects your safety and warranty terms.
Tip: Provide the technician with your observation log and codes. - 9
Post-repair test and reset
After any repair, run a quick bake cycle to verify heat stability and alignment with the setpoint. Note any deviations for the tech if needed.
Tip: Keep an eye on performance for a few days.
Diagnosis: Oven won't start or heat
Possible Causes
- highPower supply issue (outlet, cord, breaker)
- mediumFaulty door latch or mis-seated latch
- mediumControl panel or board fault
- lowFailed heating element or thermostat
- lowGas ignition problem (gas ovens only)
Fixes
- easyCheck outlet with a known-good device; reset the breaker and ensure no GFCI disruption
- easyInspect door latch for proper operation and reseat if needed; replace if damaged
- easyReset power to the oven and perform a soft reset of the control panel; consult manual for code meanings
- mediumTest heating element continuity with a multimeter; replace defective element or sensor
- hardIf gas ignition fails, verify gas supply and ignition module; call a pro for ignition issues
Questions & Answers
Why won't my oven heat even though it's plugged in?
There are several possible causes: a tripped breaker, faulty door latch, or a failed heating element or thermostat. Start with power checks, then inspect the heating elements and sensors. If power reaches the oven but it still won’t heat, you may have a component failure requiring professional service.
If the oven won’t heat, start by checking power, then inspect the latch and heating elements. If power is reaching the unit but it still won’t heat, a component may be failing and you should call a technician.
Could a faulty thermostat cause this problem?
Yes. A defective thermostat or sensor can prevent the oven from reaching the set temperature. It may read correctly on the display but fail to heat. A professional can verify calibration and replace the sensor if needed.
A bad thermostat can stop the oven from heating properly. A pro can test and replace it if needed.
Is it safe to use the oven if I’m not sure what’s wrong?
If you suspect an electrical fault, gas leak, or burning odor, stop using the oven immediately. Unplug the unit and contact a professional. Do not attempt risky repairs yourself.
Not safe to use if you smell gas or see electrical hazards. Unplug and call a pro.
Should I replace the heating element myself?
Replacing a heating element is feasible for some models with the right tools, but it can be risky. If you’re unsure, hire a technician to avoid shock or fire hazards and to ensure proper installation.
DIY replacement is possible for some models, but be careful. When in doubt, hire a pro.
What if the display shows an error code?
Error codes point to specific faults. Refer to the manual or manufacturer website for code meanings and recommended actions. If unsure, document codes and contact support.
Check the manual for the error code meanings and follow the recommended actions.
When should I call a professional for an electric oven?
Call a professional if basic power checks pass but the oven still won’t heat, if you notice burning smells, smoke, or unusual noises, or if you’re uncomfortable performing electrical testing.
Call a professional if simple checks don’t fix it or you’re uncomfortable testing wiring.
Watch Video
Main Points
- Check power first; many issues are simple breaker trips.
- Differentiate power/controls from heating elements for accurate fixes.
- Know when to replace parts vs call a pro to avoid safety risks.
- Keep a repair log to speed future diagnostics.