What to Do If Your Oven Won't Turn Off: A Quick-Start Troubleshooting Guide
Urgent, step-by-step guide to diagnose and fix an oven that won’t turn off. Learn safety checks, common causes, and when to call a pro, with insights from Oven Cook Pro.

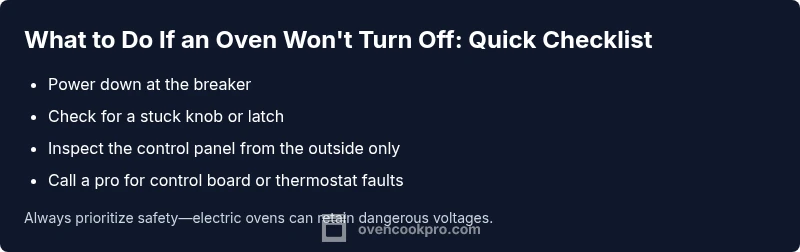
If the oven won’t turn off, the most common causes are a stuck or faulty control switch, a malfunctioning thermostat, or a failing control board. Power down at the breaker, unplug if safe, and remove the knob to check for a stuck latch. If the problem persists, follow the diagnostic flow below for safe, step-by-step fixes.
what to do if oven won't turn off: quick overview
An oven that won’t turn off poses both safety and energy risks. According to Oven Cook Pro, understanding the essential steps helps you respond quickly and safely. This guide covers why the problem happens, how to safely power down, how to narrow down causes, and when a pro is needed. By following a clear diagnostic flow, you reduce risk and prevent further damage to electrical components or gas lines. The focus is on practical, actionable steps you can take today, with safety as the top priority.
Throughout this article you’ll find practical checklists, clear diagnostic paths, and a professional-leaning approach that respects warranties and local codes. Oven Cook Pro’s approach emphasizes controlled power-downs, careful inspection, and knowing when to escalate to a certified technician for complex electrical or gas-related issues.
Immediate Safety Steps (Power Down First)
Safety is non-negotiable when an oven refuses to turn off. The first actions are simple, but they protect you from shock, burns, and fire.
- Turn the circuit breaker to the oven’s dedicated line to cut power entirely. If the breaker feels warm or you’re unsure which breaker controls the oven, turn off the main service panel.
- If it’s safely reachable, unplug the unit. Do not touch live metal parts or exposed wiring.
- Do not disassemble the back panel or touch high-voltage components unless you are trained and equipped for electrical work.
- Keep children and pets away from the kitchen until the issue is resolved.
- If you smell burning, see smoke, or hear buzzing, evacuate and call emergency services if needed. These signs indicate an electrical fault that requires immediate attention.
Once power is cut, wait a full minute or two before restoring power to clear residuals in the circuitry. If the oven reactivates unexpectedly after you restore power, proceed with the diagnostic flow below and consider professional service sooner rather than later.
Diagnosing the Problem: Electrical vs. Control Issues
Understanding the root cause is essential to avoid unnecessary parts replacement. In many cases, the problem falls into one of four camps: a stuck control knob or latch, a faulty thermostat or sensor, a malfunctioning control board, or misused modes like a lingering self-clean cycle.
- Stuck controls or misaligned knobs: Sometimes a knob can stick or not fully return to Off, keeping the circuit energized.
- Thermostat or temperature sensor faults: A bad sensor can fail to signal Off, leaving the relay energized.
- Control board/UI faults: A damaged relay or software glitch can ignore Off commands.
- Mis-set cycles (like self-clean): If the control panel is in a self-clean or delayed-start mode, it may appear to ignore Off inputs.
To differentiate, observe the display after you’ve cut power. If the display remains active without power or re-energizes quickly, it points to a control-board or thermostat fault rather than a mechanical knob issue. The next steps help you test these hypotheses safely.
This section aligns with the diagnostic flow below and is designed to be followed in a staged way to avoid jumping to conclusions.
- For gas ovens, emergency shutoff procedures differ; follow manufacturer guidance and local codes. Refer to your manual for model-specific safety notes.
Mechanical Checks and Safe Cleaning
Beyond electrical faults, mechanical issues can keep an oven running. Mechanical checks are safer when the unit is powered down and unplugged.
- Inspect the oven door latch: A damaged latch or misaligned door could fail to signal Off. Ensure the door closes fully and latches without obstruction.
- Check the inlet and selector knobs: If the knob is loose or bent, it may not seat properly in Off and could partially energize the control circuit.
- Look for sticky residues around selector switches: Food debris or baked-on grease can cause sticky behavior that prevents Off from engaging. Clean with a non-abrasive cleaner while the unit is unplugged.
- Inspect the oven’s wiring harnesses from the back panel only if you have training. Loose or damaged wires can cause intermittent energization. If you see damaged insulation, stop and call a technician.
If you are uncomfortable with any behind-the-panel checks, skip to the next section on professional help. The aim is to identify obvious mechanical issues you can safely address without tools or live circuits.
Practical Diagnostics You Can Do Without Opening the Cabinet
You don’t need to dismantle the oven to gather useful clues. These non-invasive checks can point to the likely culprit while keeping safety intact.
- Verify that no cycle is active: Ensure the display isn’t in a still-running self-clean or delayed-start mode. Even a paused timer can keep the relay engaged if not reset properly.
- Test with the oven off and unplugged: If power restoration immediately re-energizes some components without user input, the fault is likely internal to the control system.
- Assess external signals: If your oven is a smart model, check for any mobile app automations or voice commands that could send an On signal remotely.
- Check for warning indicators: LED indicators, unusual beeps, or error codes can guide you toward a specific subsystem such as a sensor or board.
These observations help you decide whether you can safely perform fixes yourself or if it’s time for professional diagnostics.
Step-by-Step: Most Common Fixes (Detailed)
This section presents a practical, structured fix path for the most common cause: a stuck control or faulty thermostat. Follow each step in sequence and stop if you encounter resistance or unsafe conditions. If the problem persists after these steps, do not proceed to more invasive repairs; contact a licensed technician.
Step 1: Power Down and Reset
Power down at the breaker and unplug if accessible. Wait at least 60 seconds to allow residual energy to dissipate. After waiting, restore power and observe whether the Off command is recognized or if the oven springs back to On without user input. If it does, the fault is likely in the control board or thermostat.
- Tip: Use dry hands and stand on a dry surface when working near electrical components. This reduces shock risk if you inadvertently touch live metal.
Step 2: Inspect for a Stuck Knob or Latch
Carefully inspect the control knobs for stiffness or misalignment. A knob that doesn’t reset to Off can send a continuous signal to the control circuit. If you can safely remove and reseat the knob, do so and test again with power restored.
- Tip: Do not force a knob that won’t budge; applying extra force can cause more damage.
Step 3: Check for Visible Control Panel Issues
Look for broken buttons, swollen keys, or signs of water exposure on the control panel. A compromised panel can short or fail to send the Off signal. If you see obvious damage, replacing the panel or module is often required and should be performed by a qualified technician.
- Tip: Take clear photos of the panel from multiple angles to show a technician. This helps speed up diagnosis.
Step 4: Evaluate Thermostat and Sensor Connections
A faulty temperature sensor or thermostat can keep the relay energized. If you are trained to handle electronics, you can test resistance readings with the right equipment, but avoid bypassing safety features. Any abnormal readings indicate a component that should be replaced by a pro.
- Tip: Do not attempt to bypass sensors. This creates safety hazards and may violate warranty terms.
Step 5: Recheck After Reassembly
If you opened the back panel with proper training, reassemble all wiring carefully, ensuring connectors are fully seated. Restore power and verify that the Off command works normally. If the oven still won’t turn off, escalate to professional diagnostics.
- Tip: Keep a log of what you tested and what the results were. This helps the technician pinpoint the issue faster.
Estimated total time: 60-120 minutes, depending on your experience and the oven model.
TIPS & WARNINGS
- Always prioritize safety: if you smell burning, hear buzzing, or see smoke, cut power immediately and call emergency services if needed.
- Do not attempt high-voltage repairs or open the main power supply. Only qualified technicians should work on internal electronics.
- Label and detach any external cords before inspection to avoid accidental re-energization.
- If your oven is under warranty, consult the manual or manufacturer support before disassembly, as some actions may void coverage.
- Keep a written record of symptoms and steps taken to help the technician diagnose faster and more accurately.
KEY TAKEAWAYS
- Power down first; safety is the priority.
- Identify whether the issue is mechanical, thermostat-related, or a control-board fault.
- If basic resets and inspections fail, call a licensed technician.
- Document symptoms and steps to streamline repairs and protect warranty terms.
- Use the diagnostic flow to avoid unnecessary part replacements and expenses.
Steps
Estimated time: 60-120 minutes
- 1
Power down and reset
Cut power at the circuit breaker and unplug if safe. Wait a full minute to allow residual energy to dissipate. Restore power and test whether the Off command is recognized. If the oven continues to stay on, the fault is likely internal to the control system.
Tip: Document the behavior observed after reset to share with a technician. - 2
Check for a stuck knob or latch
Remove the knob if you can do so safely and inspect the shaft. Re-seat the knob firmly and ensure it sits in Off when released. Test again after power restoration.
Tip: Use a flashlight to inspect for hairline cracks or corrosion. - 3
Inspect control panel for obvious damage
Look for cracked buttons, melted plastic, or moisture on the keypad. If damage is visible, avoid further testing and arrange professional service.
Tip: Take photos of damage to simplify diagnosis. - 4
Test the display and inputs
With power restored, press Off and observe if the display acknowledges the command. If the display remains active or Off is not recognized, the issue likely involves the control board or sensor.
Tip: Do not bypass safety interlocks or relays. - 5
Consult a professional if needed
If basic checks fail to resolve the problem, a licensed technician should inspect internal wiring, the thermostat, and the control board using appropriate tools and safety protocols.
Tip: Request a written estimate before any work begins.
Diagnosis: Oven stays ON or resumes heating after pressing Off
Possible Causes
- highStuck or faulty control switch or knob
- highMalfunctioning thermostat or temperature sensor
- mediumControl board/UI failure
- lowActive cycle like self-clean or delayed-start not properly canceled
Fixes
- easyPower down at the breaker and unplug if safe; wait 60 seconds, then restore power to reset electronics
- easyInspect and reseat or replace a stuck knob or faulty latch
- mediumInspect the control panel for damage; avoid probing high-voltage components; replace if necessary
- hardIf the issue persists, schedule professional service to test the control board and thermostat with specialized equipment
Questions & Answers
Why won't my oven turn off even after pressing Off?
Common causes include a stuck control knob, a faulty thermostat, or a failing control board. Start with a safe power-down, then progress through a diagnostic flow to identify the exact fault. If in doubt, consult a licensed technician.
The oven staying on usually comes from a stuck control, bad thermostat, or a faulty board. Start with turning off power and follow the diagnostic steps, and call a pro if you’re unsure.
Is it safe to unplug a wall oven to stop it from heating?
Unplugging can stop the oven if it’s accessible and you can do so safely. For gas ovens or units without a readily accessible plug, use the circuit breaker to cut power and call a technician rather than attempting risky disassembly.
Unplugging is safest only if you can reach the plug safely. If not, switch off at the breaker and avoid opening the appliance.
Could a self-clean cycle cause the oven to stay on?
Yes. Some models can misinterpret a self-clean command as an ongoing operation if the cycle isn’t turned off properly. Resetting power and verifying there’s no active cycle can resolve many of these cases; otherwise professional service may be needed.
A stuck self-clean cycle can keep the oven active. Check that the cycle is fully canceled and reset power if needed.
When should I call a professional?
Call a professional if you detect burning smells, smoke, sparking, or if you’ve tried safe power-downs and resets without success. Issues involving internal wiring, control boards, or gas supply require licensed technicians.
If you smell burning or see sparks or smoke, or if basic resets don’t fix it, call a licensed technician.
Can a faulty thermostat cause the oven to stay on?
Yes, a bad thermostat or sensor can fail to signal the Off command, keeping the relay energized. This typically requires professional testing and replacement of the sensor or control module.
A faulty thermostat can keep the oven on; this usually needs professional testing and replacement.
Will replacing the control board fix the problem?
If diagnostics point to a faulty control board, replacement is often the fix. Board work is delicate and should be performed by a technician with proper equipment to avoid further damage.
Replacing the control board is common when diagnostics show a board fault, but it’s a job for a professional.
Watch Video
Main Points
- Power down first to ensure safety
- Identify whether the issue is mechanical, thermostat-related, or board-related
- Do not bypass safety interlocks; call a pro when in doubt
- Document symptoms and steps to speed up repairs
- Respect warranty terms and manufacturer guidelines