When to Replace Oven Igniter: Quick Troubleshooting Guide
Learn when to replace oven igniter, quick checks, and a step-by-step replacement guide to restore reliable oven heating. Expert guidance from Oven Cook Pro.

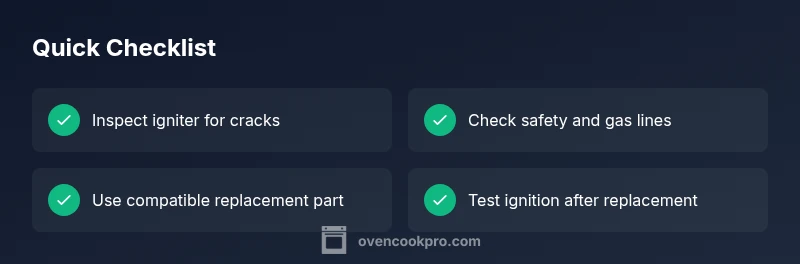
Most oven igniters fail due to wear, carbon buildup, or a loose connection. If your oven won't heat, or you hear a relay click but see no glow, the igniter is the likely culprit. A quick check: unplug the unit, visually inspect the igniter for cracks or discoloration, and confirm there is a bright glow when the oven is set to bake. If not, plan a replacement.
What the oven igniter does in a gas oven
In most gas ovens, the igniter is a small ceramic element that glows orange when energized. It lights the gas valve so the oven flame can start. Over time, the igniter can crack, become weak, or fail to draw enough current to open the gas valve. When the igniter fails, the oven may not light at all, or it might glow briefly and then go out. Replacing the igniter is a common DIY task for homeowners with basic hand tools, but it requires care because you are working near gas lines and electrical components. According to Oven Cook Pro Analysis, 2026, the lifespan of an igniter varies by brand and usage, but most faults manifest through a stubborn failure to ignite. Before replacing, verify there are no other issues such as a clogged burner, vent obstruction, or gas supply interruption. Safety matters: always disconnect power and isolate the gas supply if you smell gas or hear hissing.
Signs you might need to replace the igniter
- No ignition: The oven fails to light when the bake setting is selected, and there is no flame.
- No glow: You set the oven to bake and you do not see a bright orange glow after a few seconds.
- Repeated attempts: The igniter glows briefly but the flame fails to stay lit, indicating insufficient heat to open the valve.
- Intermittent operation: The oven lights inconsistently, suggesting an aging element or loose wiring.
- Visible damage: Cracks, chipping, or scorching on the igniter body indicates replacement is needed.
These symptoms often point to the igniter as the root cause, but be aware that problems with the gas valve, sensors, or wiring can mimic igniter failure. If in doubt, perform the diagnostic flow below or consult a professional. Oven Cook Pro reminds homeowners that a cautious approach reduces risk when dealing with gas and electrical components.
Home testing steps you can perform safely
- Power down and unplug: Always disconnect power before inspecting electrical components. If you have a gas supply shutoff, ensure it is off when performing any tests near the burner.
- Visually inspect the igniter: Look for cracks, discoloration, or loosened connections. A damaged ceramic body or burnt wiring is a clear sign it needs replacement.
- Check for glow and click: Set the oven to bake and listen for the click of the gas valve solenoid. If you don’t hear a click or see no glow, the igniter is likely failing.
- Inspect wiring harness: Ensure the plug is firmly connected and there are no loose or corroded wires. Corrosion or frayed conductors can prevent the igniter from energizing.
- Safety note: If you smell gas at any time, evacuate the area and contact emergency services. Do not attempt to operate gas appliances until a qualified technician has inspected the system.
If these checks point to the igniter, plan for a replacement. For many homeowners, replacing the igniter with the manufacturer-recommended part restores reliable ignition without replacing the entire burner assembly.
Should you repair or replace? Cost and parts considerations
- Replacement parts: Igniters are relatively inexpensive compared to full burner assemblies, but prices vary by model and type (glow-type vs. hot-surface igniters). Always verify compatibility with your oven model before purchasing a replacement part.
- DIY feasibility: If you’re comfortable with basic tools and follow safety precautions, replacing an igniter is a common DIY project. The exact steps depend on your oven make and model.
- Professional support: If you cannot access the igniter safely, you smell gas, or you encounter stubborn wiring, contact a licensed technician. A pro can verify the gas supply, valve operation, and electrical safety.
- Warranty considerations: Some oven components are covered under warranty; check your warranty status before performing self-repair.
Oven Cook Pro recommends weighing the risks and benefits before attempting a DIY fix. A properly functioning igniter not only ensures safe operation but also reduces the chance of gas leaks or improper ignition.
Steps
Estimated time: 25-40 minutes
- 1
Power down and prep
Unplug the oven or switch off the dedicated circuit breaker. Remove all racks and clear the area around the bake burner. Gather tools (screwdriver, multimeter, and replacement igniter) and ensure you have the correct replacement part compatible with your oven model.
Tip: Label wires or take a photo before disconnecting to ease reassembly. - 2
Access the igniter
Open the lower access panel or back panel as required by your model. Locate the igniter near the bake burner. Some models require removing a burner mounting plate to reach the igniter safely.
Tip: Keep track of mounting screws and any small parts that may fall during removal. - 3
Disconnect and remove
Carefully unplug the igniter harness and remove the mounting screws. Gently lift the igniter out, avoiding bending the gas lines or pulling on wires.
Tip: Do not touch the hot surfaces; allow the oven to cool if you were testing it recently. - 4
Compare and install
Compare the old igniter to the replacement part to confirm compatibility. Install the new igniter by aligning it with the mounting bracket and securing with screws. Reconnect the wiring harness firmly.
Tip: Double-check the connector orientation before plugging in to prevent reverse polarity on some models. - 5
Reassemble and test
Reattach any panels or burners you removed. Restore power and set the oven to bake. Observe ignition: you should hear a click and see a healthy glow that lights the flame within a few seconds.
Tip: If the burner fails to ignite, power off and recheck all connections before testing again. - 6
Final safety check
Ensure there are no gas leaks; listen for a consistent flame and watch for any odor. If you smell gas at any point, evacuate and contact your gas utility immediately.
Tip: Record the replacement date for future maintenance and warranty tracking.
Diagnosis: Oven won't ignite or maintain flame in a gas oven
Possible Causes
- highIgniter failure (wear, carbon buildup, or loose connection)
- mediumFaulty bake/broil sensor or temperature limit switch
- lowGas valve or gas supply issue
Fixes
- easyInspect igniter for visible damage and verify electrical connection; replace if cracked, burnt, or no glow
- mediumTest sensors and wiring for continuity; replace faulty sensor or repair wiring
- hardIf gas supply or valve is suspected, contact a licensed technician to verify gas pressure and valve operation
Questions & Answers
What are the most common signs that the oven igniter needs replacement?
The most common signs are: the oven won’t ignite, there is no glow when the oven is set to bake, and you hear no clicking noise from the gas valve. Replacing the igniter usually resolves ignition issues when these symptoms are present.
If your oven won’t ignite and you don’t see a glow or hear a click, the igniter is likely failing and may need replacement.
Can I replace the igniter myself, or should I hire a pro?
If you are comfortable with basic electrical work and have the correct replacement part, you can replace the igniter yourself. Ensure gas shutoff is secure and follow safety precautions. If you’re unsure, hire a licensed technician.
You can replace it yourself if you’re confident with basic electrical work; otherwise call a pro.
Is a weak glow always caused by the igniter?
A weak glow can indicate the igniter is aging, but it can also result from sensor issues or a faulty gas valve. A proper diagnosis should test the ignition system comprehensively.
A weak glow isn’t always the igniter; it could be sensors or gas valve issues too.
How long does an oven igniter typically last?
Igniters vary by model and usage. They often wear out with age and frequent use, which can lead to ignition failures. If you’re replacing it, ensure the replacement is compatible with your oven.
Igniters wear out over time and usage; replace with a compatible part when needed.
What safety precautions should I take before replacing the igniter?
Disconnect power, turn off the gas supply if applicable, and allow the oven to cool before starting.wear protective gloves and safety glasses to protect from sharp edges and hot components.
Power off, gas off, and let it cool before starting. Wear safety gear.
What if the oven still won’t ignite after replacement?
If ignition still fails after replacement, check wiring connections again, test the bake sensor and control board, and consider professional diagnostics. There may be a gas valve or control issue beyond the igniter.
If it still won’t ignite after replacement, recheck wiring and consider professional diagnostics for valve or control issues.
Does replacing the igniter affect oven warranty?
Replacing the igniter yourself may affect warranty coverage. Check your warranty terms and consider professional service if the oven is still under warranty.
DIY replacement may affect warranty; check terms or consult the manufacturer.
Should I test ignition on gas or electric ovens the same way?
Gas ovens rely on the igniter to light the gas; electric ovens use heating elements. This guide focuses on gas oven ignition. For electric ovens, check element health and fuses.
Gas ignition relies on the igniter; electric ovens use heating elements—different checks apply.
Watch Video
Main Points
- Identify the igniter as the likely fault when the oven won’t ignite.
- Visually inspect for cracks and verify a bright glow when energizing.
- Follow safety steps and unplug power before any inspection or replacement.
- Replace with a compatible igniter part and test ignition promptly.