Why Do Oven Igniters Fail? A Practical Troubleshooting Guide
Discover why oven igniters fail and learn a proven, step-by-step approach to diagnose, repair, and prevent ignition problems with expert guidance from Oven Cook Pro.

Most oven ignition failures come from a faulty glow bar/igniter that cannot heat reliably enough to open the gas valve. Start with a quick visual check for cracks, corrosion, or loose connections, then test ignition strength. If ignition is weak or gas won't ignite, power off and call a professional.
How an Oven Igniter Works (and why failures happen)
In a gas oven, the igniter must heat to a high enough temperature to open the gas valve and ignite the burner. When the igniter is strong, you’ll see a bright glow and the burner lights within a few seconds. Over time, heat, vibration, and moisture can degrade the igniter, ceramic insulators, or wiring, reducing heat output or causing intermittent ignition. The question, often framed as "why do oven igniters fail?", is usually answered by three failure modes: a weak or cracked igniter that won’t heat, corroded terminals or socket connections, or a failing control system that won’t send the ignition signal. According to Oven Cook Pro analysis, ignition failures are among the most common oven repair topics homeowners face, so knowing the signs, safe inspection methods, and when to replace is essential for reliable operation.
Safety note: if you smell gas, do not try to light the oven. Evacuate the area and contact your gas utility or emergency services immediately. This is a safety-critical issue that requires professional assessment.
Common Failure Modes: Glow Bar, Igniter, and Wiring
Three broad causes drive most ignition problems. First, the glow bar or igniter itself can degrade and fail to heat quickly or at all. Second, wiring or electrical connections can become loose, frayed, or corroded, interrupting the ignition signal. Third, a faulty gas valve, control board, or safety device can prevent ignition even if the igniter glows. Identifying which mode is at fault requires careful observation of symptoms (glow strength, ignition delay, clicking sounds) and safe inspection of accessible parts. Regular maintenance, including cleaning the igniter and ensuring dry connections, helps prevent premature failure. Oven Cook Pro recommends documenting any recurring symptoms to support efficient diagnosis and repair, especially if you’re coordinating with a professional technician.
Symptoms That Signal Ignition Problems
Common symptoms include a slow or absent glow from the igniter, a weak glow that persists, clicking without ignition, or the burner failing to light after several attempts. If you hear frequent clicks but no flame, this can indicate a dirty sensor, a loose connection, or a failing valve. In some cases, you may notice a gas odor or a strong gas smell after trying to ignite, which is a clear safety signal to stop and call a professional. Getting familiar with these signals helps homeowners decide when to troubleshoot and when to seek expert support. Always prioritize safety and consult the manual for model-specific symptoms and parts locations.
Safety First: When to Call a Pro
Some ignition problems are safe to troubleshoot at home, but others require professional service. If you smell gas, hear hissing, or the igniter is arcing or unusually hot, shut off power and contact your gas utility or a certified technician. Gas leaks present serious fire and health risks, so avoid attempting improvisation. For non-emergency symptoms—like a weak glow or delayed ignition—start with stepwise checks (disconnect power, inspect wiring, and visually inspect the igniter) before replacing components. Always consult the owner’s manual and adhere to local electrical codes and safety practices.
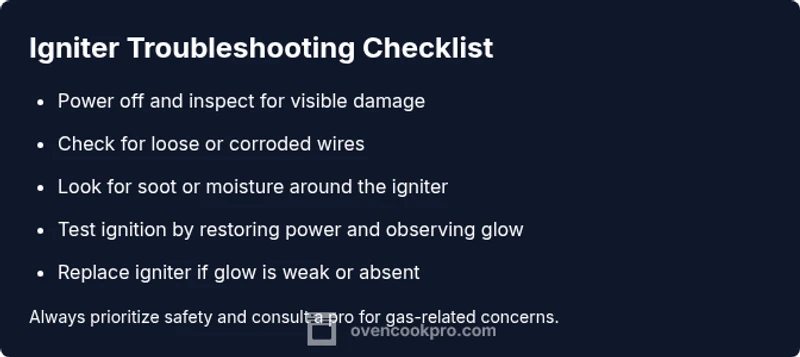
Quick Visual Checks You Can Perform Safely
Before pulling any parts, perform these non-destructive checks:
- Verify the oven is unplugged or the circuit breaker is off. Safety first.
- Look for visible cracks, soot buildup, or char around the igniter and wiring.
- Check for loose or corroded terminals at the igniter socket and control board connector.
- Ensure the igniter is properly seated in its mounting bracket and that the electrical connector is dry.
- If you see moisture or signs of water near electrical components, dry and re-evaluate; moisture can cause intermittent faults.
If any check reveals obvious damage, plan for component replacement and call a pro if you’re unsure.
Diagnostic Flow at a Glance: Symptom to Diagnosis
To systematically diagnose ignition problems, start with symptom-based questions, then test basic electrical paths, and finally inspect or replace the most likely faulty component. This flow helps prevent unnecessary part changes and should be performed with power off and the appliance secured. If you reach a point outside your comfort zone, stop and call a professional. The diagnostic flow is designed to minimize risk while maximizing the chance of a correct fix.
Prevention Tips to Extend Igniters' Life
- Schedule regular cleanings of the igniter area to prevent soot buildup which can impair heat transfer.
- Keep electrical connections dry and free of cooking splashes or cleaners.
- Use the oven as directed; avoid frequent power cycling and aggressive ignition attempts that stress components.
- If you notice recurring ignition problems, address underlying issues early rather than letting the symptoms worsen.
- Store replacements in a dry place and confirm compatibility with your oven model before installation.
What to Expect from a Professional Repair
A professional will typically verify gas supply, test electrical signals, and inspect the ignition circuitry. They may measure ignition current and verify the valve operation with specialized tools. If a short in the wiring or a failing control board is suspected, the technician will trace the circuit to identify the exact fault and perform a safe replacement. Expect costs to reflect parts plus labor, and ensure the technician provides an itemized quote and warranty on parts.
Steps
Estimated time: 60-90 minutes
- 1
Power down and access the igniter
Turn off the oven at the circuit breaker or unplug the unit. Remove the access panel to reach the igniter. This initial step ensures you can safely inspect electrical components without live current.
Tip: Label wires before disconnecting and take a photo for reference when reassembling. - 2
Inspect igniter and wiring
Look for visible cracks, carbonization, or moisture around the igniter and its socket. Check for loose or corroded terminals and ensure the connector is dry and firmly seated.
Tip: If the component feels brittle or shows signs of damage, plan for replacement rather than repair. - 3
Test igniter function
With the wiring reattached, observe whether the igniter glows consistently and brightly when power is restored. A weak or no glow suggests a faulty igniter; intermittent glow may indicate wiring issues.
Tip: If you’re unsure, stop and consult a professional rather than forcing a test. - 4
Evaluate ignition sequence
If the igniter glows but the burner does not light, inspect the gas valve and safety components. A failure to open the valve may indicate a control issue or faulty valve.
Tip: Do not attempt to bypass safety features; they protect you from gas leaks. - 5
Replace igniter if necessary
If the igniter is clearly degraded or does not glow with sufficient intensity after testing, replace the igniter assembly with a compatible part.
Tip: Only use parts recommended by the oven manufacturer to maintain safety and performance. - 6
Reassemble and test
Reattach all covers, restore power, and perform a full ignition test. Confirm reliable ignition before returning the oven to normal use.
Tip: Run a few test cycles to ensure consistent performance across multiple attempts.
Diagnosis: Oven won’t ignite or ignition is inconsistent
Possible Causes
- highWeak or failed igniter that won’t heat properly
- highLoose or corroded wiring connections
- mediumGas valve or safety mechanism not activating
- mediumFaulty control board or ignition module
- lowMoisture or contamination around ignition components
Fixes
- easyPower cycle the unit and inspect for loose connections; reseat connectors if needed
- easyInspect igniter and wiring for cracks, burns, or corrosion; tighten or replace as needed
- easyIf the igniter glows weakly or doesn’t glow, replace the igniter assembly
- mediumCheck gas supply and valve operation; call a pro if gas flow is inconsistent or valve is faulty
- hardConsult a licensed technician for control board issues or complex wiring faults
Questions & Answers
Why does my oven igniter glow but not ignite the gas?
A glow that’s present but weak or delayed often means the igniter is worn or the gas valve isn’t opening reliably. Inspect connections and consider replacing the igniter if performance doesn’t improve.
If the igniter glows but won’t ignite, the igniter may be worn or the valve isn’t opening. Check connections and consider replacing the igniter.
Can I replace the igniter myself?
Yes, if you’re comfortable with basic appliance repair and can safely disconnect power. Follow the manufacturer’s instructions and use an approved replacement part. If you’re unsure, hire a professional.
Yes, you can replace the igniter yourself if you’re comfortable with basic repair, but when in doubt, hire a professional.
What safety steps should I take before inspecting the oven?
Always unplug the appliance or switch off the circuit breaker. Do not touch live wiring, and ensure the area is dry to prevent shocks.
Unplug the oven and make sure the area is dry before you start inspecting any parts.
How long does an oven igniter last?
Igniters wear out over time with use. Their lifespan varies by model and usage, but a failure after several years is common. Regular checks help catch issues early.
Igniters wear out over time and may fail after several years, depending on use. Regular checks help spot issues early.
If replacement doesn’t fix the problem, what’s next?
If replacement doesn’t restore ignition, the issue may lie with the gas valve, control board, or safety sensor. A licensed technician should assess these components.
If replacing the igniter doesn’t fix it, you likely have a gas valve or control board issue—call a professional.
Is there a quick preventative tip to avoid igniter failures?
Keep the ignition area clean and dry, use the oven as intended, and address any ignition symptoms promptly to prevent larger failures.
Keep the ignition area clean and dry, and address ignition symptoms promptly to prevent bigger problems.
Watch Video
Main Points
- Identify ignition issues early to prevent gas leaks.
- Weak igniters are the most common failure point.
- Only perform non-destructive checks when safe; call a pro for gas or valve concerns.
- Replace damaged igniters with manufacturer-approved parts.
- Document symptoms to speed future diagnostics.