How to Get Your Oven Out of Demo Mode: A Step-by-Step Guide
Learn how to exit demo mode on most ovens with a safe, model-agnostic approach. Step-by-step resets, common signals, and when to seek professional help—backed by Oven Cook Pro guidance for confident home cooking.

You will learn how to exit demo mode on most ovens, diagnose why the display is showing a showroom-like state, and safely reset the control panel without risking damage. This guide covers power cycles, common button sequences, and when to seek professional help. By following these steps, you can restore normal operation and verify that your oven heats correctly again.
What demo mode is and why ovens show it
Demo mode is a special display state used in showrooms to illustrate features without actually heating. If a home oven accidentally enters this mode, the control panel can act like it’s waiting for demos, not real cooking. Signs include a flashing display, the word DEMO or a similar indicator, and the oven not heating when you press start. It can happen after a power surge, a failed reset, or a factory test setting left on by mistake. In most cases, exiting demo mode restores normal heating, preheat, and timing functions. Always start with the user manual for your exact model, because exit sequences vary by brand and firmware version. According to Oven Cook Pro Analysis, model-specific steps are the most reliable path to a clean exit. Keep safety in mind: if you smell burning, hear buzzing, or notice damaged wiring, stop and seek professional help immediately.
Key takeaway: Demo mode is a display feature, not a safety mechanism. Exiting it properly protects both your oven and warranty.
Signals to look for on your control panel
Different ovens show demo mode in different ways. Common signals include the word DEMO on the display, a clock icon flashing in demo mode, or a persistent display prompt that does not respond to heat control. Some models show a dedicated “Demo” indicator light, while others use a temporary screen saver. If your oven’s manual mentions a “Demo Mode” toggle or a specific button sequence, follow those exact steps. When diagnosing, document any error codes or blinking patterns; they help technicians if you end up needing service. If you’re unsure about what you see, take clear photos of the display and consult the manual or customer support. Oven Cook Pro recommends verifying display behavior against your model’s specification sheet to avoid misinterpreting a stuck setting for a real fault.
A general exit flow: safe, stepwise approach
A cautious, model-agnostic approach starts with power cycling, then a controlled reset sequence followed by a clock reset. Always begin by turning the oven off at the main breaker or unplugging it for 60 seconds to clear capacitors and reset memory. After re-energizing, check for any demo indicators. If the indicator persists, look for a reset sequence in the manual (some models require holding two buttons together for several seconds). If no model-specific sequence exists, contact support with your model number, firmware version, and a description of the signals observed. Following a consistent flow reduces the risk of unintended settings being altered and speeds up troubleshooting.
Safety considerations and what to avoid
Never attempt to repair internal electronics unless you are trained and comfortable with high-voltage appliance work. Always unplug or switch off power before opening any panel. Avoid pressing random button combinations in the hope of a generic solution; each brand can require a precise sequence. If you encounter signs of heat damage, unusual odors, or the breaker trips, stop immediately and disconnect power. Use insulated tools if you must interact with the unit and wear protective gloves when handling panels that could be warm. If in doubt, seek professional help rather than continuing with trials that could void warranties.
When to seek professional help
If demo mode returns after a reset, or if you notice frequent fault codes, inconsistent heating, or failure to re-enter a normal cooking state, call a technician. Prepare your model number, serial number, and any error codes observed. A professional will verify firmware integrity, check the control board, and confirm there are no sensor or wiring faults. Oven Cook Pro notes that timely professional support preserves safety and prevents further damage, especially for gas or electric systems with high current draw.
Tools & Materials
- Screwdriver (Phillips #2)(Essential for removing panel screws if accessing the control area.)
- User manual for your oven model(Locate model-specific exit sequences and caution notes.)
- Multimeter (optional)(Useful if you suspect electrical faults; do not probe live circuits without training.)
- Heat-resistant gloves(Protect hands when handling warm surfaces after power restoration.)
- Camera or smartphone(Document display states and panel markings for reference.)
- Warranty and service contact info(Keep handy in case you need service after the reset.)
Steps
Estimated time: 20-60 minutes
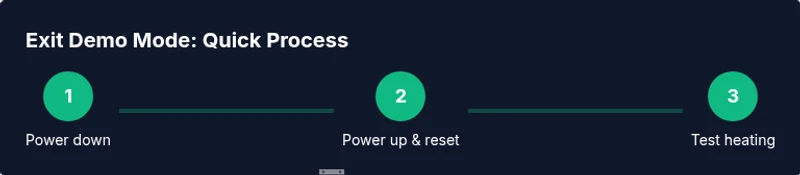
- 1
Power down the oven
Shut off power to the oven completely by turning off the breaker or unplugging the unit for at least 60 seconds. This clears temporary memory and resets basic circuits.
Tip: If you have a hard-wired setup, switching off at the breaker is safer than unplugging a built-in wall unit. - 2
Reconnect power and check the display
Restore power and observe whether the DEMO indicator or a similar message clears on its own. If the display remains in demo mode, proceed to the next step.
Tip: Take a quick photo of the display to compare before/after states. - 3
Attempt a basic reset sequence
If your manual specifies a reset sequence (such as holding two buttons for several seconds), perform it exactly as described. If there is no universal sequence, skip this step and move to a power-cycle check.
Tip: Do not press random combos; use model-specific instructions when available. - 4
Check for a demo toggle or clock reset
Look for a dedicated Demo toggle or a clock setting that can be reset to the current time. Toggle or reprogram the clock to wake the display from demo mode if supported.
Tip: If the toggle is hidden in a submenu, consult the manual or contact support for the exact path. - 5
Power cycle again if needed
If the demo state persists, power down again for 60 seconds and repeat the clock-reset step. Some models require multiple cycles to clear memory completely.
Tip: Document whether you needed more than one cycle for future reference. - 6
Run a quick bake test
After exiting, run a short bake test at a low temperature to confirm heating is normal. Observe the preheat indicator and the actual temperature on any built-in probe or sensor readout.
Tip: If it fails to heat or readings are erratic, stop and seek professional help. - 7
Record results and reset memory if possible
Note what steps you took and whether the display state changed. If your oven supports a firmware reset or memory wipe, perform it per the manual.
Tip: Keep a log of dates, steps taken, and outcomes to help technicians later. - 8
If issues persist, contact support
If the oven returns to demo mode, or if it fails any test, contact the manufacturer or a certified technician with model and firmware details.
Tip: Avoid continuing to operate a unit that indicates faults or abnormal behavior.
Questions & Answers
What is demo mode on ovens?
Demo mode is a showroom display state that imitates normal operation without actual heating. It helps customers view features but should not be used for cooking. Exiting these settings usually restores regular heating functions.
Demo mode is a showroom display state that imitates cooking but doesn’t heat. Exiting it restores normal oven operation.
Why is my oven stuck in demo mode?
A stuck demo state is often caused by a manual toggle left on, a failed reset, or firmware quirks. Rechecking the manual for a model-specific exit sequence or performing a controlled reset usually resolves it.
A stuck demo state is usually due to a manual toggle or a reset issue. Try the model-specific exit sequence or a safe reset.
Can unplugging exit demo mode?
Power cycling—unplugging or switching off the breaker for about a minute—clears most demo modes. If it persists, the model may require a dedicated reset sequence or a firmware refresh.
Yes, power cycling clears most demo modes, but some models need a specific reset sequence.
Is it risky to reset the oven to exit demo mode?
Resetting is generally safe when done as described in the manual and with the power off first. Avoid forcefully tampering with internal components or bypassing safety features.
Resetting is usually safe if you follow the manual and power-down first. Don’t tamper with internal components.
Will exiting demo mode affect warranty?
Exiting demo mode per manufacturer instructions should not void a warranty. If issues persist after exit, use authorized service channels to diagnose underlying faults.
Exiting demo mode per the manual shouldn't void your warranty, but ongoing issues should be checked by a professional.
Where can I find model-specific exit codes?
Model-specific exit codes and sequences are listed in the user manual or the manufacturer's online support pages. If the information isn’t clear, contact support with your model number and firmware version.
Check your manual or the manufacturer’s site for model-specific exit codes; contact support if unclear.
Watch Video
Main Points
- Power down to reset control board.
- Demo mode exit steps vary by model; consult the manual.
- Safety first: unplug before opening panels.
- If issues recur, contact a technician promptly.