Why Would Oven Stop Working? A Urgent Troubleshooting Guide
Urgent, step-by-step troubleshooting for a non-responsive oven. Identify common causes, safe fixes, and when to call a pro. Expert guidance from Oven Cook Pro for homeowners and DIYers in 2026.

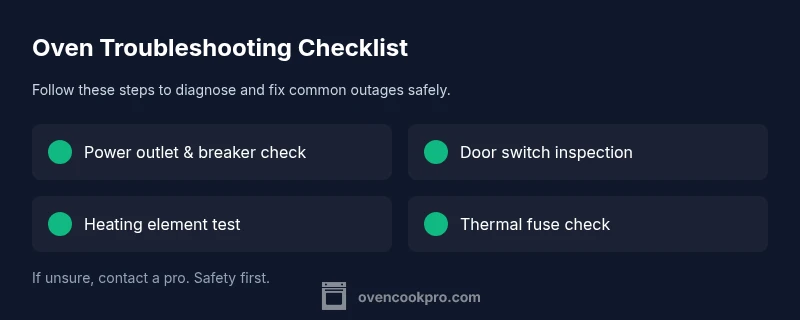
If your oven won’t heat or respond to controls, start with power, door switch, and display checks. Verify the outlet and breaker, ensure the door latch engages, and look for error codes on the display. If these basics don’t fix it, proceed to element/thermostat testing or call a pro. This quick path prioritizes safety and speed.
Understanding why would oven stop working
According to Oven Cook Pro, when an oven stops working, the most common culprits are power supply issues, safety interlocks, or faulty controls. This is one of those home problems that triggers panic, but a calm, methodical approach always wins. In practice, the question 'why would oven stop working' often has straightforward answers: the oven isn’t getting power, the door interlock prevents operation for safety, or the control board isn’t sending heating commands. By starting with simple checks you can separate harmless glitches from real faults. This section lays out the typical scenarios you'll encounter, with practical tips to test safely and avoid unnecessary risks.
Quick checks you can do safely
Before you call for help, perform a few non-invasive checks. First, confirm the oven is powered: check the wall outlet, the dedicated circuit, and any GFCI reset if applicable. If you’re using a hardwired unit, switch off the circuit breaker for 60 seconds before restoring power to reset electronics. Look at the display: any error codes or blinking lights can point to a fault. Finally, verify the door is fully closed and the door switch engages when you attempt to start the oven. These steps are essential to answer 'why would oven stop working' without risking harm.
Electrical vs. thermal failures: what to test first
Electrical issues often show up as a dead display or the oven refusing to heat, while thermal problems manifest as heat coming on for a moment then stopping. If the display is blank or unresponsive, focus on power, control wiring, and fuses. If the oven powers up but won’t heat, inspect the bake and broil elements, thermal fuse (if accessible), and the thermostat. In many cases, the fix is as simple as a blown fuse or a loose connection; more complex issues require professional testing.
Gas ovens: safety considerations
For gas ovens, the risk profile changes. If you’re not getting heat or you smell gas, shut off the gas supply and ventilate the area, then call a licensed technician. Do not attempt to disassemble gas components beyond basic exterior inspection. If the oven lights but won’t stay on, the problem may lie with the thermocouple, gas valve, or control module. Always prioritize safety when troubleshooting gas appliances.
The role of door switches and control boards
Many ovens will not operate if the door switch isn’t triggering the control board. A faulty switch or a misaligned door can prevent heating entirely. Inspect the door switch plunger for wear and ensure it travels fully when the door closes. If the control board is at fault, you may see error codes, slow response, or a completely unresponsive panel. In either case, diagnosing requires careful testing and sometimes a service call.
Heating elements, fuses, and thermostat checks
Electric ovens rely on bake and broil elements to produce heat. A visibly damaged element or a broken ceramic coil is a clear sign to replace. Use a multimeter to check continuity; a burnt-out element shows no continuity. The thermal fuse is another safety device that can cut power if the oven overheats; testing requires locating the fuse and verifying continuity. If you’re not confident with electrical testing, call a pro.
Resetting the oven and power cycling
Sometimes the oven simply needs a reset. Start by turning off the oven at the breaker or unplugging it for a minute, then restore power and try again. If the display returns but heat is erratic, a deeper diagnostic is needed. Note any error codes and cross-check them with your manual. A reset is a safe first step before diving into component-level testing.
Cleaning, maintenance, and prevention
Regular maintenance reduces the chance of sudden outages. Keep vents clean, avoid heat buildup behind the back panel, and schedule periodic inspections if you rely on your oven weekly. Use proper cookware and avoid blocking ventilation with towels or foil. For gas ovens, ensure good room ventilation and check for gas smell. Document symptoms and fixes so you can act quickly if the problem recurs, and input any recurring issues into your maintenance log.
How professionals diagnose and why you should call one
When basic checks don’t restore performance, or you encounter gas smells, high heat, or a persistent no-heat condition, it’s time to contact a pro. A trained technician will test electrical circuits, control boards, and safety interlocks with specialized tools. They’ll verify gas pressure, combustion safety, and venting as needed. The goal is to identify the root cause without risking personal safety or causing further appliance damage. Rely on professional diagnostics as a last resort after safe DIY checks.
Steps
Estimated time: 45-60 minutes
- 1
Power off and safety check
Begin by turning off power at the oven and the circuit breaker. If you must touch wires, ensure you’re wearing insulated gloves and standing on a non-conductive surface. This prevents shocks during inspection and sets a safe baseline for further testing.
Tip: Always unplug or switch off the breaker before touching any internal components. - 2
Check power supply and outlet
Test the outlet with a known-good device to confirm it’s supplying power. If the outlet is controlled by a wall switch, ensure it’s on. For hardwired units, verify connections at the terminal block if you feel comfortable; otherwise skip to contacting a professional.
Tip: If the outlet is dead, the oven will not heat regardless of internal components. - 3
Inspect door switch and control panel
Close the door and observe the switch plunger; you should hear a soft click when engaged. If the switch is sticky or misaligned, the oven may think the door is open and refuse to start. Check for visible damage or loose wires on the control panel.
Tip: A faulty door switch is a common, easy fix that often resolves non-heating issues. - 4
Test heating elements and thermostat
If you can access the bake and broil elements, inspect for visible damage. Use a multimeter to check continuity; no continuity indicates a faulty element. Check the thermostat as a secondary path if heating is inconsistent.
Tip: Only test elements when power is off and you are comfortable using a multimeter. - 5
Check thermal fuse and safety devices
Locate the thermal fuse and test for continuity. A blown fuse will cut power to the oven. Replacing a fuse should be done with the exact part from the manufacturer and with power completely disconnected.
Tip: If you’re unsure about fuse testing, skip to professional service to avoid shock or fire risk. - 6
Reassemble, power up, and test
Reconnect any components you removed, restore power, and try a basic bake cycle. Note any error codes and how the oven responds. If heating is unreliable or non-existent, proceed with professional evaluation.
Tip: Take photos of wiring before reassembly to aid a technician.
Diagnosis: Oven won’t heat or respond to controls
Possible Causes
- highPower issue (outlet, circuit breaker, or cord)
- highFaulty door switch preventing operation
- mediumFaulty bake/broil element or igniter (electric ovens)
- mediumBlown thermal fuse or fuse in control circuit
- lowControl board or relay failure
Fixes
- easyCheck outlet and circuit breaker; reset GFCI if tripped; unplug and replug the oven to reset electronics
- easyInspect door latch/door switch for proper engagement and replace if worn
- mediumTest heating elements/igniter for continuity with a multimeter; replace if open circuit
- hardInspect thermal fuse and replace only with manufacturer-approved part; if uncomfortable, call a pro
- hardIf control board shows errors or no display, schedule professional diagnostic and possible board replacement
Questions & Answers
What is the most common reason an oven stops working?
Power issues or door interlocks are the most frequent causes. Start with power and door switch checks, then proceed to component testing if needed.
The most common cause is power or door switch problems, so start there.
Is it safe to fix an oven myself?
Only if you follow strict safety steps. For electrical or gas issues, consider calling a professional.
Be cautious—electrical or gas problems are best left to a pro.
When should I replace a heating element?
If testing shows no continuity or visible damage, replace. Check wiring and connections first.
If the element has no continuity, replace it.
What if the oven won’t heat but shows error codes?
Note the code and consult the manual or manufacturer support to decode it; codes point to door, thermostat, or control issues.
Write down the error code and check the manual for meaning.
Should I call a pro for gas oven issues?
Yes if you smell gas, see no flame, or suspect venting problems. Gas appliances require a licensed technician.
Gas problems mean a professional should handle it.
Can a reset fix a stubborn oven?
A safe power cycle can clear minor glitches. If problems persist, perform deeper component checks or call a pro.
Try a gentle power reset first.
Watch Video
Main Points
- Power checks are the fastest path to a fix
- Don’t bypass safety interlocks
- Call a professional for electrical or gas issues
- Document symptoms for quick diagnosis and prevention