How to Fix Oven Temperature: A Practical Step-by-Step Guide
Learn a practical, safe method to diagnose and fix oven temperature drift. This guide covers common causes, testing methods, calibration options, and maintenance to keep your oven heating accurately.

You will learn simple, safe steps to diagnose why your oven runs hotter or cooler than set, test actual temperature, and apply fixes such as calibration, insulation checks, or thermostat replacement. Gather a thermometer, oven-safe tools, and a small screwdriver. Then follow a clear step-by-step process. This approach emphasizes safety and avoids guesswork.
Understanding Temperature Accuracy in Your Oven
Your oven’s ability to hold the set temperature is critical for consistent baking and roasting. When misalignment occurs, dishes can come out undercooked on the outside while the inside remains under-temp. Learning how to fix oven temperature begins with understanding how ovens measure heat, the difference between built-in sensors and dial readings, and why even a small drift matters over longer cook times. In practice, this means using a trusted oven thermometer to verify true heat, then comparing it to the display reading. The goal is to identify whether drift is isolated to a specific range, or a broad mismatch across the entire temperature spectrum. According to Oven Cook Pro, most homeowners can improve accuracy through a methodical, safety-first approach and by documenting observations over several bakes. By grounding your test in repeatable steps, you’ll build a reliable picture of your oven’s performance and gain confidence in how to fix oven temperature issues.
Common Causes of Temperature Drift
There are multiple culprits behind temperature drift. A worn door gasket allows heat to escape, causing the oven to work harder and the thermostat to overshoot or undershoot. Calibration drift in the thermostat is common as appliances age, leading to persistent mismatch. Sensor placement inside the cavity can affect readings if it’s too close to vents or heating elements. Convection mode (fan) vs conventional mode can also alter perceived temperature: convection ovens often read and cook differently, requiring different setpoints. Another frequent factor is crumbling insulation around the oven cavity or damaged heating elements, which reduces efficiency and creates inconsistent heat. Finally, the control board or its wiring can degrade, producing unreliable temperature signals. Understanding these causes helps you target the fix most effectively and avoid unnecessary replacements.
The Right Tools for Diagnosis
Before you dive into the kitchen, assemble a small set of tools that will make the process precise and safe. An accurate oven thermometer is essential for measuring actual heat inside the cavity. A basic screwdriver set (flat-head and Phillips) will help you access the thermostat cover or control panel if needed. Heat-safe gloves keep your hands protected when moving hot racks or components. Keep a notebook or digital device to log temperature readings, setpoints, bake times, and any symptoms you observe. For quick cleanup, have a damp cloth ready to wipe away crumbs that can interfere with sensor readings. Finally, refer to your oven’s user manual for location-specific instructions and safety recommendations.
Safety Considerations Before You Start
Working with a live oven involves burn hazards and electrical risks. Always unplug the appliance before removing panels or touching internal parts, unless your manual explicitly says to disconnect power at the wall rather than at the cooktop. Use insulated tools and keep water away from electrical components. If you smell gas, hear buzzing from wiring, or notice damaged cords, stop and call a qualified technician. When testing temperatures, avoid leaving the door open for long periods and use oven mitts when handling probes. Safety first ensures you don’t create a bigger problem while learning how to fix oven temperature.
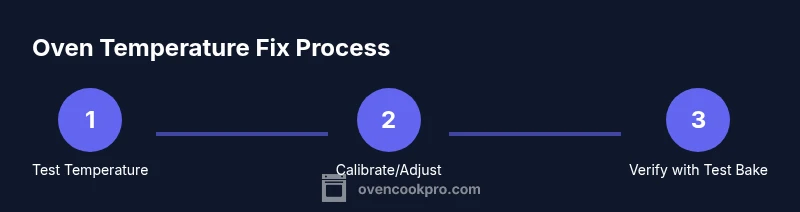
Step-by-Step Evaluation: Stage 1 — Temperature Testing
- Preheat the oven to a mid-range temperature and observe how long it takes to reach that setpoint. 2) Place the oven thermometer in the center of the oven cavity, away from walls and heating elements. 3) Compare the thermometer reading with the oven’s digital or analog setpoint, and record any drift. 4) Repeat at a second temperature to determine whether drift is consistent across the range. 5) Note whether doors or fans influence readings by closing the door and testing with and without convection, if applicable. Pro tip: run all temperature tests with the same rack position for consistency.
Step-by-Step Evaluation: Stage 2 — Calibration and Adjustment
If your oven supports calibration, access the calibration function in the control panel and adjust in small increments, then re-test at multiple temperatures to confirm improvement. If there is no calibration option or the drift persists after calibration, you may be dealing with a faulty thermostat, sensor, or control board. In that case, document readings and consider professional service. Remember to re-test after any adjustment to ensure stability and repeatability. Pro tip: always follow the model-specific calibration steps in the user manual to avoid overcorrecting.
Step-by-Step Evaluation: Stage 3 — Inspecting Components
Inspect the door gasket for wear or gaps, which can let heat escape and cause inaccurate temperatures. Check for loose hinges or misaligned doors that prevent a proper seal. Inspect insulation around the oven cavity; crumbling or compressed insulation reduces heat retention and can cause undercooking. Examine heating elements and wires for visible damage or scorching. If you notice any damaged parts, replace them according to your manual or seek professional help. Pro tip: use a flashlight to inspect seals and look for darkened areas indicating heat leakage.
Step-by-Step Evaluation: Stage 4 — Confirm with a Bake Test
After calibrating or replacing components, conduct a bake test using a simple, repeatable recipe (cookies or roasted vegetables). Preheat to the same temperatures used in testing and bake for a defined period, noting both the time to reach temperature and the final results. If the bake results align with the set temperature more closely than before, you’ve improved accuracy. If results still deviate, revisit the calibration steps or consult a professional. Pro tip: keep a log of test bakes to track improvements over time.
Maintenance and Long-Term Practices to Keep Temperature Accurate
Regular maintenance is key to preserving oven temperature accuracy. Schedule periodic checks of the door seal, racks, and insulation. Clean the interior to remove crumbs that can affect heat distribution. If your model includes a self-cleaning cycle, ensure it’s used as recommended and not as a substitute for regular maintenance. Periodically verify calibration by repeating the Stage 1 tests and updating your log. This proactive approach reduces surprises and helps you maintain reliable oven performance over years.
Quick Reference Checklist
- Verify with oven thermometer in center of cavity
- Compare readings at multiple temperatures
- Calibrate if your model supports it, otherwise assess thermostat
- Inspect door seal and insulation for wear
- Document readings and bake results for trend tracking
Tools & Materials
- Oven thermometer (in-oven thermometer)(Place in center of the oven to compare with the built-in reading)
- Flat-head screwdriver(Access thermostat cover or control panel screws)
- Phillips-head screwdriver(As needed for control panel screws)
- Heat-safe gloves(Protect hands when handling hot racks or components)
- Notepad or digital recorder(Record readings and observations)
- Cleaning cloth(Wipe crumbs and clean around thermostat area)
Steps
Estimated time: 60-90 minutes
- 1
Test actual temperature with thermometer
Preheat to a mid-range bake temperature and compare readings from the oven thermometer and the built-in display. This identifies whether drift exists across temperatures.
Tip: Keep the thermometer centered and away from walls or vents. - 2
Record and compare readings
Log the differences between set temperature and actual readings at multiple temperatures to determine drift pattern.
Tip: Use the same rack position for consistency. - 3
Calibrate if supported by model
If your oven offers a calibration function, adjust in small increments and re-test across temps.
Tip: Follow the model’s manual to avoid overcorrecting. - 4
Inspect door seal and insulation
Check the door gasket for wear and inspect insulation for gaps or damage that could cause heat loss.
Tip: Replace worn seals promptly to maintain accuracy. - 5
Check heating elements and wiring
Look for signs of damage, scorching, or loose connections that could affect heat delivery.
Tip: If you see frayed wires or obvious damage, stop and call a technician. - 6
Verify with a bake test
Run a final bake test with a standard recipe and compare results to expectations to validate improvements.
Tip: Document results for future reference.
Questions & Answers
Why does my oven temperature read higher than the set temperature?
Temperature drift can happen due to calibration drift, a faulty thermostat, or sensor misplacement. Verifying with a separate thermometer helps identify which component is at fault.
Temperature drift happens when the oven’s readings don’t match the set temperature, often from aging parts or miscalibration. Use an external thermometer to confirm.
How can I tell if my oven thermometer is accurate?
Place the oven thermometer in the center and compare its reading to the oven’s dial or display at multiple temperatures. If readings diverge repeatedly, the thermometer or sensor may be inaccurate.
Test with a trusted oven thermometer by comparing against the built-in readout at several temperatures.
Is it safe to calibrate my oven myself?
Many models offer user calibration features in the settings. If your manual supports it, follow the steps carefully; if uncertain, consult a technician.
Some ovens allow safe self-calibration; always follow your model’s guide and don’t overadjust.
What should I do if calibration doesn’t fix the issue?
If calibration doesn’t help, you may need thermostat replacement or professional inspection of the control board and wiring.
If calibration fails, a professional should check the thermostat or control board for deeper issues.
How long does a diagnostic take for oven temperature issues?
Time varies with the complexity, but plan for a thorough check, including retests after any adjustments.
It varies, but set aside enough time for testing, calibration, and a final bake test.
Can a door gasket cause temperature problems?
Yes. A worn gasket can allow heat to escape, causing inaccurate temperatures and longer preheat times.
A bad door seal can make the oven seem hot or cold because heat leaks out.
Watch Video
Main Points
- Test actual temperature with a center-cavity thermometer.
- Calibrate or replace thermostat if drift is confirmed.
- Inspect door seals and insulation for heat loss.
- Document readings to track performance over time.
- When in doubt, consult a qualified technician.