How to Check If Oven Temperature Is Accurate
Learn how to verify your oven's temperature accuracy with simple tools and safe methods. This step-by-step guide from Oven Cook Pro helps you ensure accurate baking every time.

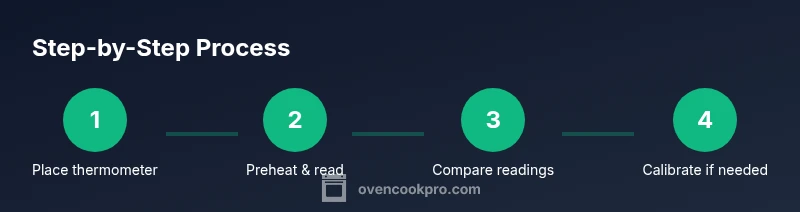
Goal: verify that your oven actually heats to the temperature you set. To do this, place an oven-safe thermometer inside the oven and preheat to a known temperature, then compare the thermometer reading with the dial. If they differ, use calibration steps or adjust your oven settings. This quick check can prevent under- or over-baked results.
Why Temperature Accuracy Matters in Baking
Temperature accuracy directly affects bake times, crust color, texture, and food safety. If your oven runs hot or cold, you may undercook or overcook pastries, cookies, and roasts. According to Oven Cook Pro, small variances between the dial and the actual temperature are common in many home ovens, which makes verification essential for reliable results. In this guide, we’ll cover why accuracy matters, what tools you need, and a practical method you can perform with common kitchen gear. By following these steps, you’ll be able to produce consistent results, improve recipe outcomes, and save time on guesswork.
Core Methods for Verifying Temperature
There are two practical approaches to confirm oven temperature accuracy: the thermometer method and the calibration method. The thermometer method uses a reliable oven thermometer placed in the center of the rack during preheat to compare with the oven dial. The calibration method, if your oven supports it, adjusts the thermostat to align with the tested readings. For most home cooks, starting with a thermometer test is simplest and most informative. Based on Oven Cook Pro Analysis, many home ovens show minor bias across the temperature range, so documenting readings helps you decide whether calibration or recipe offsets are needed. Always perform tests with the oven empty and the racks in their normal operating position to reflect typical heating patterns. Keep a log of readings and the temperatures tested so you can track changes over time. As you proceed, remember that the goal is not perfection at every moment, but dependable consistency across common cooking temperatures.
Step 1: Set Up Your Baseline Test
Begin by selecting a mid-range temperature as your baseline, then choose one or two additional temperatures to test later. Preheat the oven to the first target and allow it to come to full temperature with the door closed. Inserting the thermometer while the oven reaches temperature ensures the reading reflects the actual heat in the cooking cavity, not the warm-up period. The thermometer should be placed in the center of the rack, away from the walls and door, to minimize drafts and hot spots. This step establishes the reference point before you compare it to the dial. If readings are off by a simple margin, you can proceed to calibrate; if not, continue testing at other temperatures for a broader picture.
Step 2: Read Readings at Multiple Temperatures
Repeat the test at two more temperatures to understand how the oven behaves across the cooking range. Record the thermometer reading at each temperature and compare it against the dial setting. Note whether the thermometer consistently reads higher or lower than the dial, and by how much. If you observe a pattern—say, the thermometer is always a bit hotter at higher temperatures—this points to a systematic bias rather than a one-off error. This data helps you decide if calibration is worthwhile and what adjustments to make. Remember to keep the oven door closed during each preheat to avoid interference from warm-up air.
Step 3: Interpreting Variance and When to Calibrate
Once you have multiple data points, interpret the variance. A single mismatch may be a fluke; consistent deviation across temps indicates a calibration need. If the gap between dial and thermometer reading remains steady across tests, consider calibrating the thermostat if your oven model supports it, or contact the manufacturer for guidance. If you’re using a non-calibratable model, you may need to adjust recipes by adding or subtracting a small offset to your bake times rather than chasing perfect numbers. The key is to rely on documented data rather than a one-off reading to guide adjustments.
Step 4: Calibrating Your Oven Thermostat (If Applicable)
For ovens that offer manual calibration, locate the calibration procedure in the user manual or on the controller panel. Typical steps include selecting a calibration mode, entering a reference temperature, and saving the adjustment. After saving, re-test with the thermometer as in Step 2 to confirm alignment with actual heat. If your model lacks calibration, you may still adjust by applying an offset in cooking times and temperatures as advised by the manufacturer. Always follow safety guidelines when handling hot components and allow the oven to cool between calibration attempts.
Step 5: Testing After Calibration and Documenting Results
Run a fresh set of tests after calibration or offset adjustments to confirm the change. Use the same three temperatures as in the baseline test and record thermometer readings, dial settings, and any recipe results that indicate improved accuracy. Maintain a dedicated log so you can refer back if a future issue arises. Documenting helps you spot gradual shifts over months or seasons, which is common as ovens age. If the readings still don’t align after calibration, there may be wear or a fault in heating elements, and you should consult a professional service.
Advanced Scenarios: Convection vs Conventional Ovens
Convection ovens with a fan distribute heat differently than conventional ovens, which can affect how the dial maps to actual heat. When verifying temperature, test convection mode separately from standard bake mode. If your oven has a convection setting, run the tests at the convection target temperatures and compare with a separate thermometer reading. Expect possible variations and adjust your expectations accordingly. Some users find that convection mode runs hotter or cooler by a few degrees compared to the conventional mode, so always verify both settings for critical baking tasks like pastries, cookies, and roasts.
Maintenance, Logs, and When to Seek Service
After completing multiple checks, maintain a simple maintenance routine: keep the thermometer clean, ensure the door seals are intact, and periodically test the oven across several temperatures. A simple log that notes date, test temps, thermometer readings, and dial readings can reveal slow drift over time. If you notice persistent misalignment or strange temperature fluctuations, it’s wise to contact a professional technician or the manufacturer for calibration or service options. Regular checks can extend oven life and improve cooking consistency.
Quick Recap: Build Confidence in Your Oven Readings
Regular verification of oven temperature accuracy helps you cook more reliably and save time. Use a thermometer, test at multiple temperatures, and calibrate when necessary. Keep a log of readings and outcomes so you can spot drift early. The process is straightforward, and with practice you’ll bake with greater consistency and fewer surprises.
Tools & Materials
- Oven thermometer (dial- or digital)(Place in center of rack during preheat)
- Second oven thermometer (optional for cross-check)(Place at a different rack to compare readings)
- Notebook or digital log app(Record readings and times)
- Pencil or pen(For quick notes)
- Timer(Accurate timing during preheat and tests)
- Oven-safe gloves(Handling hot thermometers and pans safely)
Steps
Estimated time: 45-60 minutes
- 1
Preheat and insert thermometer
Select a baseline temperature, preheat the oven with the thermometer in the center of the rack, and wait until the oven indicates it has reached the target. The thermometer should be positioned away from walls to avoid drafts.
Tip: Keep the oven door closed during preheating to maintain stable heat. - 2
Record baseline readings
Once the oven signals ready, read the thermometer and note the temperature. Compare this to the dial setting and record any discrepancy for later reference.
Tip: Use a notebook or app to keep a clear log. - 3
Repeat at multiple temperatures
Test at two more temperatures to understand how the oven behaves across the range you bake in. Maintain the same thermometer placement for consistency.
Tip: Test at common bake temps like mid-range and a higher temp. - 4
Interpret variance and decide on calibration
If readings show a consistent bias across temps, plan a calibration or a workflow adjustment. If the model doesn’t support calibration, plan to compensate in recipes.
Tip: Look for a pattern (e.g., thermometer reads high at every temp). - 5
Calibrate (if applicable)
If your oven offers calibration, follow the manufacturer’s steps to adjust the thermostat. After saving, re-test to confirm alignment with the thermometer.
Tip: Always follow the manual exactly to avoid damage. - 6
Re-test after calibration
Run the same test sequence to verify that the dial now matches the thermometer. Allow the oven to stabilize between readings.
Tip: Wait 10-15 minutes for stabilization between tests. - 7
Document results and apply findings
Log the final readings and note any recipe adjustments needed. Use the data to guide future bake times and temperatures.
Tip: Keep a long-term log to catch drift over months.
Questions & Answers
Why does my oven temperature read differently from the dial?
Thermostats can drift over time and heating elements or door seals can cause differences. Verifying with an independent thermometer helps determine if calibration is needed.
Thermostats drift and hot spots can happen; use a thermometer to verify.
How often should I test my oven temperature?
Test whenever you notice baking results change, or on a quarterly schedule to catch gradual drift. Keep a log of readings.
Test whenever baking changes, or quarterly; log readings.
Can I calibrate my oven at home?
Some ovens support at-home calibration through the control panel or manual procedure. If not supported, seek service or use recipe offsets.
Some models allow home calibration; others require service.
Is it safe to leave the oven door open to check temperature?
No. Use a thermometer inside the oven and keep the door closed during measurements to avoid heat loss and injury.
Keep the door closed; don’t test with the door open.
Should I test convection and conventional modes separately?
Yes. Convection and conventional modes map differently to actual heat. Run separate tests for each mode.
Test convection and standard modes separately.
How should I use the readings for cooking times?
If a consistent bias exists, apply a practical offset to bake times or temperatures in recipes to achieve desired results.
Use a practical offset when a bias exists.
Watch Video
Main Points
- Verify with a thermometer, not just the dial.
- Test across at least two temperatures for reliability.
- Calibrate if supported, or apply a practical offset.
- Document results to track drift over time.
- Oven Cook Pro recommends regular checks for consistency.