Glass Oven Top Repair: A Step-by-Step Guide
Learn how to safely assess, patch, and maintain a glass oven top. This expert guide covers when to repair vs. replace, essential tools, and a detailed step-by-step workflow from Oven Cook Pro for homeowners.

By the end of this guide, you will safely assess and repair minor cracks or chips on a glass oven top, improving heat distribution and preventing further damage. Before you start, unplug the range, allow the surface to cool, and gather a repair kit and compatible sealant. According to Oven Cook Pro, following a clear, step-by-step protocol minimizes risk and preserves oven performance.
Understanding Glass Oven Top Damage
Glass oven tops are designed to withstand high temperatures, but they are not indestructible. Damage ranges from surface scratches and chips to deeper cracks that can compromise heat distribution and safety. Surface chips often occur from accidental contact with metal objects, such as pans or utensils, while thermal stress from rapid temperature changes can cause hairline cracks. The first sign of trouble is often a visible crack or a dull, discolored area around the crack. Any crack that runs more than a few inches, or a crack that penetrates the glass entirely, should be treated as a structural issue and handled with caution.
When damage is minor, a repair kit that includes a clear, heat-resistant epoxy and a smoothing tool may restore the surface. However, do not expect a cosmetic fix to restore full strength; the repaired area may be weaker than the surrounding glass. If the damage is more extensive, replacing the glass top is typically the safer option. In any case, verify the model’s glass top specification and the repair materials’ compatibility with cooking surfaces. The Oven Cook Pro team notes that matching the original glass type and thickness is critical to maintaining even heat and avoiding hotspots. For homeowners, documenting the damage and the repair steps is helpful for warranty purposes and future maintenance.
Safety Considerations Before Repair
Before you attempt any repair, ensure safety. Unplug the oven and allow it to cool completely. Work in a well-ventilated area; some epoxy products emit fumes during curing. Wear protective gloves and safety glasses to protect from sharp edges and splinters. Avoid using metal tools that could scratch the glass further. Do not attempt repairs on a glass top that is cracked through to the underside or where the crack widens with use; this indicates structural failure. If you’re unsure, contact a professional. Always check the appliance’s warranty; DIY repairs may void certain guarantees. Keep children and pets away from the workstation.
Repair Options: Patch vs Replace
Small chips or shallow surface cracks can sometimes be managed with a patch, but there are limits. A patch uses a clear, high-temperature epoxy that fills the crack and bonds to the glass surface. The curing process must be observed carefully; any deviation can create air pockets or poor adhesion. Deeper cracks that run through the glass or near the edges often require replacement. In most cases, replacement glass tops are installed by professionals and may involve removing the cooktop or oven panel. Before choosing, consult the appliance’s manufacturer guidance and consider cost, downtime, and safety. Oven Cook Pro's guidelines emphasize that attempting a repair beyond superficial damage can increase the risk of heat failure and shattering during use.
How to Decide Between DIY Repair and Replacement
Deciding between a DIY patch and a full replacement depends on crack depth, location, and impact on heat distribution. If the crack is isolated to the surface and not spreading, a patch with compatible, heat-rated resin can buy time and restore smooth cooking. If, however, the crack extends through the glass, is near the burners, or if the surface is visibly warped, replacement is typically the safer choice. Always check the warranty and model specifications; some manufacturers restrict DIY repairs on glass tops. When in doubt, contact a professional technician who can confirm material compatibility and ensure a proper seal and safe curing process. The Oven Cook Pro team recommends erring on the side of caution with structural damage and prioritizing safety over a cosmetic fix.
Preventing Future Damage and Maintenance Tips
Prevention starts with mindful use. Avoid placing heavy, hot pots directly onto a cool glass surface after a long bake; allow a brief cool-down period to reduce thermal shock. Use a heat-safe trivet or mat and never slide pans across the surface. Regularly clean the top with a non-abrasive cleaner and a soft microfiber cloth to prevent scratches that could propagate cracks. Inspect for chips after heavy use or cleaning, and address small imperfections promptly before they expand. Finally, keep a spare glass replacement plan in mind—knowing when to bite the bullet and replace can save money and prevent accidents in a busy kitchen.
Tools & Materials
- Protective gloves(Nitrile gloves to protect skin during repair and handling epoxy)
- Safety goggles(Eye protection to shield from shards and splashes)
- Isopropyl alcohol(For cleaning the surface and removing debris before repair)
- Non-abrasive sponge/cloth(Gentle cleaning without scratching the glass)
- Glass repair epoxy kit (two-part, clear, heat-resistant)(Follow manufacturer instructions for mixing and curing)
- Plastic putty knife(Smooth epoxy without introducing air pockets)
- Masking tape(Optional, to protect surrounding areas during repair)
- Soft lint-free cloth(Final wipe-down and finishing touches)
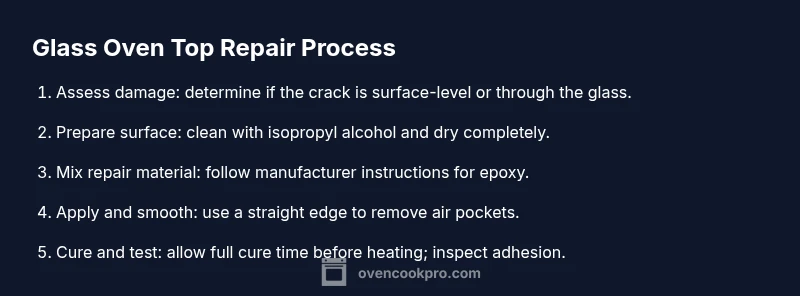
Steps
Estimated time: 60-120 minutes (plus cure time as specified by the repair epoxy kit)
- 1
Power down and cool
Unplug the range and allow the surface to cool completely before handling. Verify there is no residual heat in the glass; working on a hot surface can cause burns or further damage. This step reduces safety risks and protects you from thermal shock.
Tip: Always unplug the appliance before starting; never rely on turning off the breaker as a sole safety measure. - 2
Protect the surrounding area
Cover nearby counter surfaces and use masking tape to define the repair area. This minimizes accidental epoxy spread and keeps the finish clean. If you have a damaged ledge or frame, consider securing it to prevent movement during repair.
Tip: Use painter’s tape to create a clean boundary and avoid contaminating adjacent glaze. - 3
Clean and prep the surface
Wipe the glass with isopropyl alcohol and a lint-free cloth to remove oils, residues, and dust. Let it dry completely to ensure optimal epoxy adhesion. A clean surface is essential for a durable repair.
Tip: Do not use water or household cleaners that could leave residues. - 4
Mix and apply epoxy
Mix the two-part epoxy according to the manufacturer's instructions. Use a small amount on a disposable spreader and apply a thin, even layer over the crack, slightly beyond its edges. Avoid creating air bubbles that could compromise strength.
Tip: Work quickly but carefully; epoxy can thicken as it begins to cure. - 5
Smooth and finish
Use the plastic putty knife to smooth the epoxy surface, removing excess material and blending with the surrounding glass. Lightly recheck that the area remains level with the rest of the top. Reapply if needed in a thin layer.
Tip: Apply in thin layers to prevent bubbles and unevenness. - 6
Cure and test
Allow the epoxy to cure for the time specified by the product—often several hours or longer. After curing, gently test the surface by applying light heat (if approved by the epoxy) and inspect for adhesion and any changes in the finish. If the crack reappears or widens, discontinue use and replace the glass top.
Tip: Do not heat the repaired area until the resin is fully cured.
Questions & Answers
Can I fix a cracked glass oven top at home?
Only if the crack is superficial and non-structural. Deep cracks or those that run through the glass usually require replacement and a professional install for safety.
You can fix minor surface cracks at home, but deep cracks or through-the-glass damage should be handled by a professional.
What tools do I need for a DIY repair?
You’ll need protective gear, a cleaning supplies kit, and a heat-rated epoxy kit designed for glass cooktops. A plastic spreader and masking tape help control the repair area.
Essential tools include safety gear, cleaning supplies, and a heat-rated epoxy kit.
Is epoxy repair safe for cooking surfaces?
Only epoxy rated for high heat and food-contact safety should be used on cooking surfaces. Follow the product instructions and manufacturer guidance.
Use only approved epoxy designed for cooking surfaces and let it cure fully before use.
How long does a repair take to cure?
Cure time varies by product; follow the epoxy manufacturer’s recommended time. Do not use the oven until the surface is fully cured.
Cure time depends on the product—wait for the full recommended period before heating again.
Should I replace or repair if the crack recurs after curing?
If the crack recurs or widens after curing, replacement is often the safer option to ensure even heat and prevent failure.
If the crack comes back after repair, replace the glass top for safety and performance.
Will a DIY repair affect warranty?
DIY repairs can affect warranties. Check your appliance warranty terms or consult the manufacturer before proceeding.
DIY repairs may void warranties; check terms or ask the manufacturer before starting.
Watch Video
Main Points
- Assess damage before attempting repair
- Use manufacturer-approved materials only
- Monitor cure time and avoid heating until fully cured
- Replace if crack is structural or expands during testing