What to Do When Oven Glass Breaks: A Step-by-Step Safety Guide
Learn safe, practical steps for handling a broken oven glass, including immediate safety, cleanup, replacement options, and prevention tips from Oven Cook Pro.

This guide explains what to do when oven glass breaks, with safety and practical steps. It covers immediate actions, how to cordon off the area, cleansing shards, and assessing whether replacement parts are needed. You’ll also find guidance on DIY fixes versus hiring a professional, maintenance tips to prevent future breakage, and how to document the incident for warranties. This quick answer is designed for fast skimming and to set expectations before you dive into the detailed steps.
What to Do First: Safety and Containment
When a pane shatters in an oven, the situation can feel chaotic, but safety should guide every action. If you are asking what to do when oven glass breaks, the fastest way to reduce risk is to isolate the area, prevent anyone from touching shards, and cut power if it is safe to reach the control panel. According to Oven Cook Pro, the top safety rule is to treat sharp edges as the primary hazard and to avoid attempting any repairs while glass is compromised. Let the oven cool completely if it has been hot, and keep pets and children away from the kitchen. Collect basic tools in the safety zone: a rigid container for large pieces, cardboard or thick paper to scoop shards, and a broom for sweeping. Then assess whether the door or the oven cavity is affected and plan the next steps with a calm, methodical approach. This initial stage sets the groundwork for a safe, effective recovery rather than a rushed, risky repair attempt.
Immediate Actions You Should Take
After you confirm the area is secure, take the following concrete steps. First, switch off the oven’s power at the breaker if you can do so safely, and allow any surface heat to dissipate. Do not touch broken glass with bare hands; wear heavy-duty gloves and eye protection to guard against splinters. Clear cookware, racks, and utensils away from the immediate vicinity so you can work without tripping or slipping. Place a sturdy barrier—like a towel or cardboard—between the floor and any tiny fragments that might travel during movement. Finally, document the incident for warranty or service records and consider whether you will pursue a DIY glass replacement or hire a professional for a safe, proper installation.
Containment and Cleanup Plan
Containment means preventing further spread of shards and dust. Start by laying a protective barrier around the spill using cardboard or thick fabric. Use a broom to sweep larger pieces into a dustpan, keeping the dust to a minimum by sweeping gently in small motions. Collect fragments in a rigid container with a lid or a sealed bag. For tiny slivers, use damp paper towels or a slightly damp cloth to blot the area; avoid using a vacuum without a HEPA filter, which can recirculate fine particles. Wear gloves and a long-sleeved shirt during cleanup, and inspect the area with your fingers only after you’ve finished collecting the visible shards. When you’re done, seal the container and label it as broken glass before disposing of it according to local rules.
Assessing the Damage: Door Glass vs. Cavity
Not all oven glass is the same. Some doors use a tempered inner pane, others employ a ceramic or laminated panel, and the oven cavity may have glass that contributes to heat distribution. Safety hinges on understanding whether the damage is to the door glass, the door seal, or the inner cavity. If the outer door pane is cracked but the inner pane remains intact, you might still be able to operate the oven with extreme caution, but this is not recommended. If any pane is shattered or the seal is compromised, a full replacement is usually required to restore heat containment and prevent venting issues. In any case, treat all glass breakage as a safety issue and avoid attempting makeshift fixes that could worsen breakage or cause unpredictable failure.
Replacement Options: DIY vs Pro
Choosing between do-it-yourself replacement and professional service depends on the door design, your tools, and your level of comfort with appliance repairs. If you have a simple one-piece glass door with removable panels and you possess the correct glass type, a kit may let you swap panels safely. However, many ovens embed glass in a way that requires specialized tools and calibration to maintain door alignment and heat sealing. In such cases, attempting a DIY replacement can void warranties or create safety risks. As a general principle, if the oven is still under warranty or you are unsure about the door’s construction, contact a qualified technician. The decision hinges on safety, warranty terms, and whether replacement glass is readily available for your specific model. Oven Cook Pro analysis shows that most breakages occur due to thermal stress and impact, underscoring the value of careful evaluation before attempting a repair.
Sourcing Replacement Glass: What to Ask
Before ordering, collect your oven's model number, serial number, and door type. Ask suppliers about the exact glass specification—whether the pane is tempered, laminated, or annealed—and whether you need a full door assembly or a glass-only kit. Verify compatibility with your model and confirm installation requirements, such as whether screws or gaskets must be replaced simultaneously. Reputable vendors will provide replacement parts drawn from OEM catalogs or certified aftermarket equivalents and will spell out warranty coverage and return policies. If you cannot locate the right pane, call the manufacturer or a licensed technician to avoid mismatches that can compromise safety.
Installation Basics: What You Can Do Without Special Tools
With the right kit and careful preparation, some homeowners can replace a glass pane on a standard oven door. Start by removing the door from the oven, following the manufacturer’s instructions, then open the door to access the glass. Remove retaining screws, lift or slide out the broken pane, and replace it with the new pane, ensuring the gasket sits evenly and the seal closes smoothly. Reassemble the door and test for smooth operation before returning it to the oven. If the door is not easily accessible, or if the glass is bonded with adhesives or requires precise torque on screws, do not proceed; a professional installation is safer and more reliable.
Aftercare: Testing and Safety Checks
Once the new glass is installed, perform a cautious heat test, starting at low temperatures and monitoring for gaps around the seal, unusual rattling, or misalignment. Use a soapy water test at oven door edges to check for leaks. Observe the exterior panel during initial preheats for any signs of stress. If you notice anything unusual, shut down and call a technician. Keep monitoring for several cycles to ensure the repair holds under routine use.
Preventing Future Breaks: Best Practices
To reduce risk of glass breakage in the future, avoid sudden temperature changes, heavy pots directly on doors, or dropping items onto the glass. Use proper preheating practices, avoid slamming doors, and ensure that casseroles or bakeware do not strike the glass when sliding in and out. Consider setting aside a dedicated rack for heavy dishes and distribute weight evenly across shelves. Regular inspection and gentle handling can extend glass life.
Documentation and Warranty Considerations
Oven Cook Pro recommends keeping thorough documentation: take photos of the damage, note the model, and keep receipts for new parts or service. Review warranty terms to determine coverage for glass replacement and labor. If you used a professional, obtain a written estimate and a scope of work, including part numbers and service timeframe. After the repair, maintain a record of the service for future reference and warranty claims.
Tools & Materials
- Heavy-duty gloves(Protect hands from sharp shards)
- Safety goggles(Guard eyes from flying splinters)
- Closed-toe shoes(Sturdy, non-slip footwear)
- Broom and dustpan(Sweep up larger pieces safely)
- Cardboard or thick tray(Contain shards during collection)
- Rigid container with lid(Store broken glass securely)
- Damp cloth or paper towels(Blot and pick up fine fragments)
- Vacuum with HEPA filter(Clean without circulating dust)
- Screwdrivers (Phillips/flathead)(Only if you’re replacing glass yourself)
- Replacement oven door glass kit(Only if compatible with your model)
- Mask or respirator(Optional for dusty cleanup)
- Cleaning cloths(Wipe surfaces after cleanup)
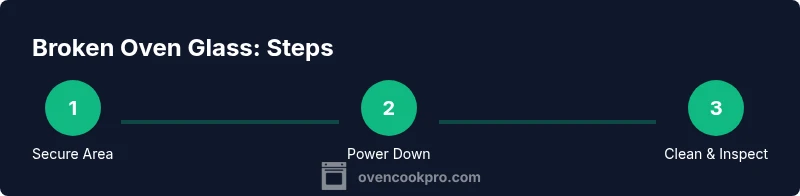
Steps
Estimated time: 60-120 minutes
- 1
Power down and secure the area
Identify the source of danger and switch off the oven at the breaker if it is safe to reach. Remove cookware and avoid stepping on shards. This reduces burn risk and keeps the workspace clear for subsequent steps.
Tip: Do not attempt to move hot racks or metal parts while the glass is compromised. - 2
Wear PPE and set boundaries
Put on heavy gloves and eye protection before touching any piece of broken glass. Establish a safety zone with a visible boundary to keep children and pets away.
Tip: If you feel uncertain, pause and call a professional. - 3
Collect large pieces with care
Sweep larger shards into a dustpan using controlled, overlapping motions. Transfer them to a rigid container and seal the lid.
Tip: Avoid using bare hands; even small shards can cause deep cuts. - 4
Capture tiny fragments
Dampen a cloth or paper towel and blot the area to lift fine slivers. Inspect the surrounding area with a bright light and vacuum any remaining dust with a HEPA-filter vacuum.
Tip: Do not use a regular shop vacuum without a filter. - 5
Inspect the door and seals
Open the door slowly and check for cracks in the outer pane and gasket integrity. Do not operate if there is any compromise in containment.
Tip: If the door feels loose, avoid further handling until inspected by a pro. - 6
Decide on replacement path
Assess whether you can source a compatible glass kit or if the entire door assembly must be replaced. Consider warranty implications and your comfort level with DIY.
Tip: When in doubt, consult the manufacturer’s guidelines. - 7
Source the correct part
Obtain the exact glass type and model-compatibility information. Verify if screws, seals, or gaskets should be replaced along with the glass.
Tip: Record part numbers and supplier contact details for future service. - 8
Install the replacement
Follow the manufacturer’s steps to install the new pane or door assembly. Ensure the seal sits evenly and the door closes without resistance.
Tip: Do not overtighten screws, which can crack glass. - 9
Test cautiously
Conduct a low-temperature preheat to check for gaps or leaks. Increase temperature gradually while watching for misalignment or heat loss.
Tip: If anything feels off, power down and seek professional help.
Questions & Answers
Is it safe to use the oven after oven glass breaks?
No. Do not operate the oven until the glass is replaced and the door is properly sealed. Broken glass can allow heat and shards to escape, creating burn hazards and potential fire risk.
No. Do not use the oven until the glass is replaced and the door is sealed.
What should I do immediately after the glass breaks?
Power down, isolate the area, wear PPE, carefully collect shards, and determine if you can replace the glass yourself or need a professional. Document the incident for warranty purposes.
Power down, isolate, wear PPE, collect shards, and decide on replacement or professional help.
Can I replace oven glass myself?
It depends on the model and door construction. Some doors allow glass-only replacement with a kit, while others require professional service to preserve heat seal and safety.
It depends on your model; some doors allow DIY glass kits, others need a pro.
How should I clean up broken glass safely?
Wear PPE, collect large pieces with a broom and dustpan, blot tiny shards with damp paper towels, and place everything in a rigid container for disposal. Avoid sweeping with bare hands.
Wear PPE, collect with a broom, blot shards, and dispose in a rigid container.
How long does replacement take?
Timeline varies by model, part availability, and whether a technician is needed. Expect variability and plan for potential delays.
It varies by model and availability; plan for possible delays.
Will a broken glass affect warranty coverage?
Warranty terms differ by brand and model. Contact the manufacturer or technician to understand coverage for glass replacement and labor.
Check the warranty terms with the manufacturer or technician.
Watch Video
Main Points
- Secure the area and power down safely.
- Assess whether door glass or cavity is damaged.
- Choose DIY replacement only if confident and compatible.
- Document the incident and preserve warranty info.