Can Oven Glass Be Replaced? A Step-By-Step Guide
Discover whether can oven glass be replaced, how to identify the right pane, sourcing parts, and safe step-by-step guidance from Oven Cook Pro. Learn when to DIY and when to hire a pro.

Yes, oven glass can be replaced on many models. The key is identifying the exact glass size and safety type, sourcing OEM parts when possible, and following model-specific steps carefully. This quick answer explains what to expect, when DIY is appropriate, and when to hire a professional for a safe, lasting repair.
Can oven glass be replaced: safety, scope, and expectations
Can oven glass be replaced? The short answer is yes for many ovens, but feasibility depends on the door design, glass type, and access to the seal. According to Oven Cook Pro, replacement is more likely possible when the door can be opened flat and when the glass is a removable pane rather than a bonded panel. This article walks you through how to determine if replacement is appropriate, what parts you’ll need, and how to proceed safely. You’ll learn to distinguish tempered safety glass from ceramic glass, why thickness matters, and how a damaged pane affects heat retention and door integrity. Keeping safety at the forefront helps prevent shattering, burns, or compromised oven performance later. Remember, this topic sits at the intersection of appliance maintenance and consumer safety—approach it with care and patience.
Types of oven glass and why it matters
Oven door glass comes in a few varieties, with tempered safety glass and ceramic glass being the most common. Tempered glass is designed to break into small, dull pieces if it fails, reducing the risk of sharp shards. Ceramic glass, often found in higher-end models, can tolerate higher temperatures but is still susceptible to cracking if impact or stress occurs. The glass must match the original thickness and mounting method to seal properly and resist oven heat. If the wrong glass is installed, you could compromise the door seal, leading to heat loss and uneven cooking. Always confirm whether your model uses a single pane, two panes, or a composite assembly, and verify the correct size before ordering replacements. This alignment matters for safety, energy efficiency, and long-term durability. As you assess, check for signs of stress, like spidering, cool spots near the pane, or condensation between layers, which indicate the pane should be replaced promptly.
How to verify compatibility for your oven
Before buying replacement glass, you must verify compatibility with your exact oven model. Start by locating the model and serial numbers on the oven or inside the door frame. Then consult the manufacturer’s parts catalog or an authorized parts retailer to find the correct glass part number. Measurements matter: carefully measure the pane’s width, height, and thickness, noting any distinctive features like vent holes or mounting clips. If you’re unsure, contact the OEM support line with photos and your model details. OEM parts are designed to fit the original door geometry and seal, which matters for heat retention and safety. In many cases, a properly matched pane will also carry a warranty or guarantee from the seller, offering extra protection for your investment.
Where to source the correct glass and parts
Start at the manufacturer’s official parts store or an authorized distributor to ensure you receive the correct pane. If OEM parts are unavailable, seek reputable third-party suppliers who clearly specify compatibility with your model and offer return policies. Avoid generic glass replacements that do not specify fitment or heat tolerance. When purchasing, request confirmation that the glass is tempered (and rated for the temperatures your oven reaches) and that the mounting hardware (clips, gaskets, and seals) is included or clearly compatible. Always inspect the packaging for any signs of damage that could compromise integrity. After you receive the glass, compare it side-by-side with the old pane to confirm size, thickness, and mounting point alignment. This reduces the chance of a costly misfit.
DIY replacement vs professional service: pros and cons
DIY pane replacement can save money and give you quick results if you have experience with small appliance repairs, but it carries risks. Replacing oven glass requires handling hot components, precise alignment of the seal, and correct reassembly to maintain a proper temperature seal. A misaligned pane or damaged gasket can cause heat loss, uneven cooking, and safety hazards. Conversely, a professional service offers expertise, a manufacturer-approved installation, and often a warranty on the work. If your oven is under warranty, DIY replacement may void coverage for related issues, so review the terms before proceeding. If you’re comfortable with detailed disassembly, have the right tools, and can follow the safety steps precisely, DIY is a feasible option for many models. Either route should prioritize a secure seal and intact, crack-free glass.
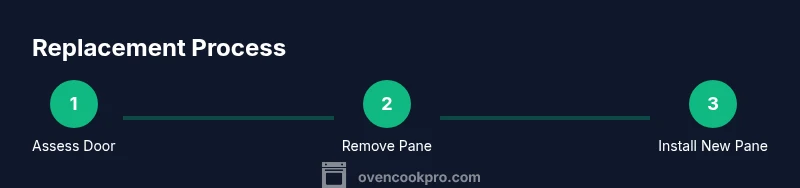
What the replacement process looks like (high-level)
The replacement process involves removing the oven door, disassembling the door for pane access, replacing the pane with the correctly matched item, resealing, and reassembling the door. It’s essential to consult your model’s service manual for hinge removal instructions and to avoid stressing the frame. In many cases, you’ll need to remove screws around the door frame, lift out the old glass, install the new pane with the proper clips or gaskets, and test the door for a snug seal. If any gasket is warped or if clips are damaged, replace them to preserve heat retention and prevent leaks. This high-level overview is designed to give you a sense of the sequence; follow model-specific steps to avoid misassembly.
Safety, warranty, and maintenance after replacement
Always power down the oven and unplug or switch off circuit breakers before starting work. Wear cut-resistant gloves and eye protection to guard against broken glass. After replacement, thoroughly clean the door and inspect the seal for gaps. A properly installed pane should sit flush and be free of cracks or chips. If your appliance is still under warranty, verify coverage, as some manufacturers require professional installation to preserve warranty benefits. Regular maintenance—such as inspecting seals, cleaning door frames, and avoiding heavy impact—extends the life of the pane and maintains energy efficiency. Proper storage of tools and careful disposal of the old pane are good finishing practices.
Troubleshooting and common mistakes to avoid
Common mistakes include using the wrong glass type, neglecting to replace worn gaskets, or forcing the door closed with an ill-fitting pane. These missteps can lead to heat loss, poor oven performance, or cracked panes. Don’t skip the step of verifying the glass’s heat rating and fit before purchase. Also avoid attempting a replacement if you notice frame damage or misaligned hinges; these issues may require replacement of the door or frame. If you’re unsure, consult the manufacturer’s guidelines or reach out to a qualified technician. Proper fit and seal are essential for safe and efficient operation.
Tools & Materials
- Replacement oven glass pane (OEM recommended)(Ensure correct model compatibility and tempered safety glass rating)
- Screwdrivers set (Phillips #2, flathead)(Sized for hinge screws and door hardware)
- Gloves and eye protection(Cut-resistant gloves and safety goggles)
- Gasket or door seal (if needed)(Replace if worn or damaged)
- Silicone sealant or heat-rated adhesive(Only if advised by manufacturer)
- Rags and isopropyl alcohol(For cleanup and surface prep)
- Measuring tape or calipers(Verify thickness and dimensions)
- Small container or tray for screws(Keep hardware organized)
- Torque driver or small wrench(For precise reassembly if required)
Steps
Estimated time: about one to two hours
- 1
Power down and prepare
Turn off the oven, unplug if possible, and remove any heat source nearby. Clear a workspace with good lighting and lay a soft mat to protect the glass. Label parts as you remove them to simplify reassembly.
Tip: Set aside screws in labeled cups; misplacing small parts is a common source of mistakes. - 2
Remove the door from its hinges
Open the door fully and stabilize it. Use the manufacturer’s instructions to lift the door free from hinges or to disengage hinge pins. Place the door on a padded surface to avoid impact.
Tip: Do not force parts; if hinges resist, consult the service manual. - 3
Access the glass panel
Identify the retaining screws or clips holding the pane. Carefully remove them without applying excessive force. Slide or lift the old pane away from the door frame.
Tip: Take a photo of the arrangement before removal to aid reassembly. - 4
Measure and verify replacement
Measure width, height, and thickness of the glass and confirm the temperature rating. Compare with the replacement pane to ensure a perfect fit. If dimensions don’t match, stop and source the correct part.
Tip: Thicker panes alter clearance and hinge alignment; do not force a larger pane. - 5
Install the new glass and seal
Place the new pane into the frame, attach clips or gasket, and ensure it sits flush. If a sealant is required, apply a thin bead as specified by the manufacturer. Recheck alignment before securing screws.
Tip: Avoid over-tightening screws to prevent cracking the glass. - 6
Reassemble and test
Reconnect the door and reattach to hinges. Close gently and test for a uniform seal. Power on the oven and run a short preheat to confirm no gaps or unusual noises.
Tip: If you hear grinding or see gaps, stop and inspect the seal immediately.
Questions & Answers
Can I replace oven glass myself, or should I hire a professional?
You can replace oven glass yourself if you have the right pane, tools, and careful technique. For complex door assemblies, hot surfaces, or uncertain model-specific steps, a professional is safer and can protect your warranty.
You can replace the glass yourself if you have the right parts and tools, but for complex doors or uncertain models, consider a professional to protect safety and warranty.
How do I know which glass to buy for my oven?
Check the oven’s model and serial numbers, then consult the official parts catalog or an authorized retailer to locate the exact pane. Compare thickness, dimensions, and mounting method before purchase.
Look up your model number, verify the exact pane in the official parts catalog, and compare thickness and size before buying.
Will replacing the glass affect my oven’s warranty?
Warranties vary by manufacturer. Some require using OEM parts and professional installation; DIY replacement may void certain coverage. Always check the warranty terms for your specific model.
Warranty terms vary; some require OEM parts and professional installation. Check your model’s terms before starting.
How long does a glass replacement typically take?
A glass replacement can take from a short session to a few hours, depending on the model, accessibility of the door, and your experience with similar tasks.
It can take a few hours depending on the model and your DIY experience.
Is it safe to replace glass without removing the door?
In most cases, removal of the door is required to access the glass securely. Attempting to replace without removing it increases the risk of injury and improper fit.
Usually you need to remove the door to replace the glass safely and ensure a proper seal.
What should I do if the new glass arrives cracked?
Do not install a cracked pane. Contact the supplier for a replacement or return, and inspect the packaging for damage during transit to support a claim.
If the pane is cracked, don’t install it. Request a replacement and check the packaging for transit damage.
Can I reuse the original gasket with a new pane?
Only reuse a gasket if it’s in good condition and seals correctly. If it’s worn, warped, or damaged, replace it to ensure a proper seal and heat retention.
Reuse the gasket only if it’s in good shape; otherwise replace it to maintain a proper seal.
Watch Video
Main Points
- Know the correct glass type and size before buying.
- OEM parts ensure proper fit and safety.
- Follow model-specific steps for safe replacement.
- Weigh DIY vs pro help against warranty and risk.
- A proper seal prevents heat loss and future cracks.