Replacement Glass Oven Top: A Step-by-Step Guide for Home Cooks
Learn how to safely replace a cracked or damaged glass oven top with a clear, practical step-by-step process. Includes safety checks, tools, installation tips, and maintenance from Oven Cook Pro.

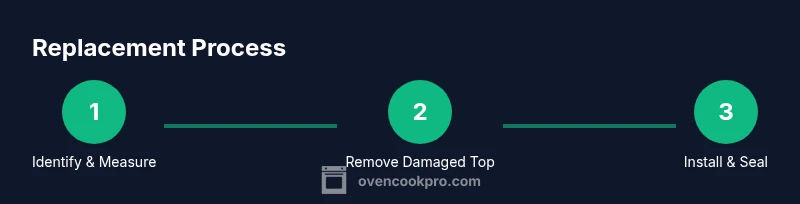
By following a safe, step-by-step process, you can replace a cracked or damaged glass oven top and restore a smooth, level cooking surface. You’ll verify compatibility, gather essential tools, remove the old pane without damaging surrounding components, install a new glass top, and perform a final seal check. This guide from Oven Cook Pro covers safety, fit, and cleanup.
What you’re replacing and why a replacement glass oven top matters
A replacement glass oven top is a new, heat-resistant panel that sits over the cooking area of the oven. It provides a flat, easy-to-clean surface and protects the underlying elements from spills and heat exposure. Cracks, chips, or haze can worsen with use, risking heat leaks or uneven baking. According to Oven Cook Pro, assessing the damage and confirming size, cutout, and mounting pattern are essential before ordering a replacement. In this guide we’ll outline when to replace and how to plan for a proper fit that will last for years of home cooking. A damaged top can also affect heat distribution, which in turn impacts browning and cooking times. By the end, you’ll have a clear, actionable path to a reliable replacement glass oven top that restores both safety and performance to your kitchen. 2026 is a good year to upgrade with a replacement that aligns with current standards and spare parts availability.
Safety and compatibility considerations
Safety comes first when handling a damaged or cracked replacement glass oven top. Always unplug the appliance and ensure the oven is completely cool before touching any components. Wear safety glasses and heat-resistant gloves to protect against shards and sharp edges. Verify that the replacement glass oven top is rated for your oven’s temperature range and that its mounting hardware matches your model. A mismatched pane can crack or warp under heat, creating dangerous gaps or misalignment that complicates future cleaning and operation. Oven Cook Pro’s 2026 analysis emphasizes double-checking model numbers, glass thickness, and edge finish before purchase. If anything feels uncertain, reference the manufacturer’s manual or contact customer support for confirmation of fit.
Sourcing the right replacement glass oven top
The first step in sourcing a replacement glass oven top is to locate your oven’s model number and note the exact dimensions. Decide whether you want an OEM replacement or a compatible third-party pane, understanding that both options have pros and cons in terms of fit, warranty, and lead time. Check the supplier’s Returns policy and warranty coverage, and verify packaging so you don’t receive a cracked pane. Confirm that the replacement has the same edge profile and screw hole pattern as your original top. Reading customer notes about fitment can reveal subtle differences between brands. The Oven Cook Pro team recommends choosing a pane that explicitly states suitability for your oven’s make and model to minimize returns and ensure a long-lasting seal.
Tools and workspace preparation
Before you begin, clear a sturdy workspace and gather the tools and materials you will need. A clean, well-lit area helps you keep track of small screws and brackets. Lay out a soft mat to protect surfaces and place a labeled tray for fasteners. A routine inspection of the old top’s mounting hardware will reveal whether brackets, screws, or clips are reusable or need replacement. Having a helper on standby can speed up removal and reduce the risk of dropping glass. Ensure you have a digital camera or phone to document the process for future reference. This planning phase reduces last-minute scrambles and helps you achieve a precise, professional-looking installation.
Removal of the damaged top and prep for install
Carefully remove any sealing strips, brackets, and mounting screws holding the old glass top in place. Support the pane with both hands as you lift to avoid bending or dropping it. If the top is stubborn, use a plastic putty knife to gently loosen any adhesive or gasket held in place by the frame, taking care not to scratch surrounding surfaces. Compare the mounting frame’s inner dimensions to the replacement glass top—small discrepancies can cause misalignment. Take photos of screw locations, bracket positions, and gasket seating so you can replicate the arrangement with the new pane. Leaving the frame clean and dry ensures a secure, uniform seal when the new top is installed.
Installing the replacement glass oven top
Dry-fit the new glass oven top by placing it into the frame without adhesive to confirm fit. Align all screw holes and edge transitions, then gradually secure the top with screws or brackets, applying even pressure and avoiding over-tightening. If a gasket or silicone sealant is recommended by the manufacturer, apply it per the product instructions and clean any excess immediately. Once seated, wipe the surface with a lint-free cloth to remove fingerprints or dust that could affect the seal. The replacement glass oven top should sit level and evenly across the cooking surface, with no gaps where spills can accumulate.
Seal, finalize, and verify operation
If the manufacturer prescribes a sealant, apply a thin bead as directed, then allow the sealant to cure fully before use. Reinstall any trim pieces or brackets that were removed, ensuring nothing interferes with the front edge’s flush contact with the cooktop. Reconnect power and perform a test cycle on the oven, watching for even heating and listening for unusual noises that might indicate misalignment. Clean the surface again after the test run and inspect the edges for any signs of leakage or cracking. With the replacement glass oven top properly seated, you should experience improved heat distribution and easier cleaning compared with the damaged top. Remember to keep a maintenance routine to extend the life of your replacement pane and protect your investment.
Maintenance, care, and long-term considerations
To extend the life of your replacement glass oven top, wipe away spills promptly after cooking with a non-abrasive cleaner. Avoid using abrasive pads that can scratch the surface, and never place hot pots directly on the glass. Regularly check the screws and brackets for signs of loosening and tighten them as needed to preserve a level cooking surface. If you notice micro-cracks or hazing developing over time, consider replacing the glass sooner rather than later to avoid sudden failure during a high-heat bake. Keeping the area around the oven clear and dry reduces the risk of accidental impact or splash damage. With mindful upkeep, your replacement glass oven top will continue to perform reliably for many meals.
When to call a professional vs. DIY
DIY replacement is feasible for many standard ovens when you have the right model-specific replacement glass oven top and essential tools. If your oven is a high-end or commercial model, or if the top is glued into a rigid frame, professional service may be more prudent to avoid mistakes that could compromise safety. If you observe persistent cracking, an unusual fit, or difficulty aligning screw holes, contact the manufacturer or a qualified appliance technician. The Oven Cook Pro Team recommends weighing the complexity of the task against your comfort level and, when in doubt, choosing professional installation to preserve warranty coverage and ensure safe operation.
Tools & Materials
- Replacement glass oven top (OEM or compatible)(Ensure exact size, cutout, mounting pattern; tempered for oven use.)
- Safety glasses or goggles(Protect eyes from shards during removal and handling.)
- Heat-resistant gloves(Non-slip grip; suitable for handling hot surfaces near the oven.)
- Screwdrivers (Philips and flat-head)(For removing mounting screws and brackets; include sizes common to appliance hardware.)
- Putty knife or plastic scraper(Gently loosen any adhesive or gasket without scratching.)
- Measuring tape or ruler(Confirm outer dimensions and cut-out before ordering.)
- Non-abrasive cleaner and lint-free cloth(For cleaning surfaces before install.)
- High-temperature silicone sealant(Use only if the manufacturer specifies; follow cure times.)
- Masking tape or painter’s tape(Protect edges during handling and alignment.)
- Soft workspace mat(Provides a stable, cushioned surface to prevent slips.)
Steps
Estimated time: 60-90 minutes
- 1
Prepare workspace and safety gear
Power down the oven and unplug the unit. Allow the surface to cool completely. Don safety goggles, heat-resistant gloves, and work in a well-lit area. Clear a wide, stable space for the replacement top, and have a helper nearby if possible.
Tip: Keep all screws in labeled containers to avoid mix-ups. - 2
Remove the old glass top and hardware
Open the oven cavity and carefully detach any brackets or mounting screws. Support the glass with both hands and lift straight up to prevent edge damage. If you encounter resistance, check for hidden fasteners or clips and remove them gently.
Tip: Take photos of screw locations to replicate the layout on the new top. - 3
Inspect frame and gasket
Examine the frame for warping, corrosion, or gasket wear. Replace any damaged components before installing the new top. Ensure the opening is clean, dry, and free of debris that could affect the seal.
Tip: Note any differences in screw pitch or bracket shape that may affect fit. - 4
Dry-fit the replacement top
Place the new glass oven top into the opening without sealant to verify fit. Check that all holes align and the edge sits flush with the frame. If alignment is off, reassess the replacement part choice or contact the supplier.
Tip: Do not apply sealant yet; the dry-fit confirms geometry before bonding surfaces. - 5
Install and secure the top
Install the replacement glass oven top and gradually tighten screws or brackets in a cross pattern to avoid warping. Stop when the surface feels snug and evenly seated. If a gasket is required, install it per the manufacturer’s instructions.
Tip: Use even torque on all fasteners to prevent stressed glass. - 6
Seal if required and finalize
Apply high-temperature sealant only if specified by the manufacturer. Wipe away any excess sealant and allow it to cure as directed. Reconnect any trims and ensure the top remains level after reassembly.
Tip: Follow cure times precisely to achieve an airtight seal. - 7
Test, clean, and verify
Plug the oven back in and perform a short test cycle at a low setting to ensure proper function and no unusual noises. Clean the surface with a non-abrasive cleaner and inspect the edges for gaps or loose fittings. If anything seems off, turn off the oven and recheck the installation.
Tip: Let glass cool before touching; do not attempt cleaning while hot.
Questions & Answers
Is it safe to replace a glass oven top myself, or should I hire a professional?
DIY replacement is feasible for many standard ovens if you have the right model-specific top and proper tools. For complex frames or high-end units, professional installation may be wiser to preserve warranty and avoid damage.
DIY is possible for many models, but call a pro if you’re unsure.
How do I know the replacement top will fit my oven?
Match the oven’s model number, exact outer dimensions, cutout size, edge profile, and screw hole pattern. If in doubt, contact the manufacturer or supplier for a guaranteed fit.
Make sure the exact model and dimensions match.
What tools are essential for this repair?
Essential tools include safety gear, screwdrivers, measuring tools, and the replacement glass top. Cleaning supplies and sealant are optional based on manufacturer guidance.
Have safety gear, screwdrivers, and a measuring tool handy.
Is it safe to cook on a newly installed glass top right away?
Yes, after installation and any required sealing has cured, perform a brief test and then cook as usual. Avoid placing heavy items until you’re confident the top is seated correctly.
Yes, once it’s fully installed and cured.
What should I do if the replacement glass top arrives cracked?
Do not install a cracked pane. Contact the supplier for a replacement or return according to their policy. Document the damage with photos for faster processing.
Don’t install a cracked pane—get a replacement.
How long does the replacement process typically take?
Most DIY replacements take about one hour to ninety minutes, depending on model access and whether any sealant is required. Plan for a little extra time if you are learning the process.
Typically around 1 to 1.5 hours.
Watch Video
Main Points
- Verify fit and model compatibility before ordering.
- Handle glass carefully to prevent cracks during removal and installation.
- Follow manufacturer instructions for sealing and curing.
- Test performance and clean after installation for long-term maintenance.