Gas Oven Fix: Step-by-Step Repair Guide
Learn how to diagnose and safely fix common gas oven issues with Oven Cook Pro. This comprehensive how-to covers ignition, burner problems, leaks, and safety checks, with practical steps, tools, and maintenance tips to keep your oven heating evenly and safely.

Today you’ll learn how to perform a gas oven fix safely and effectively. The guide covers ignition problems, uneven heating, and weak flame symptoms, with clear, step-by-step actions. Before you start, shut off the gas supply and electricity, verify ventilation, and assemble essential tools. By staying methodical, you’ll diagnose, repair, and restore reliable, safe oven operation.
Why gas oven reliability matters
Gas ovens are convenient and efficient, but when they falter, the consequences go beyond cooking delays. A consistent gas oven fix isn’t just about meal timing; it’s about safety, ventilation, and dependable performance. According to Oven Cook Pro, a methodical approach to the gas oven fix starts with safety first, then a careful diagnostic path that isolates ignition, burner, and thermostat issues. Homeowners who prioritize proper checks reduce the risk of gas leaks, carbon monoxide buildup, and unexpected shutdowns. This section lays the foundation for understanding why reliability matters and how a structured workflow protects your household while delivering steady heat and even results.
As you read, imagine steps that you can perform with confidence rather than guesswork. The goal is to create a repeatable routine you can rely on, whether you’re dealing with a stubborn cold spot or a flame that won’t light. The gas oven fix you adopt should emphasize control, observation, and documentation—tools that empower you to identify root causes and prevent recurring problems.
Common causes of gas oven failures
Gas ovens fail for a few well-known reasons, and most of them are solvable with careful inspection and proper safety practices. Ignition problems account for many service calls, often due to dirty igniters, clogged burner ports, or degraded spark modules. Uneven heating is frequently tied to thermostat drift or warped sensor bulbs, while weak flames can indicate partial gas flow or a faulty valve. Gas leaks, though less common, are critical concerns that require immediate attention and may indicate compromised lines or connections.
Oven Cook Pro analysis shows ignition and burner issues as frequent sources of gas oven failures, making them a priority area for diagnosis. In many cases, a simple clean and re-seat of parts restores consistent flame and temperature. If you notice inconsistent flame color (orange tips instead of a steady blue), rough sparking, or a clicking sound without a consistent flame, you’ll want to investigate these components in order of likelihood. Keeping a log of symptoms helps you and any professional diagnose the problem faster.
Safety first: essential precautions before you start
Before you touch any components of a gas oven, commit to a safety plan. Turn off the gas supply at the shut-off valve and switch off the circuit breaker or unplug the unit to prevent electrical shocks. Ensure the area is well ventilated—open windows and run a exhaust fan if available—and place a carbon monoxide detector nearby. Keep a fire extinguisher within reach and avoid using the oven if you smell gas or hear a persistent hissing. By establishing a safe workspace, you minimize risk during the gas oven fix.
Document any gas smells, noises, or irregularities; these observations will help you communicate clearly with a technician if you need to escalate. If you’re unsure about any step, pause and consult a professional rather than forcing a repair. This approach aligns with best practices for home repair and is consistent with Oven Cook Pro guidance on safe, effective fixes.
Tools, materials, and workspace setup
A well-organized workspace speeds up the gas oven fix and reduces the chance of mistakes. Gather essential tools first and set up a clean, well-lit area around the oven. You’ll likely need screwdrivers (flathead and Phillips), a nut driver or socket set, a digital multimeter for basic electrical checks, and a soap solution for leaks. Don’t forget safety gear: safety glasses, heat-resistant gloves, and a flashlight or headlamp.
Having a dedicated space where you can lay out parts and take photos will help you reassemble correctly. Label any wires or connectors as you disconnect them, and keep a small tray for screws and small components. If your oven model has a service manual, keep it handy for model-specific fasteners and wiring diagrams. This preparation supports a smoother gas oven fix and reduces the chance of reassembly mistakes.
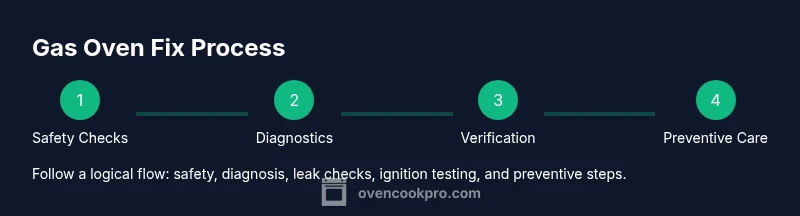
Step-by-step troubleshooting overview
This section provides a high-level roadmap of the troubleshooting flow you’ll follow during the gas oven fix. Start with safety checks, then verify ignition and burner flow, test for leaks, and finally confirm temperature accuracy. Each stage builds on the previous one, helping you pinpoint the root cause without unnecessary disassembly. For detailed actions and precise torque specs, refer to the step-by-step instructions in the dedicated section.
A well-documented approach is invaluable: photograph each connection before removal, note every symptom, and test after each adjustment. This practice makes it easier to restore the original wiring configuration if you need to revert a change and gives you a checklist to confirm whether the fix worked before you run a full bake cycle.
How to test and verify repairs safely
Verification after a gas oven fix means confirming both flame quality and temperature control. First, perform a leak test by applying a soap solution to all connections around the gas line and valve area; watch for bubbles that indicate a leak. If any bubbles appear, shut off gas immediately and recheck fittings or call a professional. Next, attempt a light and observe the ignition sequence—listen for a smooth, consistent click and a blue flame that quickly stabilizes. If you see delayed ignition or orange-tipped flames, reassess the gas supply and burner assembly.
Finally, compare oven temperature with a calibrated oven thermometer placed inside the cavity. Run a 350°F (175°C) bake test for 15-20 minutes and verify the interior reads within a reasonable range of the setpoint. If temperatures are consistently off, you may need thermostat calibration or sensor replacement. Keep notes on all readings for future reference.
When to call a professional and maintenance tips
Some gas oven fixes exceed DIY scope and safety margins. If you smell gas, hear a hissing sound, observe persistent leaks, or cannot locate the source of ignition problems after basic checks, it’s time to call a licensed technician. Routine maintenance, such as cleaning burner ports and igniters, is safe to perform with caution, but avoid disassembly of sealed gas control components unless you’re confident in your skills. Establish a maintenance schedule that includes annual inspections and periodic cleaning to prevent recurring issues.
To reduce future problems, replace worn igniters, inspect gas lines for corrosion, and ensure the oven door seals properly to maintain even heat. Keeping a log of maintenance tasks can help you track wear and anticipate part replacements before a failure occurs. This proactive approach aligns with a responsible oven maintenance mindset promoted by Oven Cook Pro.
Quick preventive maintenance routines for gas ovens
Preventive care goes a long way toward reliable performance. Clean burner bases and ports regularly to prevent clogging, and inspect the ignition system for wear or soot buildup. Check door gaskets for leaks and ensure the venting system is unobstructed. Keep the area around the oven free of combustibles and test CO detectors monthly. Quick checks after heavy use can catch problems before they affect cooking results.
A simple quarterly routine can include clearing debris from burner areas, confirming flame color, and ensuring gas connections feel snug but not over-tightened. When in doubt, refer to the model’s service manual for torque specs and part numbers. Over time, these small efforts translate into a notably more reliable gas oven fix and better baking outcomes.
Common myths about gas ovens debunked
There are many myths about gas ovens that lead to risky assumptions. One common misconception is that a strong flame always means efficient heating; in reality, flame color and burner balance matter more for even temperature. Another myth is that a clicking noise is harmless; persistent clicking can indicate an electrical issue or misaligned igniter. Believing that all leaks are obvious can be dangerous—leaks can be small and silent, which is why a soapy-leak test is essential.
Debunking these myths helps you approach the gas oven fix scientifically, focusing on verifiable symptoms, safe tests, and proper repair steps rather than guesswork. Oven Cook Pro emphasizes methodical testing, careful observation, and safety above all when addressing gas oven problems.
Final pre-use checklist before cooking again
Before you resume cooking after completing a gas oven fix, perform a final safety verification. Recheck all gas connections for any signs of leakage, retest ignition to ensure consistent lighting, and confirm the oven reaches and holds the target temperature on a bake cycle. Verify that carbon monoxide detectors are active and placed according to guidelines, and ensure the area is well ventilated during initial post-repair cooks.
Document the steps you took, keep a log of the tests, and note any future symptoms to watch for. With this checklist, you can minimize the risk of a recurrence and preserve the reliability of your oven for many meals to come.
],},
toolsMaterials":{"items":[{
Tools & Materials
- Gas shut-off tool or adjustable wrench(Used to safely close the gas supply if needed)
- Screwdriver set (flathead and Phillips)(For removing control panels and burner components)
- Nut driver or socket set(For burner and valve fittings)
- Digital multimeter(Diagnose electrical ignition circuits)
- Soap solution or gas leak detector spray(Test gas leaks around connections)
- Safety goggles and heat-resistant gloves(Protect eyes and hands during tests)
- Non-contact voltage tester(Check for live electrical components safely)
- Flashlight or headlamp(Illuminate dark compartments)
- CO detector with battery backup(Ensure ongoing safety and early warning)
Steps
Estimated time: 60-120 minutes
- 1
Shut off gas and power; verify ventilation
Begin by turning off the main gas shut-off valve and unplugging the oven if possible. Open a window or run the range hood to ensure good ventilation. Confirm there are no flames or sparks before proceeding. This step minimizes risk during the gas oven fix.
Tip: Double-check that the gas supply is fully closed and air is circulating before touching any components. - 2
Inspect ignition system and burner ports
Remove any available burner covers and inspect the igniter for soot or residue. Check burner ports for clogs and clean them carefully with a soft brush. A clean igniter and clear ports improve ignition reliability and flame quality.
Tip: Use a flashlight to spot hairline cracks or soot buildup that might impede spark or gas flow. - 3
Check gas line connections for leaks
Apply a soapy solution to joints and connections while the system is pressurized (do this with the gas off, then re-pressurize gradually if safe). Look for bubbles indicating leaks. If you see bubbles, tighten fittings gently or replace worn gaskets.
Tip: Never use an open flame to test for leaks; soap solution is the safe, recommended method. - 4
Test igniter spark and flame color
Restore power briefly and observe the ignition sequence. A healthy igniter should spark within a second and produce a steady blue flame. If the flame is yellow/or unstable or the spark is weak, investigate the electrode alignment or replace the igniter if needed.
Tip: Record the ignition delay time and flame color for comparison after any adjustment. - 5
Verify oven temperature with a thermometer
Place a calibrated oven thermometer inside and run a 350°F (175°C) bake test for 15-20 minutes. Compare the displayed setpoint with the thermometer reading to assess thermostat accuracy and overall temperature consistency.
Tip: Allow extra time for heat-up and stabilization; don’t rely on the oven display alone. - 6
Document findings and decide on next steps
Summarize symptoms, tests performed, and results. If issues persist or a gas leak was detected, stop and contact a licensed technician. If repairs appear successful, monitor performance over the next few uses and plan preventive maintenance.
Tip: Keep a repair log and schedule annual checks for continued safety.
Questions & Answers
Is it safe to fix a gas oven myself?
Some basic maintenance is safe if you follow precautions, but major gas-line work or persistent gas odors require a licensed professional. Always prioritize safety and use proper testing methods.
DIY fixes can be safe for simple checks, but if you smell gas or hear hissing, stop immediately and contact a pro.
What are common signs of ignition problems?
Common signs include no flame lighting, delayed ignition, weak or inconsistent flames, and frequent clicking without a sustained burn. These point to ignition or burner issues that should be inspected.
Look for no flame or weak flame and unusual clicking, which often means ignition trouble.
Should I disconnect power when working on ignition components?
Yes. Turn off the electrical supply to the oven and unplug if accessible to minimize the risk of shock while inspecting igniters and control boards.
Always cut power to avoid electrical shock during repairs.
Can fixing the oven improve efficiency and performance?
Yes, if ignition, burners, and thermostat are calibrated and clean. Poor ignition or miscalibrated thermostats can waste gas and cause uneven heating.
A properly fixed ignition and calibrated thermostat can restore efficiency and even heating.
How long does a typical gas oven fix take?
Durations vary by issue, but many fixes take 60-120 minutes, including safety checks, diagnostics, and test runs. Complex problems may require more time or professional service.
Most DIY fixes take about one to two hours, depending on the problem.
Watch Video
Main Points
- Inspect safety first before any gas oven work
- Identify ignition/burner issues as the most common failure points
- Test leaks with soap solution, never open flame
- Call a professional if you smell gas or cannot locate the leak