Repair Oven: Step-by-Step Guide to Fix Common Faults
Learn to diagnose and repair common oven faults with a safe, step-by-step approach. Tools, testing, maintenance, and guidance on when to call a professional. From Oven Cook Pro.

In this guide, you’ll learn how to diagnose and repair common oven faults safely, extend the appliance’s life, and know when to replace components. You’ll review essential tools, stepwise diagnostics, safe testing methods, and maintenance tips so you can repair oven issues confidently at home. According to Oven Cook Pro, following a structured plan reduces risk and waste.
What causes oven faults and how to recognize them
Ovens fail for several reasons: worn heating elements, thermostat drift, blown fuses, faulty wiring, or a damaged door seal. Recognizing symptoms early can save money and prevent safety risks. Common signs include uneven heating, the oven not reaching temperature, abnormal clicking, or a persistent smell of burning. The Oven Cook Pro team notes that many faults stem from simple wear-and-tear rather than a single catastrophic failure. If you notice you're consistently off by more than 15-20 degrees of setpoint, start a controlled diagnosis: verify the thermostat reading with a calibrated oven thermometer, compare it against the dial, and observe whether both bake and broil functions behave similarly. The goal is to isolate whether the issue is heat generation, temperature sensing, or control electronics. According to Oven Cook Pro, performing a careful, methodical check minimizes the risk of unnecessary part replacements and reduces waste.
Safety first: essential precautions before you begin
Before you touch any wiring or components, power safety is non-negotiable. Unplug the unit at the wall outlet or switch off the circuit breaker dedicated to the oven. If you have a gas oven, shut off the gas supply as an extra precaution and ventilate the area. Never work on live circuits; residual charge can remain in power electronics. Wear safety gloves and eye protection, keep a fire extinguisher nearby, and keep children and pets away. Have a battery-operated flashlight to inspect inside without leaning over hot coils. This approach aligns with best practices from Oven Cook Pro Team and reduces the chance of shocks or burns.
Tools, parts, and testing gear you’ll need
- Electrical multimeter: For continuity and resistance checks
- Oven thermometer: Calibrated, to measure actual temperature
- Screwdrivers (Phillips and flat-head) set: To remove panels safely
- Replacement parts (heating element, thermostat sensor, or fuse): Optional, only if diagnosed faults call for replacement
- Safety gloves: Essential for handling hot components
- Owner’s manual and model number: Helps you get exact part specs
- Wire cutters/needlenose pliers: Optional, for connectors and wiring
Having these on hand reduces downtime and keeps you within a safe DIY window.
Diagnostic workflow: identify the real issue
Start with a quick functional check: does the oven display respond to controls, and do error codes appear? Use an oven thermometer to verify actual temperatures at multiple setpoints. Test heating element continuity with a multimeter; an open circuit or very high resistance indicates a faulty element that needs replacement. If the element tests fine but the temperature is consistently off, the sensor or thermostat may be drifting. If both bake and broil modes fail to heat properly, suspect the control board or wiring harness. Document your observations and proceed with a targeted fix rather than a full teardown to avoid unnecessary parts replacement.
Common fixes and when to replace components
For most home repairs, replacing a faulty heating element or temperature sensor is the most common fix. A worn gasket or door seal can cause heat loss and uneven baking; replacing the seal often yields quick improvements. A blown thermal fuse or damaged wiring harness also stops heat delivery and may require professional help. If multiple major components fail within a short period, consider whether the oven’s age justifies replacement. The goal is to restore accurate temperature control and reliable operation without introducing new safety risks.
Testing after repair: verifying temps and function
Reassemble any panels and restore power. Calibrate the thermostat by testing several temperatures with your oven thermometer (e.g., 350°F, 400°F, and 450°F) and compare actual temps to the setpoints. Watch for consistent performance across bake and broil modes. If temps drift again, re-check connections and sensor placement. Perform a modest bake (like cookies) to confirm even heat distribution and door seal integrity. Proper testing helps confirm the repair actually fixed the fault and that the oven remains safe to use.
Maintenance to prevent future failures
Keep the interior clean and free of baked-on residue that can affect sensor readings. Inspect the door gasket for wear and replace it if you notice gaps or tears. Periodically clean burner arcs, vents, and back panels to prevent dust accumulation. Preheat as needed to avoid thermal shocks, and always run a quick temperature check after a repair. Routine checks extend oven life and reduce the likelihood of recurring faults.
When to call a professional: signs it’s beyond DIY
If you smell gas, hear unusual buzzing, see smoke, or your oven shows persistent error codes after basic troubleshooting, stop and call a licensed technician. Gas ovens require specialized gas-line knowledge, and high-voltage components can pose serious risk. If you’re unsure about the wiring harness or control board, it’s safer to seek expert help. The Oven Cook Pro team emphasizes safety-first, especially when reliability or safety is in question.
Tools & Materials
- Electrical multimeter(For continuity and resistance checks)
- Oven thermometer(Calibrated, accuracy within ±5°F recommended)
- Screwdrivers set (Phillips and flat-head)(Phillips #2 for most oven panels)
- Replacement parts (heating element, thermostat sensor, fuse)(Only if diagnosed fault indicates replacement)
- Safety gloves(Heat-resistant and snug-fitting)
- Owner’s manual and model number(Helps identify exact part specs)
- Needle-nose pliers(Useful for connectors)
- Non-conductive lubricant or contact cleaner(For safe contact cleaning if indicated by fault)
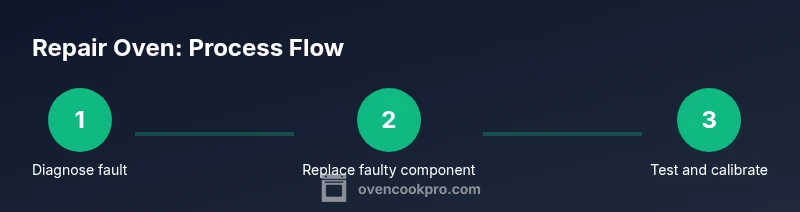
Steps
Estimated time: 60-90 minutes
- 1
Power down and disconnect power
Switch off the oven at the wall and unplug the power cord, or flip the circuit breaker feeding the oven. Wait 60 seconds to discharge residual energy in control boards. Verify power is off with a non-contact tester before touching any components.
Tip: Label wires before disassembly and keep screws in a labeled container. - 2
Access internal components safely
Remove visible access panels to reach heating elements, sensors, and wiring harnesses. Photograph each connection before removal to aid reassembly. Do not force panels; use the correct screwdriver size to avoid stripping screws.
Tip: Work on a clean, non-slip surface; keep track of small parts. - 3
Test heating element continuity
Set the multimeter to resistance or continuity mode and test the element leads for proper continuity. An open circuit or very high resistance indicates a faulty element needing replacement. If continuity is good but the oven still misbehaves, test the thermostat sensor next.
Tip: Document resistance readings and compare against typical spec values from the manual. - 4
Replace faulty component
Install the exact replacement part for your model, ensuring correct orientation and secure mounting. Recheck all connections for tightness and no loose wires. If you replaced multiple components, double-check compatibility.
Tip: Only use manufacturer-approved parts when possible to maintain safety and performance. - 5
Reassemble and calibrate controls
Reinstall panels, restore power, and reset any control settings. If your oven has a programmable thermostat, recalibrate per the manual. Confirm wiring is correct and nothing is grounding.
Tip: Keep a simple diagram of wiring for future reference. - 6
Run a test bake and verify results
Bake a test batch at a moderate temperature (e.g., 350°F) and verify with an oven thermometer that the actual temperature matches the setpoint. Check multiple temperatures to ensure sensor accuracy. If temps drift, revisit sensor placement and calibration.
Tip: Allow the oven to stabilize for 10–15 minutes before taking readings.
Questions & Answers
Can I repair an oven myself?
DIY repair is possible for simple faults like a faulty bake element or door seal, but avoid gas lines or high-voltage components. Always disconnect power first and consult the manual.
Yes, you can try simple fixes, but do not work on gas lines or high-voltage parts. Make sure the power is off and follow the manual.
What are warning signs that require a pro?
If you smell gas, see smoke, hear buzzing, or if the oven won’t heat to any temperature after basic checks, call a licensed technician. Gas-related issues require professional service.
Gas smell or smoke means stop and call a pro.
Should I replace the oven instead of repairing?
Repair is often cost-effective for a single fault; replacement may be warranted if several major components fail or the appliance is old. Consider long-term reliability and cost.
Repair is usually cheaper upfront, but replacement can be better long-term if multiple parts fail.
Do I need to recalibrate after a repair?
Yes. Recalibrating ensures the oven’s temperature matches the setpoint. Test several temps with a thermometer to confirm accuracy.
Yes, recalibrate and re-check temps at a few points.
Is it safe to use the self-clean cycle after a repair?
Only if the repair doesn’t involve the door seal or control board. Self-clean can reveal hidden faults, so use caution and follow the manual.
Only run self-clean if advised after the repair; otherwise skip.
What basic safety steps should I follow?
Always unplug, ventilate the area, and wear protective gear. If you’re unsure about any step, pause and consult a professional.
Unplug, ventilate, and wear protection; contact a pro if unsure.
Watch Video
Main Points
- Unplug before touching wiring to ensure safety
- Test temps with a calibrated thermometer for accuracy
- Replace only the exact matching parts if faults are confirmed
- Document steps and wiring to simplify future repairs
- Call a pro for gas ovens or if hazardous signs appear