Common Problems with Microwave Ovens: Troubleshooting
Urgent, step-by-step troubleshooting for common problems with microwave ovens. Learn safe checks, quick fixes, and when to call a pro from Oven Cook Pro.

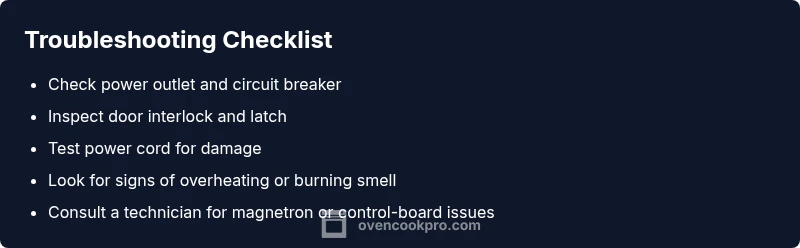
Power and door issues top the list. Start by verifying the outlet and circuit breaker, then inspect the door interlock and seal. Unplug the microwave for 60 seconds to reset, then plug back in. If it still won’t start or heat, the problem may involve the magnetron or control board, requiring professional service.
Common Causes of Microwave Problems
According to Oven Cook Pro, most common problems with microwave ovens fall into a handful of categories: power supply issues, door interlocks, worn seals, and failing high-voltage components. This section breaks down each category, signs to watch for, and the practical checks you can perform safely in a typical kitchen. By recognizing the root cause, you can decide whether a quick reset will fix the issue or if a professional service is required. The Oven Cook Pro analysis shows that many malfunctions arise from simple issues such as a blown fuse or a tripped outlet.
-
Power supply and outlets: If the microwave will not start, the first suspect is the outlet or circuit. Try plugging the unit into a known-good outlet or another device on the same circuit. Check your home's GFCI and ensure the circuit breaker hasn’t tripped. Even a short-term outage or a loose plug can prevent the oven from powering up. If the outlet is fine but the unit still won't respond, the problem may be inside the cord or the power relay on the control board.
-
Door interlock and latch: A microwave often won’t run if the door interlock switch is worn or misaligned. You might notice the light stays on, or the oven hums without heat. Inspect the door seal for damage and try closing firmly. If the switch is intermittent, it may require replacement by a technician.
-
High-voltage components: The magnetron, high-voltage diode, and capacitor are critical for heating. Signs of failure include no heating despite normal operation, buzzing noises, or a strong burnt smell. Do not attempt to service these parts yourself; they carry dangerous voltages and usually require professional service.
-
Control board and keypad: A faulty control panel can produce random settings, fail to respond, or display error codes. Check for obvious moisture or corrosion on connectors, reseat loose cables, and perform a soft reset if the model supports it. If errors persist, the board likely needs replacement.
Safety and Immediate Fixes You Can Try Now
In any microwave troubleshooting, safety comes first. Before you poke around, unplug the unit and let any stored energy dissipate. Do not operate the microwave with a damaged cord, a bent plug, or a damaged door seal.
-
Quick power reset: Unplug the microwave, wait 60 seconds, then plug it back in. This can clear minor software glitches on many modern models.
-
Inspect the exterior and cord: Look for kinks or frayed insulation. If you see damage, stop using the oven and schedule service. Use the appliance's built-in reset or lock features if available after reconnecting power.
-
Check the door: Ensure the door closes securely and the latch engages fully. If the door is misaligned or the latch is sticking, the safety interlock may prevent operation.
-
Observe for signs of overheating: If you notice heat buildup, a burning smell, or unusual smoke, turn off power immediately and unplug. Do not attempt to use the oven again until it’s serviced.
-
What to do next: If the unit still won't start or heats inconsistently after these checks, move to the structured diagnostic flow below or contact a trained technician. For safety, avoid opening the cabinet to inspect internal parts yourself.
Electrical and Outlet Troubleshooting
Power delivery is the backbone of any microwave. If the appliance refuses to start or behaves erratically, begin with the electrical supply before delving into components.
-
Outlet test: Use a simple appliance such as a lamp to confirm the outlet provides steady power. If the lamp flickers, the outlet or circuit has an issue.
-
Circuit load: Ensure the microwave is not running on a shared circuit with high-draw devices (e.g., toaster, coffee maker). High load can cause voltage dips that interrupt operation.
-
Power cord and plug: Inspect for visible damage. A damaged cord should be replaced by a certified technician. Do not attempt to repair internal insulation.
-
Reset and calibrate: Some microwaves offer a user-level reset or a micro-adjustment setting. Follow the user manual to restore defaults; this can resolve misconfigurations that prevent heating.
-
Safety note: If your home uses older wiring or you notice tripped breakers frequently, consult a licensed electrician to evaluate the electrical system before continuing.
The Door, Latches, and Interlocks
Door interlock switches are a common failure point. A faulty latch prevents the microwave from starting even when power is present, or causes it to start and stop randomly.
-
Visual check: Inspect the door seal for warping, cracks, or debris. Clean any residue and ensure the gasket sits evenly.
-
Interlock function test: With the oven unplugged, test the door latch by gently pressing the latch while attempting to close the door. If the latch feels loose or does not engage, replacement is likely needed.
-
When to replace: If the door interlock or switch shows signs of wear, consult a service professional. Replacing interlocks typically requires disassembly but is routinely done by trained technicians.
-
Safety reminder: Do not bypass interlocks. Bypassing safety features can cause electric shock or arcing.
Magnetron and High-Voltage Components
If the microwave runs but does not heat, or you hear buzzing or burning smells, the magnetron or associated high-voltage parts may be failing.
-
Symptoms: No heat, buzzing, arcing, or a strong burnt odor suggests a bad magnetron or HV diode.
-
Caution: These parts store lethal voltages even when unplugged. Do not attempt to test or replace them unless you are qualified. Consult a professional.
-
Professional service: A trained technician can safely test the magnetron with specialized equipment and replace it if required. Expect a non-trivial cost, but it restores proper heating.
-
Replacement timing: If the unit is older or the magnetron shows signs of wear, replacement is often more economical than repeated repairs.
Control Panels, Displays, and User Interface
A vague or unresponsive keypad is common and easy to diagnose.
-
Visual inspection: Look for moisture around the control board area or inside the keypad. Moisture can cause erratic behavior.
-
Dashboard resets: If your model supports a master reset, perform it following the manual. Some models require a specific sequence.
-
Connector checks: With power off, reseat loose ribbon cables between the control board and keypad. Corrosion or dust can cause intermittent failures.
-
Codes and diagnostics: Note any error codes and consult the manual or the brand website. Some codes indicate specific failures, guiding you toward a repair.
Maintenance, Cleaning, and Prevention
Preventing problems is easier than repairing them. Regular cleaning and mindful use extend the life of microwave ovens.
-
Cleaning routine: Wipe the interior after spills; avoid using abrasive cleaners that can damage enamel. Clean the exterior and vents monthly to prevent heat buildup.
-
Ventilation: Keep the vents clear of dust and lint. A clogged vent can overheat the magnetron and shorten its life.
-
Use and load guidelines: Avoid heating metal objects, standing time, or sealed containers; use microwave-safe dishes and cover loosely to prevent splatter while allowing steam to escape.
-
Interior wear: Pay attention to unusual odors, smoke, or excessive noise, which may signal component wear. If you detect persistent odors or changes in performance, schedule service.
-
Brand note: The Oven Cook Pro team recommends maintaining the oven with routine checks to reduce the likelihood of future failures by addressing small issues before they escalate.
Steps
Estimated time: 25-40 minutes
- 1
Verify power supply
Unplug the microwave, inspect the plug and outlet for damage, then plug into a known-good outlet. If the outlet is controlled by a GFCI, reset it and re-test.
Tip: Use a lamp or another simple device to confirm outlet stability. - 2
Reset and test
Plug the unit back in and perform a 60-second reset by unplugging again if necessary. Power-cycle can clear minor software glitches that prevent operation.
Tip: Avoid touching internal components during reset. - 3
Check door interlock
Ensure the door closes firmly; inspect the seal for damage and verify the latch engages completely when closed.
Tip: If the latch feels loose, avoid using the microwave until repaired. - 4
Inspect the fuse and wiring
If you’re comfortable, examine visible fuses and wiring for signs of damage. Do not attempt internal testing without training.
Tip: Damaged wiring should be handled by a professional. - 5
Evaluate heating path
If heating is inconsistent, the magnetron or high-voltage components may be at fault. Schedule professional evaluation.
Tip: Do not disassemble high-voltage parts. - 6
Control panel check
With the unit powered off, reseat connectors between the control board and keypad. Look for corrosion or moisture and dry if present.
Tip: If codes appear, consult the manual or Oven Cook Pro resources.
Diagnosis: Microwave won’t heat or start
Possible Causes
- highPower issue or outlet problem
- highDoor interlock fault
- mediumBlown fuse or thermal fuse
- lowMagnetron failure
- lowControl board failure
Fixes
- easyCheck outlet with a known-good device and reset the circuit breaker
- mediumInspect door interlock and latch; replace if damaged
- easyReplace blown fuse or thermal fuse if accessible to a qualified technician
- hardHave magnetron tested and replaced by a professional if heating is absent
- mediumTest control board connections and reseat cables; replace board if errors persist
Questions & Answers
What are the most common problems with microwave ovens?
Most issues come from power supply, door interlocks, or high-voltage component failures. Regular checks and safe resets solve many everyday malfunctions.
Common problems include power issues, door interlocks, or high-voltage failures. Start with power and door checks, then reset.
Why won’t my microwave start?
Check the outlet, circuit breaker, and door interlock first. Damaged cords or blown fuses can also prevent startup.
If it won’t start, check power and door interlock first, then inspect the cord and fuse.
Why isn’t my microwave heating even though it runs?
A non-heating unit may have magnetron or HV component failure, or a faulty interlock that prevents heating. A professional should diagnose.
If it runs but doesn’t heat, it could be magnetron or HV component failure; a pro should diagnose.
How do I reset the microwave’s control panel?
Some models offer factory reset or specific button sequences. Refer to the manual or perform a center-reset as described in the manual.
Try unplugging for 60 seconds to reset the control board, then plug back in.
When should I call a technician?
Call a technician if you smell burning, hear buzzing, or suspect high-voltage parts. Magnetron or control-board failures require professional service.
If you smell burning or hear buzzing, or suspect high-voltage parts, call a technician.
Are DIY fixes safe for microwaves?
Some basic checks are safe, but never open high-voltage components. If unsure, defer to a professional to avoid shock or fire hazards.
Don’t open high-voltage parts; safer to call a pro if you’re unsure.
Watch Video
Main Points
- Power and door checks first
- Do not ignore burnt smells or buzzing
- Avoid DIY on high-voltage parts
- Regular maintenance prevents future failures