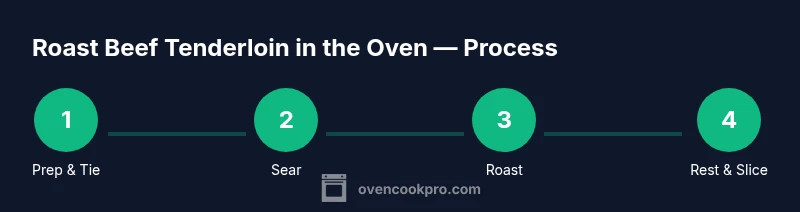
Roast Beef Tenderloin in the Oven: A Step-by-Step Guide
Learn how to roast beef tenderloin in the oven to perfection with expert tips on prep, searing, timing, resting, and carving for juicy, evenly cooked slices.

According to Oven Cook Pro, a successful roast starts with a trimmed, tied tenderloin, a hot initial sear, and precise finish temps. This guide provides a complete, step-by-step method for juicy, evenly cooked slices, including preheat, sear, roast, rest, carve, and service. You'll also find timing ranges, thermometer guidance, and practical storage tips.
Why roast beef tenderloin in the oven makes a centerpiece
A properly roasted beef tenderloin is a testament to technique and patience. The oven's steady heat allows for even browning and a uniform degree of doneness from end to end, which is essential for a cut that can be lean and prone to drying if mismanaged. By planning ahead—choosing a well-trimmed tenderloin, tying it for uniform thickness, and timing your finish with a thermometer—you can create a dramatic, crowd-pleasing centerpiece. According to Oven Cook Pro, achieving a rosy interior with a caramelized crust hinges on starting with a dry surface, a brief sear to set flavor, and letting the meat rest before slicing. This section will set the stage for reliable success, whether you’re cooking for a weeknight dinner or a holiday feast.
Choosing the right tenderloin: size, trim, and quality
Selecting the right tenderloin is foundational. Look for a piece with a consistent thickness and a modest fat cap. A typical roast runs between 2 to 4 pounds, which translates to about 6 to 8 servings, depending on slice thickness. If the fat cap is uneven or thick, trim carefully to leave a uniform layer that can baste the meat during cooking. Quality matters more as you go closer to prime cuts, but you don’t need ultra-premium beef to achieve excellent results; a well-marbled, responsibly raised tenderloin will yield tenderness and flavor without overpowering the palate. Plan on patting the surface dry—moisture on the surface will steam rather than sear, reducing color and crust formation.
Preparing the meat: pat dry, tie, season
Proper preparation begins with surface dryness. Pat the tenderloin dry with paper towels before tying it at regular intervals with kitchen twine to maintain even thickness. Season generously with coarse salt and freshly ground pepper, applying salt at least 30 minutes ahead if possible, so the surface can start dissolving and penetrating the meat. Fresh herbs like rosemary and thyme, plus a light coating of olive oil or another high smoke-point oil, will help form a flavorful crust. If you have time, a quick overnight rest after seasoning can intensify flavor, as salt draws moisture to the surface where it evaporates, concentrating the beef’s natural flavors.
Searing: flavor lock and color
Searing is optional but highly recommended for depth of flavor and crust formation. Heat a heavy, oven-safe skillet over medium-high heat and brush with a thin coat of oil. Sear the tenderloin on all sides until a deep brown crust forms, about 2–3 minutes per side. This step creates a barrier that helps retain juices during roasting and adds a rich, caramelized flavor profile. If you prefer to skip pan searing, you can roast at a high temperature directly, but the crust may be lighter and the roast different in character. Either way, monitor the surface color to avoid charring.
Roasting method: temperatures, timings, and doneness targets
Preheat your oven to a high starting temperature, commonly 425°F (220°C), to promote rapid browning, followed by a reduced temperature phase if your plan calls for it. Roast until the internal temperature at the thickest part reaches your target: about 120–125°F (49–52°C) for rare, 125–130°F (52–54°C) for medium-rare, or 135–140°F (57–60°C) for medium. This process typically takes roughly 12–18 minutes per pound after searing, but the most reliable method is to monitor with an instant-read thermometer. Remember, carryover cooking will raise the final temperature by about 5–10°F as the roast rests, so plan accordingly. Always rest the meat before carving to allow juices to redistribute.
Resting and carving: timing and technique
Rest is where the magic happens. After removing the roast from the oven, tent it loosely with foil and let it rest for 10–15 minutes. During this window, juices reabsorb into the meat, resulting in juicier slices and a more uniform pink throughout. Carve against the grain in thin, even slices to maximize tenderness. If you want a precise presentation, trim any obvious connective tissue before slicing and fan the pieces onto a warm platter. A final light seasoning of flaky salt right before serving can elevate flavors without overpowering them.
Sauces and side pairing: simple, complementary flavors
A classic red wine reduction or a simple pan sauce made from the roasting juices complements beef tenderloin beautifully. To keep the dish balanced, choose sides that won’t compete with the meat’s richness: roasted garlic potatoes, green beans almondine, or a bright arugula salad. Keep side dishes warm but not steaming hot to prevent moisture from pooling on the plate. If you’re feeding a crowd, consider a light horseradish cream or mustard-dill sauce that echoes the meat’s mineral notes without overwhelming the palate.
Troubleshooting common issues and how to fix them
Dry meat usually results from overcooking or insufficient resting. If the crust browns too quickly while the interior remains underdone, reduce oven temperature by 25°F and move the roast to a cooler part of the rack, or tent loosely with foil to prevent further browning. Uneven cooking can occur with irregular tenderloin shapes; tying helps, but you can also rotate the pan halfway through roasting to promote even exposure to heat. If you notice a pale crust, it may indicate surface moisture; ensure surface dryness before roasting next time. Remember that using a reliable thermometer is the best tool to prevent guesswork.
Make-ahead and leftovers: planning and storage
Leftovers can be repurposed into sandwiches, salads, or a steak-and-eggs breakfast. Store sliced roast in an airtight container in the refrigerator for up to four days, or freeze portions for longer-term use. Reheat gently in a low oven (around 325°F / 165°C) or in a skillet with a small splash of broth or wine to retain moisture and flavor. If you’re planning ahead, consider dry-brining the meat a day or two before cooking to deepen flavor without introducing moisture that could hinder searing.
Tools & Materials
- Beef tenderloin roast (trimmed, 2-4 lb)(Even thickness is key for even cooking)
- Salt and freshly ground pepper(Coarse salt preferred; season generously)
- Olive oil (or high-smoke-point oil)(Light coating for surface slickness)
- Fresh garlic and herbs (rosemary, thyme)(Optional aromatics)
- Kitchen twine(To tie tenderloin at even thickness)
- Heavy oven-safe skillet or roasting pan with rack(For searing and roasting)
- Instant-read meat thermometer(Target 120-130°F depending on doneness)
- Butter (optional)(Finishing baste if desired)
- Aluminum foil(Tent during resting)
- Carving knife and cutting board(Sharp blade, thin slices)
Steps
Estimated time: 60-90 minutes
- 1
Gather and prep the meat
Remove the tenderloin from its packaging and pat dry thoroughly with paper towels. If there is excess silver skin, trim it away. Place the meat on a clean surface and prepare twine for tying, herbs, and oil for coating.
Tip: Evenness starts with surface dryness; moisture hinders crust formation. - 2
Tie for uniform thickness
Tie the tenderloin at intervals with kitchen twine to maintain uniform thickness, which ensures consistent cooking from end to end. Do not wrap too tightly; the meat should still breathe. If you’re using a fat cap, trim excess while leaving a thin layer to baste flavor.
Tip: Aim for uniform cross-section to avoid undercooked ends. - 3
Preheat and season
Preheat the oven to 425°F (220°C). Pat dry again if needed, then brush lightly with oil and season generously with salt and pepper. Add optional minced garlic and chopped herbs for aroma.
Tip: Salt ahead helps flavor penetration; a short rest after seasoning enhances outcome. - 4
Sear the meat
Heat a heavy skillet over high heat and sear the tenderloin on all sides until a deep brown crust forms, about 2–3 minutes per side. This step builds flavor and helps crust retention during roasting.
Tip: Do not overcrowd the pan; work in batches if needed to maintain high heat. - 5
Roast to target doneness
Transfer from the skillet to a rack-lined roasting pan if you seared on the stove. Roast in the hot oven, checking the internal temperature with a thermometer about every 5 minutes after the first 15 minutes. Target 120–125°F for rare, 125–130°F for medium-rare, and 135–140°F for medium.
Tip: Remember carryover cooking; plan to pull roast a few degrees early. - 6
Rest the meat
Remove the roast from heat and tent loosely with foil. Let rest 10–15 minutes. Juices redistribute, improving slice tenderness and juiciness.
Tip: Rest longer for thicker roasts; avoid slicing hot to prevent juice loss. - 7
Carve and serve
Slice thinly against the grain for maximum tenderness. Arrange on a warmed platter and season with a pinch more salt if needed. Offer a simple pan sauce or jus on the side.
Tip: Always cut across the muscle fibers for tenderness.
Questions & Answers
What temperature should I roast beef tenderloin in the oven?
Roast at 425°F (220°C) to promote browning, then reduce space heat if needed and monitor with a thermometer to reach your target doneness.
Roast at four-twenty-five, then keep an eye on the thermometer to reach your preferred doneness.
Is searing the tenderloin necessary?
Searing adds flavor and color, but you can skip it if you prefer a simpler method. If you skip searing, start with a higher initial surface browning in the oven.
Searing is optional but highly recommended for flavor; you can skip it if you want fewer steps.
How long should the roast rest after cooking?
Rest the roast for 10-15 minutes to let juices redistribute, ensuring a juicier, evenly sliced final product.
Rest for 10 to 15 minutes before slicing for best juiciness.
What are the doneness targets in internal temperature?
Rare: 120-125°F, Medium-rare: 125-130°F, Medium: 135-140°F. Remember carryover increases final temp by a few degrees.
Rare around 120 to 125, medium-rare 125 to 130, medium 135 to 140, with a bit of carryover.
Can I cook from frozen?
Cooking from frozen is not ideal; it leads to uneven doneness. Thaw in the refrigerator overnight for best results.
Better to thaw first for even cooking and predictable timing.
How should I store leftovers?
Store sliced leftovers in an airtight container in the refrigerator for up to four days, or freeze for longer storage. Reheat gently to avoid drying.
Refrigerate sliced leftovers for up to four days; reheat gently to preserve moisture.
Watch Video
Main Points
- Season generously and rest before slicing.
- Use a thermometer to hit precise doneness.
- Sear for color and flavor, then finish in the oven.
- Slice against the grain for tenderness.
- Plan for 60-90 minutes total for most roasts.