Oven Pot Roast Recipe: Tender, Slow-Cooked Comfort
Learn to craft a fall‑apart oven pot roast with seared beef, vegetables, and rich gravy. This step-by-step guide covers cuts, temps, braising, and make-ahead tips for reliable weeknight dinners.

Learn how to make a fall‑apart oven pot roast with searing, braising, and a simple gravy. This guide covers cuts, temps, timing, and make-ahead options. See our full step-by-step guide for details.
What makes an oven pot roast a reliable weeknight centerpiece
According to Oven Cook Pro, a reliable oven pot roast hinges on choosing the right cut, building flavor with browning, and braising slowly until the meat nearly falls apart. This method yields a one-pot meal with minimal hands-on time and maximum depth of flavor. In practice, you want a cut with good marbling, a sturdy pot that can go from stove to oven, and vegetables that hold up to long cooking. The goal is a cohesive dish where every component finishes together, not a separate protein and side dish.
As you plan, think about timing: searing improves texture and seals juices, while low, slow braising allows tough fibers to break down. You’ll want liquid that is flavorful but not overpowering—broth, wine, or a combination—plus aromatics like garlic, onions, and herbs. Resting after braising isn’t optional; it redistributes juices and makes carving easier. With the right setup, you’ll produce a comforting meal that feeds a crowd or stretches a small gathering into delicious leftovers. This guide uses practical, home-kitchen terms so you can shop, prep, and cook with confidence. Throughout, you’ll see Oven Cook Pro tips and science-backed choices to help you avoid common mistakes.
Tools & Materials
- 4- to 6-quart Dutch oven (oven-safe with lid)(Ideal size for browning and braising in one pot)
- Heavy skillet (for searing, if not using the Dutch oven on stovetop)(Optional if your Dutch oven can be used on the stove as well)
- Tongs(For turning meat and vegetables without piercing the meat)
- Chef’s knife(For chopping meat and vegetables safely and evenly)
- Cutting board(Stable surface; prevents accidents during prep)
- Instant-read meat thermometer(Target 195–205°F (90–96°C) for tender pot roast)
- Measuring spoons and cups(Accurate seasonings and liquids)
- Oven mitts(Heat protection when handling the hot pot)
- Optional: roasting rack(Improves air circulation if you want even browning underneath)
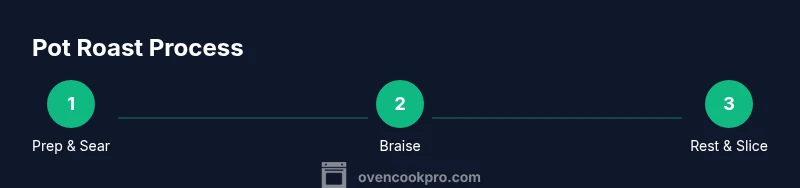
Steps
Estimated time: 2.5-4 hours
- 1
Choose and prepare the meat
Select a well-marbled chuck roast (about 3–5 pounds). Pat the surface dry, then generously season with salt and pepper. Let it rest for 15–20 minutes to improve surface seasoning and even cooking. This step ensures browning will develop a rich crust that flavors the braise.
Tip: Season in advance if possible; dry surface allows better browning. - 2
Sear the roast to develop flavor
Heat a heavy pan or the Dutch oven over medium-high heat with a thin layer of oil until shimmering. Sear the roast on all sides until deeply browned, 3–4 minutes per side. Remove to rest briefly before braising. Searing adds Maillard flavor that deepens the final gravy.
Tip: Do not rush the browning—proper color matters more than speed. - 3
Prepare vegetables and aromatics
Coarsely chop onions, carrots, and potatoes if using. Finish with garlic, bay leaves, thyme, and peppercorns. Sauté onions and garlic briefly in the same pan to pick up browned bits, which will dissolve into the braising liquid.
Tip: Cut vegetables into uniform sizes for even cooking. - 4
Build the braise base and return the meat
Deglaze the pan with a splash of broth or wine, scraping up the fond. Return the roast to the pot, add aromatics, and pour in enough liquid to come halfway up the meat. This forms the foundation of a flavorful, cohesive braise.
Tip: Fond = flavor; deglazing is where it all starts. - 5
Braise in the oven
Cover the pot and place it in a 325–350°F (165–175°C) oven. Cook for 2.5–3.5 hours, until a fork or thermometer slides in with little resistance. If the liquid reduces, add more broth; a gentle simmer preserves moisture.
Tip: Rotate the pot halfway for even cooking and tenderness. - 6
Rest, carve, and finish the gravy
Let the meat rest 15–20 minutes before slicing across the grain. Skim fat from the braising liquid and simmer to reduce if needed. Thicken with a cornstarch slurry or butter and stir in pan drippings for a glossy gravy.
Tip: Resting redistributes juices and improves slicing.
Questions & Answers
Can I use a different cut for pot roast besides chuck?
Yes. Brisket or bottom round can work, but they may need longer braising or different moisture control. Flank and round cuts require extra attention to prevent toughness and may benefit from additional connective tissue breakdown during extended braising.
Brisket or bottom round can substitute, but watch tenderness and adjust time accordingly.
Is red wine necessary for a pot roast?
Wine adds depth and acidity, but you can braise with beef broth alone. If using wine, a small amount (1/2 to 1 cup) is usually enough to lift the flavor without overpowering the beef.
Wine is optional, but it helps build layered flavor; broth alone also works well.
What is the best temperature for pot roast?
A moderate oven around 325–350°F (165–175°C) is ideal for breaking down connective tissue without drying the meat. Adjust slightly if using a larger roast.
Keep the oven steady at 325 to 350 degrees for tender meat.
How can I fix a dry roast after cooking?
If the roast is dry, cook a bit longer the next time or ensure more braising liquid. Resting helps retain moisture. For leftovers, shred meat and mix with some braising liquid to revive moisture.
Add time or liquid next round; resting helps keep juices in.
Can I prepare this recipe in advance?
Yes. Braise up to the point of adding liquid, cool, then refrigerate. Reheat gently on the stove or in a low oven, and finish with a quick glaze or gravy.
Absolutely—you can braise ahead and reheat for a quick meal.
Watch Video
Main Points
- Season generously for depth
- Sear before braising for best texture
- Keep enough liquid to braise, not boil
- Let the roast rest before slicing
- Finish with a flavorful gravy from the braising liquid