Dutch Oven Pot Roast: The Ultimate Step-by-Step Guide
Learn how to master dutch oven pot roast with a practical, step-by-step approach—from searing to braising and serving. Perfect for cozy weeknight dinners and weekend feasts, with tips for tenderness, depth of flavor, and versatile variations.

In this guide you’ll master a deeply flavorful Dutch oven pot roast from start to finish. Gather a few pantry staples, sear the meat to build flavor, then braise in a low, steady heat until fork-tender. This method works with chuck roast, carrots, potatoes, and onions, delivering reliable, comforting results.
Why a Dutch Oven Excels for Pot Roast
A Dutch oven is ideal for a pot roast because its thick walls and tight lid trap heat and moisture, creating a self-contained braising environment. The even heat distribution reduces hot spots, while the lid keeps steam near the meat so connective tissue breaks down without drying out. A well-seasoned cast-iron or enamel-coated Dutch oven also contributes to a rich brown fond that forms the base of a flavorful gravy. According to Oven Cook Pro, choosing the right cut and browning the meat properly are key to a deeply flavorful Dutch oven pot roast. This approach yields a dish that feels luxurious yet is approachable for home cooks. The goal is to develop a deep, cohesive flavor in the pan and deliver tender meat that can be sliced or pulled with a fork.
Ingredient Strategy: What to Use and Why
For a classic dutch oven pot roast, you’ll want a well-marbled chuck roast around 3 to 4 pounds. This cut has the intramuscular fat and connective tissue that break down during braising, yielding moist, flavorful meat. Build a simple flavor base with vegetables like onions, carrots, and potatoes, plus aromatics such as garlic, thyme, and bay leaves. Stock or beef broth provides the braising liquid, while a splash of red wine can deepen the sauce. Don’t forget salt and pepper to season early. If you prefer a richer gravy, a teaspoon of tomato paste can be stirred in with the aromatics. These components come together to create a balanced, savory profile that pairs with side dishes like mashed potatoes or crusty bread.
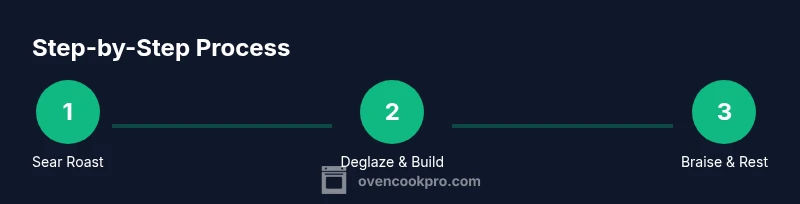
Searing: The Flavor Foundation
Pat the meat dry and season generously with salt and pepper. Sear the roast in hot oil until a deep brown crust forms on all sides. Don’t crowd the pan; work in batches if needed to maintain a high sizzle. The browning reaction (Maillard) is where much of the flavor comes from, so resist the urge to rush this step. Once browned, remove the roast and set aside. The pan will be coated with browned bits (fond) that you’ll use to build the gravy. A quick tip: let the meat rest for a few minutes after searing so you don’t lose juices when you transfer it to the braising liquid.
Deglazing and Building Flavor
With the roast set aside, pour a splash of red wine or broth into the hot pot to loosen the browned bits. Scrape the bottom with a wooden spoon to release the fond and reduce some of the alcohol. This deglazing step creates a concentrated flavor base for the braising liquid. Stir in aromatics (onions, garlic, thyme) and any tomato paste if used. Allow the aromatics to soften and the liquids to reduce slightly before returning the meat to the pot.
Braising Basics: Temperature, Time, and Liquid
Return the meat to the pot and add beef stock or broth so the liquid comes about halfway up the sides of the roast. The goal is a gentle braise at a steady, low temperature to break down collagen without evaporating all the moisture. Cover tightly and braise in a 325–350°F (163–177°C) oven, or simmer on the stovetop at a low, steady level. Total braising time is typically 2.5–3 hours for a 3–4 pound roast, but test for tenderness with a fork; the meat should be easily pierced and you should be able to slide a fork through with little resistance. During braising, check occasionally to ensure there’s still liquid in the pot and the surface isn’t boiling vigorously.
Vegetables: When and What to Add
Root vegetables like carrots and potatoes are traditional companions for pot roast. Add carrots about halfway through the braise and potatoes in the last 45–60 minutes, so they absorb the rich flavors without turning mushy. Cut vegetables into uniform pieces to ensure even cooking. If you prefer a lighter plate, you can add parsnips or turnips for extra sweetness and texture. The vegetables will finish cooking in a well-seasoned gravy that’s ready to spoon over the meat.
Troubleshooting Common Issues
If the meat remains tough after the estimated braise time, re-check tenderness with a fork and continue braising in 15–30 minute increments. Add more liquid if the pot looks dry or the sauce tightens too much. If the gravy seems greasy, skim the fat off the surface and whisk in a small knob of butter to create a glossy finish. If the meat overcooks and falls apart, it’s still delicious as a shredded roast, which is perfect for sandwiches or tacos. Always taste and adjust salt at the end, since reduced liquids can concentrate flavors.
Flavor Variations and Add-Ins
Herbs like rosemary, thyme, and bay leaves are classic, but you can experiment with dried porcini mushrooms, a splash of red wine, or a tablespoon of Worcestershire sauce for deeper savoriness. For a richer sauce, swirl in a bit of butter at the end. If you prefer a lighter profile, substitute half the beef stock with a high-quality chicken stock and keep the aromatics bright with a squeeze of lemon zest at service. The key is balancing acid, salt, and fat to suit your taste.
Finishing Touches and Serves: Rest, Carve, and Plate
Let the roast rest for 10–15 minutes after braising to redistribute the juices. Slice against the grain for the most tender texture, or pull apart with forks if you prefer shredded meat. Strain the braising liquid into a pan and simmer to reduce to a glossy gravy; whisk in a small amount of cornstarch slurry if you desire a thicker consistency. Serve with the vegetables and a generous ladle of gravy. A simple side like mashed potatoes or buttered egg noodles pairs beautifully with the rich meat.
Make-Ahead, Leftovers, and Freezer Tips
Pot roast stores well in the refrigerator for 3–4 days and freezes beautifully for 2–3 months. Reheat gently on the stove or in a low oven, adding a splash of beef stock if the gravy thickens too much. Leftover meat can be repurposed for pot pie filling, shredded sandwiches, or a hearty hash. The robust flavors often taste even better after a day or two as the spices and aromatics meld further.
Tools & Materials
- Dutch oven (enameled or cast iron)(Must be large enough to hold roast and vegetables with lid on)
- Chef knife(For trimming and chopping aromatics)
- Cutting board(Stable surface; avoid cross-contamination)
- Tongs(For turning meat without piercing)
- Ladle and wooden spoon(To baste and deglaze)
- Meat thermometer(Check internal temperature and tenderness)
- Measuring spoons/cups(Accurate seasoning and liquids)
- Aluminum foil(For tenting during rest)
- Timer(Monitor braising intervals)
- Oven or stove with accurate heat control(Maintain steady low heat)
Steps
Estimated time: 2.5–3.5 hours total (including prep and resting)
- 1
Gather and prep ingredients
Assemble roast, aromatics, vegetables, and liquids. Pat the meat dry and pat it generously with salt and pepper to enhance the sear.
Tip: Dry surfaces improve browning and crust formation. - 2
Preheat and heat the pot
Preheat the Dutch oven on the stove to medium-high heat and ensure the lid seals well. A hot pot helps achieve a deep brown crust.
Tip: Use a small amount of oil with a high smoke point. - 3
Sear the roast
Sear the roast on all sides until a rich brown crust forms. Do not move the meat too soon or crowd the pan.
Tip: Work in batches if needed to maintain heat. - 4
Remove meat and deglaze
Transfer the roast to a plate. Deglaze the pot with wine or broth, scraping up the fond to enrich the base.
Tip: Keep the liquid to help form a cohesive gravy. - 5
Return meat and add aromatics
Place the roast back in the pot with onions, garlic, and herbs. Pour in enough liquid to come halfway up the roast.
Tip: Aromatics boost flavor around the meat. - 6
Braise gently
Cover and braise in a 325–350°F (163–177°C) oven or on the stove for 2.5–3 hours, until fork-tender.
Tip: Check once or twice and add liquid if needed. - 7
Add vegetables at the right time
Tumble in carrots and potatoes during the last 45–60 minutes so they finish with the meat.
Tip: Cut vegetables evenly for uniform cooking. - 8
Finish the gravy and rest
Remove the meat, strain the braising liquid, and simmer to reduce to a glossy gravy. Rest the meat 10–15 minutes before slicing.
Tip: Resting helps retain juiciness. - 9
Serve and enjoy
Slice against the grain and plate with vegetables. Spoon the gravy generously over the meat.
Tip: Pair with mashed potatoes or crusty bread.
Questions & Answers
What cut of meat is best for a Dutch oven pot roast?
Chuck roast is ideal for braising due to its connective tissue and marbling. It holds up to long cooking and yields tender, flavorful results. You can also use brisket or boneless shoulder as alternatives if chuck isn’t available.
Chuck roast is ideal for braising, but brisket or shoulder work too.
Can I make this without a Dutch oven?
Yes. A heavy, lidded pot that retains heat works well. If you don’t have one, use a Dutch oven-style casserole with a tight lid or two layers of foil plus a heavy pan to mimic the braising environment.
You can use a heavy pot with a tight lid if you don’t have a Dutch oven.
Should I sear the meat before braising?
Searing creates a flavorful crust and fond that enriches the sauce. Don’t skip this step; ensure the pan is hot and avoid overcrowding to achieve proper browning.
Sear the meat well to develop flavor, then braise.
How do I fix a gravy that’s too thin or too thick?
If too thin, simmer longer or whisk in a slurry of cornstarch and water. If too thick, add a bit more stock or water and stir until you reach the desired consistency.
Simmer to thicken or add stock to thin the gravy.
What are good side dishes for pot roast?
Classic sides include mashed potatoes, buttered noodles, or crusty bread. A green vegetable, like roasted green beans or sautéed spinach, adds color and balance to the plate.
Mash with potatoes or bread, plus a green side for balance.
Can I prepare this ahead of time?
Yes. Braise the roast and vegetables up to the point of finishing the gravy, then refrigerate. Reheat gently and add gravy to loosen if needed before serving.
Yes, you can braise ahead and reheat before serving.
Watch Video
Main Points
- Start with proper searing to build flavor.
- Keep braising temperatures gentle for tenderness.
- Add vegetables at the correct time to avoid mushiness.
- Rest the meat and finish with a glossy gravy.