Brisket in a Dutch Oven: A Complete Step-by-Step Guide
Learn how to braise brisket in a Dutch oven for fork-tender meat with rich flavor. From selecting the cut to resting, this educational guide covers searing, braising liquids, timing, and serving ideas. Oven Cook Pro.

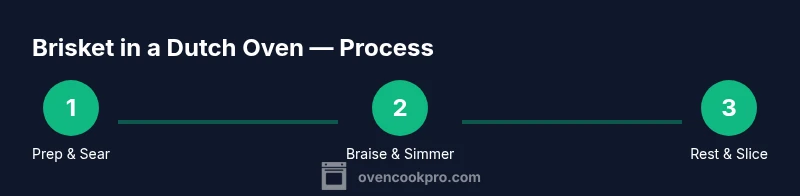
This guide walks you through braising brisket in a Dutch oven for fork-tender results, from selecting the right cut and searing for depth of flavor to a controlled braise and proper resting. You’ll learn technique, timing ranges, and flavor-building tips that keep everything in one pot. By the end, you’ll pull a richly saucy brisket that’s ready to slice and serve.
Why braising brisket in a Dutch oven makes sense
Braising brisket in a Dutch oven combines searing flavor with gentle, even heat for tough cuts. The cast iron retains heat, distributing it steadily as the meat's connective tissue breaks down. This method minimizes moisture loss and helps build a deeply developed bark, or crust, on the outside. For home cooks, a single Dutch oven means less equipment, fewer pans to clean, and safer handling than juggling multiple pots. When prepared correctly, brisket becomes fork-tender and saucy, with the meat soaking up aromatics from the braising liquid. According to Oven Cook Pro, success hinges on three steps: a thorough sear to develop color, a controlled braise at a low temperature, and a generous resting period before slicing. Start with quality meat, respect the browning stage, and you’ll unlock flavors that rival traditional oven braises.
Tools & Materials
- Cast iron Dutch oven with lid(4–6 quart size is ideal for most briskets; ensure lid fits tightly to trap moisture)
- Large sharp knife(For trimming fat and slicing after resting)
- Cutting board(Stable surface; separate resting area for meat)
- Tongs(For turning the meat during sear)
- Meat thermometer(Probe should read 190–205°F (88–96°C) for tenderness)
- Aluminum foil(Helpful to tent meat during resting)
- Measuring cups and spoons(For precise seasoning and liquids)
- Oven mitts(Heat-resistant, silicone grips recommended)
- Liquid (broth stock, wine, or beer)(Choose one or a combination for braising liquid)
Steps
Estimated time: 3-4 hours
- 1
Gather ingredients and prep brisket
Collect the brisket (trim excess fat if needed, leaving a thin fat cap for flavor). Peel and chop aromatics (onions, garlic, carrots if using). Pat the meat dry so browning isn’t steamed, and measure your braising liquid. This prep sets you up for even searing and a cohesive braise.
Tip: Dry surface = better browning; moisture on the meat inhibits crust formation. - 2
Season generously and rest at room temp
Season the brisket with salt, pepper, and any preferred rub. Let it come to room temperature for 20–30 minutes to promote even cooking. This helps maintain a consistent internal temperature during searing.
Tip: Season ahead of time to allow spices to penetrate the surface. - 3
Preheat oven and heat the Dutch oven
Preheat the oven to 325–350°F (165–175°C). Heat the Dutch oven on the stove over medium-high until the surface is evenly hot. A hot pan ensures a flavorful crust with minimal sticking.
Tip: A well-heated pan yields a richer sear and browner crust. - 4
Sear brisket on all sides
Sear the brisket in batches if necessary until a deep brown crust forms on every side. Transfer to a plate and keep the browned bits (fond) in the pan for later deglazing.
Tip: Do not crowd the pan; browning requires contact with hot surface for Maillard reaction. - 5
Deglaze and build aromatics
Pour in a portion of braising liquid to deglaze, scraping up the fond with a wooden spoon. Add onions, garlic, and any herbs, sautéing briefly to release aroma flavors.
Tip: Fond is flavor—don’t skip the deglazing step. - 6
Add brisket and braise liquid
Return the brisket to the pot, add the remaining liquid and aromatics, and bring to a gentle simmer. The liquid should come up about a third to halfway up the sides of the meat.
Tip: Liquid level affects how the meat braises; too little dries out, too much dilutes flavor. - 7
Braise covered in the oven
Cover with the lid and transfer to the oven. Braise low and slow until the brisket is fork-tender, checking a few times for evenness and adjusting liquid if needed.
Tip: Keep a steady, gentle simmer; avoid roaring boils that toughen the meat. - 8
Rest, slice, and serve
Remove the brisket from heat and let it rest, tented loosely with foil, for 15–20 minutes. Slice against the grain and serve with the braising liquid as a sauce.
Tip: Resting redistributes juices; cutting too early causes juice loss.
Questions & Answers
Can I use a different pot if I don’t have a Dutch oven?
You can use a heavy Dutch-style pot or a heavy casserole with a tight-fitting lid; a heavy-duty roasting pan with foil can work, but you’ll lose some braising efficiency without a lid that traps moisture.
If you don’t have a Dutch oven, a heavy lidded pot or a covered roasting pan can substitute, but expect a little more moisture loss without a tight seal.
What liquids are best for the braising liquid?
Beef stock or a low-sodium broth is a solid base. You can add red wine for depth or beer for a malty note. For a richer sauce, include a small amount of tomato paste or a splash of soy sauce.
Stock is a solid base; wine or beer adds depth, and a touch of tomato paste or soy sauce boosts color and savoriness.
How long should I braise per pound of brisket?
Braised brisket times vary with size and oven; plan for several hours total and test tenderness with a fork. Large cuts may need more time, while smaller ones finish sooner.
Plan for a few hours and test with a fork; the goal is fork-tender meat.
Can I refrigerate or freeze brisket after cooking?
Yes. Cool completely, then refrigerate up to 3–4 days or freeze for longer storage. Reheat gently in the oven with some braising liquid to preserve moisture.
Cool completely, then store in the fridge for a few days or freeze; reheat with extra braising liquid to keep moisture.
Should I trim fat before braising?
Trim excess surface fat, but leave a thin layer for moisture and flavor. The fat contributes to tenderness and adds richness to the sauce.
Leave a thin fat cap if you can; it helps flavor and moisture during braising.
Watch Video
Main Points
- Sear well for flavor and color
- Keep braising liquid at a steady, gentle simmer
- Let the meat rest before slicing for juiciness
- Choose a well-marbled brisket for best tenderness
- A single Dutch oven makes prep, cooking, and cleanup easier