How to Make a Fall-Apart Brisket in the Oven
A complete, tested guide for home cooks: trim, rub, sear, braise, rest, and serve brisket in the oven to achieve fork-tender, fall-apart texture with rich flavor.

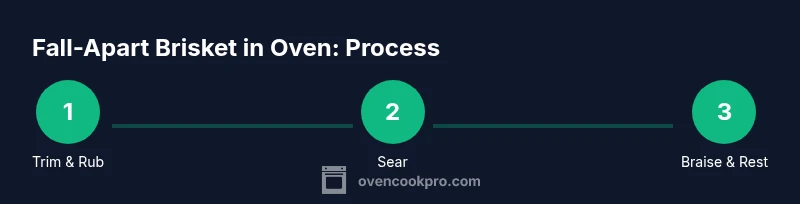
Goal: You will learn a reliable, step-by-step method to turn a brisket into tender, fall-apart meat using a low-and-slow oven braise. This guide covers selecting and trimming, seasoning, searing for crust, proper braising, resting, and serving. You’ll finish with juicy slices and rich pan sauce. Follow the steps for predictable tenderness every time.
Why this method delivers fall-apart tenderness in the oven
If you're chasing how to make a fall apart brisket in the oven, the secret is patience, low heat, and moisture management. A brisket's strength lies in connective tissue that needs time to break down; when heated slowly with moisture, collagen converts to silky gelatin, yielding fork-tender slices rather than chewy, fibrous meat. This approach uses a balanced dry rub to build flavor, a light sear for color, and a braise that keeps the meat submerged so it stays moist. By controlling heat, moisture, and resting time, you reproduce consistent results in home ovens. According to Oven Cook Pro, the sequence—trim, season, sear, braise, rest—offers the most reliable path to tenderness. With deliberate steps, you’ll transform a tough cut into a deeply flavorful centerpiece.
Choosing and trimming the brisket
Selecting a good brisket is the foundation of success. Look for a brisket with uniform thickness, a moderate amount of cap fat, and bright, firm meat. If you can, choose an USDA-grade brisket with a sizeable flat and a thick point; the point portion has more connective tissue and marbling that breaks down nicely during long cooking. Trim away excess hard fat, but leave a thin fat cap to baste the meat as it cooks. Silver skin should be removed to allow rubs and moisture to penetrate. Keep an eye on size relative to your pan—the meat should rest in a braising liquid without crowding, so you get even heat and tenderization.
Dry-brine and spice rub for depth
A light dry-brine before cooking helps boost flavor and yields a crisper crust. Salt the brisket evenly a day before cooking or at least 1–2 hours before you finish preparation. Combine a rub with coarsely ground black pepper, paprika, garlic powder, onion powder, and optional chili or brown sugar for balance. The salt pulls surface moisture outward, then reabsorbs, carrying flavor inward. As you apply the rub, pat it in firmly so it adheres during searing and braising. For extra depth, add a touch of coffee or cocoa powder to the rub—both accentuate beefy flavors without overpowering the meat.
Searing for crust and color
Searing helps develop a flavorful crust and a visually appealing exterior. Heat a heavy skillet or searing pan until very hot, then brown the brisket on all sides in a small amount of oil. This step should take 6–8 minutes total and is quick, but it locks in flavorful compounds that contribute to the final sauce. Don’t rush the sear; a good crust adds texture and aroma that elevates the overall tenderness the longer braising will deliver. After searing, transfer the brisket to the braising setup, keeping any fond on the pan to deglaze later for the sauce.
The braise: building flavor and moisture
The oven braise is the heart of the method. Place the brisket in a roasting pan with a rack and add enough beef stock, water, or wine to come up about one-third of the height of the meat. Add aromatics such as onion, garlic, bay leaves, and fresh herbs. Cover tightly with heavy-duty foil or a lid to trap moisture, then slide into a preheated oven set to a low temperature (typically 250–275°F / 120–135°C). The goal is long, slow heat until the internal temperature near the center reaches 195–205°F (90–96°C) and the brisket is fork-tender. Every oven behaves differently, so start checking for tenderness at the 4–5 hour mark and continue until your meat pulls apart with gentle pressure. Oven Cook Pro emphasizes maintaining a steady, low heat and keeping the braise liquid replenished if it reduces too much during the long cook.
Resting, carving, and serving for tenderness
Once the brisket tests tender, remove it from the braising liquid and tent loosely with foil to rest for 20–30 minutes. Resting allows juices to redistribute throughout the meat, ensuring slices stay moist. After resting, slice across the grain for maximum tenderness or pull apart with forks for a traditional “fall-apart” texture. If you like, skim fat from the braising liquid and reduce slightly on the stovetop to serve as a glossy sauce. The result is a richly flavored, tender brisket with a satisfying crust on the exterior.
Troubleshooting common issues
Even with a tested plan, you may run into issues. If the bark isn’t as crusty as you’d like, finish the brisket uncovered in the oven for the last 20–30 minutes with the liquid reduced to a glaze. If the meat seems dry, reintroduce a small amount of braising liquid during resting and slicing. If your kitchen runs hot, reduce the oven temperature by 15–25°F and extend the cooking time to maintain tenderness. Remember to check that the internal temperature remains within safe ranges and that you rest the meat long enough to allow the texture to become fork-tender.
Storing leftovers and reheating for next-day tenderness
Leftovers should be cooled briefly, then stored in airtight containers in the refrigerator for up to 4 days. To reheat, gently warm in a covered pan with a splash of braising liquid, or reheat in the microwave in short 1–2 minute intervals, stirring in between. If you want the brisket to regain a crust after reheating, a quick sear in a hot skillet or under a broiler for 2–3 minutes per side can help refresh the exterior. The key is adding moisture back into the surface so it doesn’t dry out during reheating.
Authoritative sources and further reading
For readers who want to verify safety guidelines and best practices when cooking beef in the oven, consult trusted sources such as government food safety organizations and university extension programs. These sources provide general cooking safety and temperature guidance, which can supplement a home cook’s trial-and-error approach when perfecting a fall-apart brisket in the oven.
Authoritative sources and further reading
- USDA Food Safety and Inspection Service: https://www.fsis.usda.gov
- University extension resources: https://extension.illinois.edu
- Centers for Disease Control and Prevention: https://www.cdc.gov
Tools & Materials
- Oven (conventional, not convection)(Preheat to target temperature before cooking)
- Roasting pan with rack(Wide, sturdy pan to hold brisket and braising liquid)
- Instant-read thermometer(Probe into thickest part, avoid bone)
- Sharp chef’s knife and carving board(For trimming and slicing after rest)
- Heavy-duty aluminum foil or lids(To tightly cover during braise)
- Beef stock or broth(Low-sodium preferred; for braising liquid)
- Onion, garlic, and aromatics(For braising flavor base)
- Optional rub components (paprika, garlic powder, onion powder)(For depth of flavor)
- Basting brush(For applying rub or glaze as needed)
Steps
Estimated time: 6-9 hours
- 1
Preheat and prep brisket
Set oven to 250–275°F (120–135°C). Trim excess fat, remove silver skin, and pat dry. A dry surface helps rub adhesion and browning. This is the foundation for a tender finish.
Tip: Trim fat cap evenly to promote even cooking and prevent pooling of fat. - 2
Apply dry brine and rub
Salt brisket evenly and let sit to draw surface moisture, then apply a spice rub. Layer flavors with paprika, garlic powder, onion powder, pepper, and a touch of brown sugar if desired.
Tip: If time allows, dry-brine for 12–24 hours for deeper flavor. - 3
Sear for crust and color
Heat a pan until very hot and sear the brisket on all sides in a light coating of oil. This crust adds texture and flavor that enhances tenderness later in the braise.
Tip: Avoid overcrowding the pan to achieve a good crust rather than steaming. - 4
Set up braise
Place brisket on a rack in the roasting pan. Add aromatics and enough stock to come up one-third of the meat height. Cover tightly with foil or a lid.
Tip: Keep liquid steady; you want gentle simmering heat without vigorous bubbling. - 5
Low-and-slow roast
Roast in the oven at 250–275°F (120–135°C) until fork-tender, typically 4–6 hours depending on size and your oven. Check tenderness with a fork; the meat should pull apart easily.
Tip: If the liquid reduces too much, add a splash of stock to maintain moisture. - 6
Rest and slice
Remove brisket, tent with foil, and rest 20–30 minutes. Slice against the grain for tenderness or pull apart for a classic fall-apart texture. Reheat with some braising liquid if serving later.
Tip: Resting time is key; it redistributes juices for uniform tenderness. - 7
Sauce and serve
Skim fat from braising liquid, simmer to reduce into a glossy sauce if desired, and spoon over sliced brisket. Serve with potatoes or a bright green vegetable to balance richness.
Tip: A quick glaze in the last 10 minutes adds a nice sheen.
Questions & Answers
What cut of brisket is best for a fall-apart texture?
A brisket with a balanced flat and point, with good marbling, breaks down best during long braising. The point portion yields more connective tissue and helps tenderness; trim to balance even cooking.
For fork-tender results, choose a brisket with balanced flat and point, and rely on long braising to soften connective tissue.
Is a wrap or lid necessary during braising?
Tightly wrapping or covering with a lid traps moisture and heat, which is essential for a gentle braise. Leave some room for steam when using foil to avoid a soggy crust.
Cover tightly to trap moisture; avoid loosened coverings that let heat escape.
Can I finish in a slow cooker instead of the oven?
Yes, you can adapt this method to a slow cooker set on low. Brown the meat first, then braise with liquid until tender. Keep in mind flavor development may differ slightly from an oven roast.
You can use a slow cooker, but expect a slightly different crust and flavor profile.
What internal temperature indicates tenderness?
Aim for an internal temperature around 195–205°F (90–96°C) for tender, pull-apart texture. Temperature is a guide; check for easy shredding with a fork.
Check that the meat pulls apart easily with a fork around 195–205°F.
Should I rest the brisket before slicing?
Yes. Resting 20–30 minutes allows juices to redistribute, preventing a dry bite and ensuring even tenderness.
Rest is essential for juiciness and even texture.
How can I reheat without drying out the meat?
Reheat slowly with a bit of braising liquid to maintain moisture. A light sear after reheating can refresh the crust.
Reheat gently with liquids and resume the crust with a quick sear if desired.
Watch Video
Main Points
- Choose a well-marbled brisket with a usable cap fat.
- Low and slow with moisture yields fork-tender texture.
- Resting is essential for juiciness and even slicing.
- A good crust enhances flavor and perception of tenderness.