How to Make a Brisket in the Oven: A Step-by-Step Guide
Learn the proven method to bake a juicy, tender brisket in the oven. From cut selection to resting, this guide covers seasoning, searing, braising, and carving for reliable home-cook results.

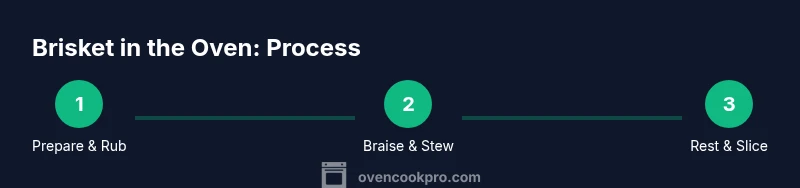
Learn how to make a brisket in the oven that yields fork-tender slices. From selecting the right cut and basic prep to seasoning, searing, and slow braising, this guide covers every essential step. Gather a roasting pan, thermometer, foil, and patience for best results. You’ll know when to wrap, how long to rest, and how to slice against the grain for maximum tenderness.
Why Oven-Cooked Brisket Delivers Flavor
Oven braising is ideal for brisket because the oven provides steady, even heat that penetrates the meat slowly, breaking down tough collagen into melt-in-your-mouth tenderness. When you cook at low temperatures with moisture, the connective tissue converts to gelatin, enriching both texture and juiciness. A well-humidified environment also helps maintain surface moisture, reducing the risk of dry edges. In home kitchens, this method offers predictable results, provided you control temperature and ensure a proper rest. The Oven Cook Pro team found that consistent temperature control and a mindful resting period are key to repeatable results, especially for larger cut sizes. The practical takeaway: plan for several hours and monitor internal temperature rather than chasing an exact clock time.
Choosing the Right Brisket and Prep
Brisket comes in two main sections—the flat and the point. Many cooks opt for a whole packer (both sections) for the best balance of tenderness and flavor. When selecting, look for even marbling and a bright red color; avoid overly dark or dry surfaces. Before cooking, trim a thin layer of hard fat if it sits on top, then pat the surface dry. Bringing the meat to room temperature for 30–60 minutes helps ensure even cooking. A light dusting of salt can begin the seasoning process, and a dry rub can be prepared in advance for more depth. Proper prep reduces surface moisture that can wash away seasoning during searing.
Seasoning and Searing for Depth
Season generously with a balanced dry rub—salt, pepper, paprika, garlic powder, and optional chili for heat. Searing is optional but highly recommended; it develops a deep brown crust that adds flavor and helps lock in juices. Use a hot pan with a small amount of oil, sear the brisket on all sides until browned, then remove it to rest briefly. If you skip searing, you’ll still achieve tender meat, but the surface flavor will be less robust. Resting briefly after searing allows juices to redistribute before braising.
Low-and-Slow Braising: Temperature and Time
Bake the brisket at a low, steady temperature to maximize tenderness. A typical range is 275–325°F (135–165°C); higher end speeds up the process but can risk drier edges if not monitored. Plan for several hours; you’ll know the meat is ready when it’s fork-tender and the connective tissue has dissolved. If you find the surface drying, add a splash of broth or water and re-cover to braise. The goal is a moist, evenly cooked brisket with a glossy exterior.
The Braising Liquid: Broth, Wine, and Aromatics
Create a flavorful braising base with beef broth, onions, garlic, and aromatics like thyme or bay leaves. A splash of red wine can add depth but is optional. Pour enough liquid to come up about a third to halfway up the sides of the brisket—this moist environment helps break down connective tissue without boiling the meat. As the brisket braises, the liquid will reduce and concentrate flavors, producing a rich pan sauce that pairs beautifully with the finished slices.
Resting and Carving: Getting the Most Tender Slices
Once the brisket is tender, remove it from the braising liquid and tent loosely with foil. Rest the meat for 20–30 minutes to allow juices to redistribute. Slice against the grain in thin, even sections; this breaks up muscle fibers for easier chewing. If you need to trim extra fat for serving, do so after resting. The resting step is essential to achieving a juicy, sliceable brisket with the right texture.
Common Pitfalls and How to Avoid Them
Common issues include overcooking leading to dry edges, uneven cooking from a cold start, and insufficient moisture during braising. Prevent these by letting the meat come to room temperature before cooking, keeping the braising liquid topped up, and using a thermometer to track internal temperature. Wrapping the meat too early or too tightly can trap steam in a way that dulls crust development; apply the wrap at the appropriate stage to balance moisture and crust.
Finishing Touches and Leftovers
After slicing, consider finishing with a little extra pan sauce or a light brush of glaze for shine. Store leftovers in airtight containers with some braising liquid to maintain moisture. Reheat gently, adding a splash of broth if needed to revive tenderness. A properly cooked brisket also freezes well if wrapped tightly. With proper handling, you can enjoy leftovers across multiple meals with minimal loss of flavor.
Tools & Materials
- Roasting pan with rack(Large enough to hold brisket with 1–2 inches of liquid underneath)
- Meat thermometer (probe or instant-read)(Target internal temp ~195–205°F for tenderness)
- Heavy-duty aluminum foil(For wrapping during braising and resting)
- Sharp carving knife(For clean slices after resting)
- Basting brush(Optional for brushing glaze or surface moisture)
- Mixing bowl(For mixing rub or marinade components)
Steps
Estimated time: Estimated total time: 4-6 hours
- 1
Prepare the brisket
Trim excess fat to expose lean meat, pat dry, and let it sit at room temperature for 30–60 minutes to promote even cooking. This helps the rub adhere and prevents a cold center from cooling the oven temperature as you start braising.
Tip: Trimming a thin fat cap improves browning and reduces greasy surfaces. - 2
Apply the dry rub
Season generously with a balanced rub; salt, pepper, paprika, and garlic powder are classic. For extra flavor, mix spices ahead of time and apply evenly, pressing the rub into the meat for better adherence.
Tip: Let the rub sit for 15–20 minutes to penetrate the surface. - 3
Sear the brisket (optional)
In a hot pan with a small amount of oil, sear the brisket on all sides until a deep brown crust forms. Searing Lock is optional but adds depth of flavor and crust as a starting point for braising.
Tip: Avoid overcrowding the pan to maintain high heat. - 4
Set up braising liquids
Place the brisket in a roasting pan and add braising liquid: beef broth (and a splash of wine if desired) with aromatics like onion and garlic. The liquid should come up about a third to halfway up the sides of the meat.
Tip: Use aromatics consistent with your rub for cohesive flavor. - 5
Cover and braise in the oven
Cover tightly with foil or a lid and place in a preheated oven at a low temperature. Braise for several hours until the meat is fork-tender and the connective tissue has dissolved.
Tip: Check liquid level halfway and add more broth if needed. - 6
Monitor tenderness and finish
When a fork slides in with little resistance, the brisket is near done. If needed, continue braising in 15–30 minute increments until tenderness is reached.
Tip: Avoid overcooking to prevent dry edges. - 7
Rest and carve
Remove from liquid and tent with foil for 20–30 minutes. Slice against the grain into even pieces for maximum tenderness.
Tip: Resting redistributes juices and improves sliceability. - 8
Serve or store
Serve with pan sauce or glaze. Refrigerate leftovers in airtight containers with some braising liquid; reheat gently to preserve moisture.
Tip: Cool briefly before refrigerating to prevent condensation.
Questions & Answers
Can I cook a brisket from frozen?
For best results, thaw completely in the refrigerator before cooking to ensure even heat and tenderness. Cooking from frozen can lead to uneven doneness and longer total time.
Thaw completely in the fridge before cooking for even heat and tenderness.
What is the best cut for oven brisket?
A whole packer brisket (combining the flat and point) or a well-marbled flat both work well for oven braising. Choose based on your texture preference and portion needs.
A well-marbled flat or a whole packer gives great flavor and tenderness.
Should I wrap the brisket while braising?
Yes, wrap with foil after an initial browning phase to trap moisture and help tenderize. Uncover near the end if you want more crust or to reduce liquid.
Wrap after browning to keep moisture in; uncover if you want more crust at the end.
How do I know when it’s done?
Use a probe thermometer; tenderness around 195–205°F indicates tenderness. The meat should slide apart easily when tested with a fork.
Probe tenderness around 195–205°F; it should be fork-tender.
Can I speed up cooking by raising the oven temperature?
Raising the oven temperature can shorten cooking time but increases the risk of dry edges. Low and slow yields more even texture and juiciness.
Higher heat can dry edges; slow, steady heat gives better texture.
How should I reheat leftover brisket?
Slice thinly and rewarm gently with a splash of braising liquid or stock to preserve moisture. Avoid microwaving unduly long to prevent toughness.
Reheat thin slices with a bit of braising liquid for moisture.
Watch Video
Main Points
- Choose a well-marbled brisket and trim fat as needed.
- Season boldly and sear for depth of flavor.
- Cook low and slow with moisture for optimal tenderness.
- Rest before slicing to maximize juiciness.