Beef Tenderloin in the Oven: Exact Cooking Time
Learn exact oven cooking times for beef tenderloin, plus doneness targets, resting guidance, and pro tips from Oven Cook Pro. Master a reliable two-stage roast and carve perfection.

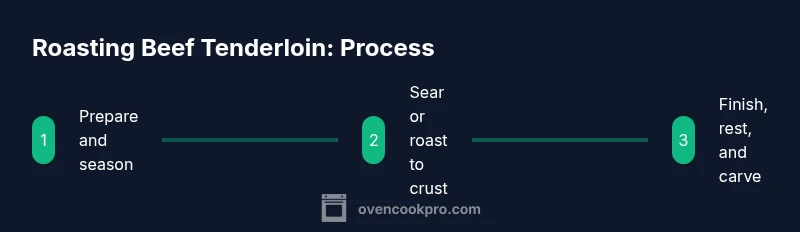
You will learn how to roast beef tenderloin in the oven to your preferred doneness, with dependable times, temperatures, resting guidance, and carving tips. You’ll need a reliable oven, a meat thermometer, a heavy roasting pan, and optional aromatics. This guide also covers convection options, rest periods, and how to slice for even portions.
Why proper cooking times matter for beef tenderloin
Beef tenderloin is prized for its tenderness and mild beef flavor. Getting the roast right means juicer slices, even doneness from end to end, and a crust that contrasts with a tender center. According to Oven Cook Pro, precision matters more than guesswork: small deviations in time or temperature can shift the final texture significantly. The Oven Cook Pro Team also notes that resting after roasting is essential for juiciness, flavor integration, and easier carving. In practice, planning your roast around a target internal temperature rather than a fixed minute count leads to consistently reliable results.
This approach helps you avoid common pitfalls like overcooking the outer layer while the center remains underdone, or vice versa. The guidance you’ll read here emphasizes a thermometer-driven method rather than chasing a single minute-per-pound rule. With the right setup and patience, you’ll achieve a buttery texture and a browning crust that makes every slice worthy of a holiday plate.
Key variables that influence roasting time
Several factors determine how long beef tenderloin spends in the oven. The weight and shape of the tenderloin matter most—long, slender roasts cook differently from a compact lump. Oven calibration and rack position also affect heat distribution, while the choice of roasting pan and whether you sear first influence the crust and exterior texture. Finally, whether you use conventional or convection heat changes how evenly the meat develops color and warmth. Understanding these variables helps you tailor timings to your specific roast and kitchen setup.
Doneness targets and carryover cooking
A primary goal is to hit your preferred internal temperature, then allow carryover cooking to finish the job during resting. Common targets in Fahrenheit include: rare, medium-rare, medium, and medium-well ranges, with higher warmth leading to firmer texture. Carryover cooking typically adds a bit of heat after removal from the oven, so plan to pull the tenderloin a few degrees below the final target. According to Oven Cook Pro Analysis, 2026 resting improves juiciness and flavor integration. The Oven Cook Pro Team emphasizes that precise temperature control is more reliable than chasing exact minutes.
To simplify, decide your final doneness first, then monitor internal temperature with a probe thermometer as the roast progresses. This reduces the risk of overcooking and helps you achieve a consistently rich, rosy center.
High-heat sear vs finish method
A quick initial sear or roast at a higher temperature creates an appealing crust that locks in juices. Some cooks skip the sear and rely on a long, steady roast for a more even color. The choice depends on your preference for crust depth and the meat’s starting temperature. If you choose high-heat searing, make sure the pan and rack are properly prepared to avoid scorching. Convection can be used to accelerate browning and evenness, but reduce the overall temperature slightly to prevent over-roasting the exterior.
Oven setup and equipment choices
Preparation matters as much as the roast itself. A heavy roasting pan with a sturdy rack helps heat circulate under the tenderloin, preventing soggy bottom and promoting even browning. Preheating the oven to a high initial temperature (for crust) and then lowering to finish temperature requires a reliable oven and a thermometer. Place the meat on a rack so hot air can circulate all around, and use aluminum foil loosely to tent if you need to rest briefly after cooking. A kitchen timer and a carving board close at hand ensure you’re ready to serve at the exact moment of doneness.
Seasoning, aromatics, and moisture retention
The flavor profile of beef tenderloin shines with simple seasoning and aromatic companions. A generous salt crust helps draw out surface moisture for browning, while garlic, thyme, and rosemary contribute classic, delicate notes. Oil or butter helps with heat transfer and moisture retention. If you want a richer finish, a light glaze or a touch of mushroom pan sauce can complement the beef without masking its natural flavor. The key is to balance salt, fat, and aromatics so the meat remains the star.
Estimating time by weight (practical approach)
Because tenderloin shapes vary, rely on a thermometer and target temperatures rather than fixed minutes per pound. A practical approach is to start with a high-heat phase to build crust, then finish at a moderate temperature while monitoring the internal temperature. For a typical center-cut roast, expect a crust-forming phase followed by a longer, lower-heat finish until the thermometer reaches your target. Remember to account for carryover heat during resting, which can add several degrees and a few minutes' worth of carryover cooking.
Resting, carving, and serving tips
Allow the roast to rest at least 10-15 minutes after removal from the oven. Resting helps juices redistribute and makes slicing easier, producing more uniform portions. Use a sharp carving knife and slice against the grain to maximize tenderness. Serve with a simple pan jus or a light sauce that complements the meat’s natural flavors—garlic, herbs, and a touch of butter elevate the experience without overpowering the beef.
Safety, storage, and make-ahead options
Always keep food safety in mind when handling raw and cooked meat. Refrigerate leftovers promptly and reheat gently to maintain moisture. If you plan to prepare ahead, portion the tenderloin after roasting and chill or freeze in airtight containers. Thaw in the refrigerator before reheating, and consider finishing with a quick rewarm in a hot pan or oven to reestablish crust and texture.
Tools & Materials
- Meat thermometer (instant-read or probe)(Critical for accurate doneness)
- Heavy roasting pan with a rack(Promotes even heat circulation)
- Carving knife and cutting board(Sharp blade for clean slices)
- Aluminum foil(Tent during rest if needed)
- Oven mitts(For safety when handling hot pan)
- Kitchen timer(Track stages and resting)
- Optional aromatics (garlic, herbs)(Enhance flavor without overpowering)
- Kitchen scale (optional)(Helpful for portioning or brine calculations)
Steps
Estimated time: 60-90 minutes total, depending on weight and desired doneness
- 1
Select and prepare the beef tenderloin
Choose a center-cut tenderloin and trim any silver skin or excess fat. If desired, tie the tenderloin with butcher’s twine to even thickness for uniform cooking. Pat dry to promote browning, then apply a light oil coating before seasoning.
Tip: Uniform thickness ensures even heat; tie if needed. - 2
Season and bring to room temperature
Season generously with salt, pepper, and optional aromatics. Let the meat rest at room temperature for about 30-60 minutes to promote even cooking.
Tip: Salt can be done early as a dry brine for deeper flavor. - 3
Preheat oven and prepare roasting setup
Heat the oven to a high starting temperature to develop a crust, then plan to finish at a lower temperature. Place the tenderloin on a rack in a preheated pan so air circulates under and around the meat.
Tip: Center rack position helps even heat distribution. - 4
Roast at high heat to crust
Roast at the initial high heat for 15-25 minutes to form a rich crust and begin surface browning. Keep an eye on the color; remove if it darkens too quickly.
Tip: Watch for deep caramelization without burning. - 5
Lower oven and finish to target internal temp
Reduce oven to the finishing temperature and continue roasting until the thermometer approaches your target doneness. Maintain a steady heat and avoid opening the door frequently.
Tip: Use a probe thermometer to monitor progress without opening the oven. - 6
Check temperature and remove from oven at target
When the internal thermometer reads within 5-10 degrees of your target, remove the roast. Plan for carryover cooking during rest.
Tip: Remove slightly before the final target to account for carryover. - 7
Rest, carve, and serve
Tent loosely with foil and rest 10-15 minutes. Slice against the grain into even portions and serve with pan jus or a light sauce.
Tip: Resting is essential for juiciness and ease of carving.
Questions & Answers
What oven temperature is best for beef tenderloin?
A high initial heat is often used to develop a crust, followed by a lower finishing temperature to finish doneness. The exact temperatures depend on your oven and desired doneness, but rest assured that a thermometer guides consistency.
Start with a higher heat to brown, then finish at a lower temperature, guided by a thermometer.
How long per pound should I roast beef tenderloin?
Rather than chasing a per-pound time, monitor the internal temperature with a probe thermometer and adjust for carryover during rest. This approach yields reliable results across different shapes and oven temps.
Rely on a thermometer rather than fixed minutes per pound, as sizes and ovens vary.
Should I sear the tenderloin before roasting?
Searing is optional. It creates a crust and enhances flavor, but a well-balanced roast can be achieved without searing by finishing at high heat and monitoring internal temperature.
Searing is optional; it adds crust and flavor, but you can achieve great results without it.
Is beef tenderloin safe to serve medium-rare?
Yes, when handled properly and sourced from a safe, reputable source. Use a thermometer to hit your target doneness and let carryover finish the rest.
Yes, medium-rare is safe if you monitor the temperature and handle the meat properly.
Can I prep this in advance?
You can season ahead of time or prepare the roast up to the cooking stage and finish just before serving. Refrigerate safely and reheat carefully to preserve crust and juiciness.
You can season ahead or prep the roast early, then finish cooking close to serving time.
Watch Video
Main Points
- Rely on internal temperature, not time, for doneness.
- Resting seals in juices and improves slicing.
- A sear adds crust but isn’t required for a tender result.
- Use a rack to promote even heat distribution.
- Salt early or as a dry brine for deeper flavor.