Beef Tenderloin in the Oven: A Step-by-Step Complete Guide
Master beef tenderloin in the oven with Oven Cook Pro’s step-by-step guide. Learn prep, seasoning, roast temps, resting, and safety for a tender centerpiece.

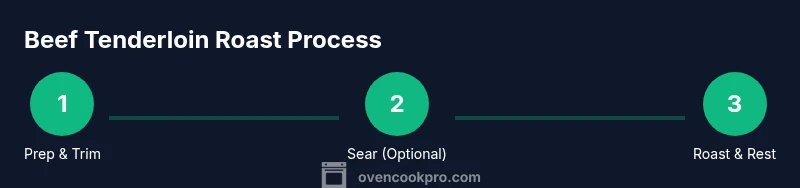
Learn to roast beef tenderloin in the oven for consistent doneness and juicy slices. This guide covers trimming, seasoning, optional searing, precise roasting temps, resting, and carving. By following the steps, you’ll achieve a restaurant-worthy centerpiece with advice from Oven Cook Pro. Whether you prefer rare or medium-rare, this method scales for large roasts and small tenderloins alike.
Why beef tenderloin shines in the oven
Beef tenderloin is a lean, elegant roast that rewards careful handling in the oven. If you’re exploring beef tenderloin how to cook in oven, start by understanding why this cut cooks so well with dry heat: it’s very tender and benefits from a short, hot initial sear and a slow finish at a moderate temperature. According to Oven Cook Pro, using a center-cut loin helps maintain uniform thickness, which translates into even cooking from end to end. The meat’s lean texture means it benefits from a brief sear to develop a crust and a controlled roast to finish at a precise internal temperature. Because tenderloin lacks a lot of connective tissue, overcooking quickly dries it out; small adjustments in temperature, resting, and carving matter more here than with fattier roasts. This section sets the stage for precise timing and emphasizes the importance of temperature control, the use of a thermometer, and a calm resting period before you slice.
Preparing the Tenderloin: Trimming, Drying, and Seasoning
Trimming silver skin and excess fat improves bite and evenness, so start with a clean roast. Pat the surface dry with paper towels; moisture on the exterior can prevent browning. If the loin is uneven in thickness, wrap and tie with kitchen twine at 1-inch intervals to create a uniform cylinder. Season generously with kosher salt and freshly ground black pepper, then rub with a light coat of olive oil to help the crust form. If you like garlic and herbs, finely minced garlic and chopped rosemary or thyme can be added to the oil for a subtle aromatic note. The seasoning should blanket the entire surface, not just the top, to ensure a balanced crust across the roast.
Searing vs. Roasting: The Flavor Approach
One optional, flavor-boosting step is a quick sear in a hot pan before roasting. A heavy skillet over high heat, lightly oiled, can brown the tenderloin on all sides in two to four minutes per side. Searing locks in juices and creates a crust that contrasts nicely with the tender interior. If you skip searing, you’ll still get a great result with a longer roasting phase; the crust will come from the high-heat oven and the seasonings. Either approach requires careful monitoring of internal temperature to avoid overcooking. For some cooks, searing is essential for color and flavor; for others, it’s optional but recommended when you want maximum crust without dry edges.
The Oven Roast: Temperature and Time Guidelines
Rubbed and optionally seared, the roast then goes into a preheated oven. A common starting point is 425°F (218°C) for roasts that are 4–6 pounds, with a shorter time for smaller tenderloins. The exact time depends on thickness and your target doneness. Use a meat thermometer to monitor: aim for about 120–125°F (49–52°C) for rare, 130–135°F (54–57°C) for medium-rare, and 140–145°F (60–63°C) for medium. Remember that carryover cooking will raise the temperature by roughly 5–10°F (3–6°C) during resting. Don’t rely solely on the clock; check the thermometer frequently as the roast nears the target.
Resting and Carving: Juiciness and Slices
Transfer the roast to a warm cutting board or a rack and tent loosely with foil for 15–20 minutes. Resting allows the juices to reabsorb and re-distribute, which keeps slices moist when you carve. Slice thickly against the grain to hold onto tenderness and present nice, even portions. If you’ve roasted to the desired temperature but still see a pink center, give it a few extra minutes in a warm pan before resting. Make sure your knife is sharp; a clean cut helps retain juices on every slice.
Common Mistakes and How to Fix Them
Common errors with beef tenderloin in the oven include overcooking, under-seasoning, and skipping resting time. Overcooking dries the meat; avoid it by pulling temperatures early and letting carryover finish the job. Under-seasoning dulls the flavor of the lean roast, so salt generously and consider a finishing brush of herbed butter. Another pitfall is removing the meat immediately after roasting; resting is essential. If the loin is unevenly thick, adjust with a gentle re-truss or tie to create uniform heat distribution. Finally, avoid crowding the pan; give the roast space so all sides brown evenly.
Flavor Variations and Sauces
Herb butter, garlic butter, or a simple pan sauce can elevate the beef tenderloin. Try a compound butter by blending unsalted butter with minced garlic, chopped parsley, and lemon zest; smear a dollop on the carved slices. For a richer finish, reduce red wine with shallots and a splash of beef stock to create a glossy sauce. A mushroom glaze adds depth; sauté mushrooms until browned, then whisk in a little cream or stock. Keep the sauce warm so it’s ready at carving time.
Make-Ahead and Storage Tips
You can prepare components ahead: tie the loin, season, and refrigerate for several hours before roasting, which can even improve flavor as the seasonings permeate the meat. Leftovers store well in an airtight container for up to 3–4 days in the fridge; freeze for longer storage. Reheat gently in a low oven, covered, to preserve moisture. Reclaim juices by simmering in a small pan and adding a splash of stock to loosen up any brown bits. When reheating, cover the tenderloin so it doesn’t dry out and serve with a fresh spoon of warm sauce to bring back moisture.
Tools & Materials
- Beef tenderloin (center-cut, 4–6 lb)(Choose uniform thickness for even cooking)
- Kosher salt(Generous seasoning for crust and juiciness)
- Freshly ground black pepper(Coarse grind preferred)
- Extra-virgin olive oil(Light coat for searing and moisture)
- Fresh garlic (optional)(For aromatics in oil)
- Fresh herbs (rosemary or thyme, optional)(Tie with twine if used)
- Kitchen twine(For tying the roast into a uniform cylinder)
- Heavy skillet for searing (optional)(Prefer cast iron; used if searing)
- Roasting pan with rack(Elevates roast and promotes even browning)
- Meat thermometer(Monitor internal temp precisely)
- Aluminum foil(For tenting during rest)
Steps
Estimated time: 60-75 minutes
- 1
Preheat and prep
Preheat oven to 425°F (218°C) and line a roasting pan with a rack. Gather tools and ingredients so everything is ready for the roast. Keeping the environment organized reduces errors later.
Tip: Preheating ensures even heat transfer for a reliable crust. - 2
Trim and tie the loin
Remove silver skin and excess fat. If needed, tie every 1 inch to create a uniform cylinder for even cooking.
Tip: A uniform shape reduces hot spots and undercooked centers. - 3
Season and oil
Pat dry, rub with oil, and season generously with salt and pepper. Add minced garlic/herbs if using.
Tip: Dry surface improves browning; oil helps the crust form. - 4
Sear (optional)
Heat a heavy skillet over high heat and sear the roast on all sides for 2–4 minutes per side until browned.
Tip: Do not crowd the pan; work in batches if needed. - 5
Roast to target temp
Transfer to the oven and roast until the thermometer reads 120–125°F (rare) to 130–135°F (medium-rare). Carryover heat will finish the job after removal.
Tip: Check thermometer frequently as you near the target. - 6
Rest and carve
Tent with foil and rest 15–20 minutes before carving. Slice against the grain for tender portions.
Tip: Resting preserves juices for juicy slices.
Questions & Answers
What is the best oven temperature for beef tenderloin?
A common approach is 425°F to start, then finish to the desired internal temperature with a thermometer. Adjust time based on the roast size and thickness.
Start at four twenty-five in the oven, then monitor the internal temperature to finish as you prefer.
Should I trim silver skin before roasting?
Yes. Trimming helps the seasoning penetrate and prevents tough bites. Tie the roast if needed for even cooking.
Yes, trim the silver skin for a better bite and even cooking.
Is searing before roasting necessary?
Searing adds crust and flavor but is optional. If you skip it, you’ll still achieve a good crust from high-heat roasting.
Searing is optional but adds flavor; you can skip it if you prefer.
How long should beef tenderloin rest after roasting?
Rest for 15–20 minutes to redistribute juices. This step is essential for juicy, evenly sliced meat.
Rest it for about 15 to 20 minutes before carving.
Can I roast from frozen?
Roasting from frozen is not recommended because it leads to uneven cooking and undercooked centers. Thaw for best results.
Thaw the meat for even cooking; roasting from frozen isn’t ideal.
Watch Video
Main Points
- Choose a center-cut loin for even cooking.
- Use a thermometer to hit your target doneness.
- Rest the roast 15–20 minutes before carving.
- Sear for crust or skip—both work with temperature control.
- Serve with herb butter or a simple pan sauce.