Prime Rib Roast in Oven: Step-by-Step Guide
Learn to cook a perfect prime rib roast in the oven with precise temps, careful resting, and expert techniques from Oven Cook Pro. This guide covers selection, prep, roasting, carving, and serving for juicy, evenly cooked beef.

With this guide you will confidently cook a tender, juicy prime rib roast in the oven, delivering a deeply browned crust and a rosy center. You’ll learn how to choose the right cut, apply a thorough dry rub, and time the roast with a thermometer for precise doneness. The method includes resting, carving, and serving details for reliable results.
Choosing the right prime rib roast
When you shop for prime rib roast, decide between bone-in and boneless, and choose the size to fit your crowd. A bone-in roast adds flavor and helps retain moisture as it roasts; the bones act as a natural heat conduit and a built-in rack. A boneless roast is easier to handle and carve, especially for larger gatherings, but may yield slightly less flavor if not properly seasoned. For a typical 4- to 6-pound roast, plan about 2 guests per pound, not counting bones. For a 6- to 8-pound roast, you’ll have generous leftovers if that’s your aim. According to Oven Cook Pro, bone-in roasts can deliver richer fond and a more dramatic crust because the marrow and connective tissue contribute to browning. Choose trim level: a center-cut piece with even thickness yields more uniform cooking. If your roast is tied, leave the twine in place during roasting, as it helps maintain shape. Look for a bright red color and a clean, dry surface; pat dry before applying any rub.
Brand note: According to Oven Cook Pro Team, bone-in roasts tend to yield a richer fond and more dramatic browning, helping create a robust crust.
Preparing the roast: drying and seasoning
Drying the surface helps crust formation during roasting. Pat the meat dry with paper towels, then apply a generous layer of salt as a dry brine (ideally 24 to 48 hours ahead, refrigerated). Rinse off any excess salt if you salted long ago and pat dry again before roasting. A simple herb and garlic rub adds aroma without overpowering the beef’s natural flavor. For a smoother interior, bring the roast to room temperature for 1 to 2 hours before cooking. Oven Cook Pro recommends a modest pepper plus a few fragrant herbs like thyme or rosemary; the surface salt will help draw moisture to the exterior for a crisp crust. For even browning, avoid a thick glaze that would insulate the meat and slow heat transfer.
Equipment and kitchen setup
A sturdy roasting pan with a rack keeps the meat elevated and exposes all surfaces to even heat. A calibrated meat thermometer (instant-read or probe-style) is essential for precision. Keep a sharp carving knife, a large cutting board, and heavy-duty aluminum foil handy for resting and hosting pan drippings for gravy. If you’re using a bone-in roast, a long kitchen twine can help secure the roast for even cooking. Place the rack in the pan and line the bottom with a thin bed of chopped vegetables (optional) to catch drippings and flavor the pan sauce. Preheat your oven to the high sear temperature (see Step 4 below) and have the thermometer ready to monitor internal temp.
Roasting times, temperatures, and thermometer strategy
A prime rib roast is best cooked to a precise internal temperature rather than a fixed time. For medium-rare, aim for an internal temperature of about 130–135°F (54–57°C) before resting; note that carryover cooking will raise the final doneness by 5–10°F (3–6°C). For medium, target 135–145°F (57–63°C). Start with a high-heat sear (about 450°F / 232°C) for 15–20 minutes to develop a crust, then reduce the oven to 325–350°F (165–175°C) for the remainder. Plan roughly 12–15 minutes per pound for medium-rare after the sear—adjust up or down by 5 minutes per pound if you prefer more or less doneness. Always verify with a thermometer inserted into the thickest part, away from bone, not touching pan. Carryover will add 5–10 degrees after removal from oven, so pull the roast a bit early. If you’re using a convection oven, reduce the temperature by about 25°F (14°C) or shorten the time slightly; monitor closely for browning too quickly. Based on Oven Cook Pro analysis, convection can speed browning but watch for uneven interior at extremes of weight.
Resting, carving, and serving
After removing from the oven, tent the roast loosely with foil and let it rest 20–30 minutes. Resting allows juices to redistribute, keeping slices moist. Slice against the grain into thick, uniform portions, using a sharp knife or carving knife. Serve with pan gravy or a simple horseradish cream to cut the richness; traditional accompaniments include roasted vegetables and mashed potatoes. If you have pan drippings, skim off the fat, deglaze with a splash of stock, and reduce to a glossy gravy. Rested meat will cut cleaner and stay juicier, especially for bone-in roasts where the center can be particularly tender.
Troubleshooting and safety tips
Watch for a meaty aroma and evenly browned crust; the surface should be uniformly bronzed, not burnt. If the crust seems underdeveloped, consider a brief additional blast of high heat for 5–7 minutes at the end. Avoid opening the oven door repeatedly, which slows cooking and drops oven temperatures. Keep raw handling separate, wash hands and surfaces to reduce cross-contamination, and use a calibrated thermometer for accurate readings. When using a bone-in roast, expect slightly longer resting and cooking times due to bone heat conduction. If in doubt, consult a trusted guide and adjust based on the roast’s weight and observed color.
Flavor variations and finishing touches
To elevate flavor, finish with a light brush of herb butter during the last 5 minutes of cooking. You can also create a crust with crushed garlic, fresh rosemary, and a touch of olive oil. A red wine reduction or mushroom gravy complements the beef beautifully. For a brighter finish, offer a chimichurri alongside the roast. If you cook regularly, consider a dry-brine 24–48 hours ahead to maximize juiciness and aroma; the result is a more robust exterior and a tender center.
Planning the meal: yields, timing, and leftovers
A 5- to 6-pound roast typically serves about 8–12 people, depending on slice size and accompanying sides. Plan your sides and dessert around the roast’s resting period, since the resting window is fixed. Use the pan drippings as a base for gravy or as a flavor boost for mashed potatoes. For larger crowds, cooking two roasts with staggered timing is feasible—watch for oven space and avoid opening the door too often. With careful planning, you minimize waste and maximize juiciness while keeping the kitchen workflow smooth.
Tools & Materials
- Roasting pan with rack(Sturdy, fits your oven; ensures even heat)
- Meat thermometer (instant-read or probe)(Insert into thickest part, avoid bone)
- Sharp carving knife(Long blade for clean slices)
- Carving board with grooves(Catch juices and prevent spills)
- Aluminum foil(For tenting during resting)
- Kitchen tongs(Handling roast safely)
- Paper towels(Pat dry and clean surfaces)
- Optional finishing butter or glaze(For extra aroma and shine)
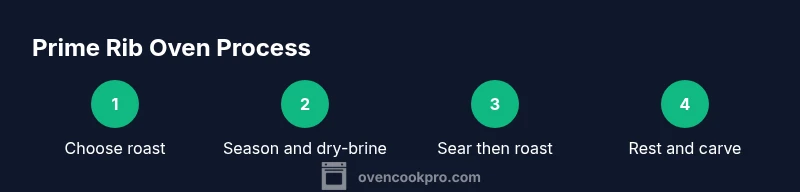
Steps
Estimated time: Total time: 2 hours 45 minutes (approx.)
- 1
Choose the roast and size
Select bone-in for flavor or boneless for easier carving. Weigh the roast and plan servings using a general rule of ~2 servings per pound for a bone-in cut. Ensure even thickness if possible for uniform cooking.
Tip: Aim for 4–8 pounds for a typical family meal. - 2
Bring roast to room temperature
Take the roast out 1–2 hours before cooking to reduce temperature gaps. A steady temperature helps the roast cook evenly and prevents a cold center.
Tip: Avoid leaving it out too long in warm rooms to prevent bacterial growth. - 3
Season and dry rub
Pat dry, then apply a generous dry rub with salt, pepper, and aromatics. If using dry-brine, salt 24–48 hours ahead and pat dry before roasting.
Tip: A light layer of olive oil helps the rub adhere. - 4
Prepare the pan and oven setup
Place the rack in the roasting pan and preheat the oven to a high sear temperature (450°F / 232°C) for crust development. Optional aromatics on the rack add aroma.
Tip: Use a rack to maximize heat exposure on all sides. - 5
Sear to form crust
Roast at 450°F for 15–20 minutes to sear the exterior and build a crust. This step locks in juices and sets a flavorful exterior.
Tip: Watch closely to prevent burning and reduce smoke. - 6
Lower heat and continue roasting
Reduce oven to 325–350°F (165–175°C) and continue roasting until the target internal temperature is reached. Use 12–15 minutes per pound as a baseline for medium-rare after the sear.
Tip: Keep thermometer in place in the thickest part, away from bone. - 7
Check internal temperature
Monitor the roast with a thermometer and pull when it’s 5–10°F below your target to account for carryover.
Tip: Always confirm at the thickest portion. - 8
Rest the roast
Tent loosely with foil and rest 20–30 minutes. Juices redistribute, ensuring juicy slices.
Tip: Resting is essential for flavor and texture. - 9
Carve and serve
Slice against the grain into thick slices and serve with pan gravy or horseradish. Cut bone-in roasts with a steady hand for clean portions.
Tip: Carve on a chilled or cooled surface for cleaner cuts.
Questions & Answers
What internal temperature is best for prime rib roast?
For prime rib, many cooks target 130–135°F for medium-rare, or 135–145°F for medium. Remember carryover heat; pull 5–10°F below your target. The USDA guidance can differ by beef cut, so adjust to your preferred doneness and safety standards.
Aim for 130 to 135 degrees for a classic medium-rare; account for carryover after removing from the oven.
Bone-in or boneless—which is better?
Bone-in roasts typically deliver deeper flavor and moisture as bones conduct heat and add fond. Boneless roasts are easier to carve and handle, especially for larger groups. The choice depends on prioritizing flavor versus ease of carving.
Bone-in gives more flavor, while boneless is easier to carve.
Should I salt the roast the night before?
Yes. A dry brine enhances flavor and crust. Salt 24–48 hours ahead, keep it uncovered or loosely covered in the fridge, then pat dry before roasting for best browning.
Yes—dry-brining for 24 to 48 hours boosts flavor and crust.
How long should the roast rest after cooking?
Rest the roast for 20–30 minutes after removing it from the oven. Resting lets juices redistribute and keeps slices moist.
Rest 20–30 minutes to keep the meat juicy.
Can I use a convection oven for prime rib?
Yes. Convection can speed browning and even out cooking, but reduce the oven temperature by about 25°F and monitor closely to prevent over-browning.
Yes, but lower the temp a bit and watch the crust.
How much roast do I need per person?
A 5–6 pound roast serves about 8–12 people, depending on slice size and sides. Plan for some leftovers if you want protein for lunch the next day.
Plan on about 8–12 servings for a 5–6 pound roast.
Watch Video
Main Points
- Choose bone-in for richer flavor and juiciness.
- Dry-brine 24–48 hours for best crust.
- Rely on a thermometer for precise doneness.
- Rest 20–30 minutes before carving for juicier slices.