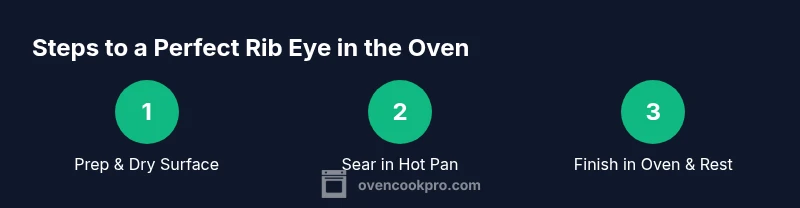
How to Cook Rib Eye in the Oven: A Step-by-Step Guide
Master the oven-cooked rib eye with a perfect crust and juicy center. This educational guide covers selection, prep, searing, oven finishing, resting, and serving, with tips from Oven Cook Pro.

Goal: Learn how to cook a rib eye in the oven to a perfect sear and juicy, evenly cooked center. Start with a well-marbled steak, pat dry, and season generously. Sear in a hot skillet, then finish in a hot oven until the inside reaches your desired doneness. Rest before slicing. According to Oven Cook Pro, this method balances crust formation with precise temperature control.
How to cook rib eye in the oven: Why the oven works for this cut
The oven delivers reliable, even heat that helps a thick rib eye cook through without choking on hot spots. When you learn how to cook rib eye in the oven, you gain consistency across thicker cuts and better control of doneness. According to Oven Cook Pro, finishing with a high-heat sear followed by a short bake creates a crusty exterior while preserving a juicy interior. The dry-heat environment also supports browning reactions that develop complex flavors. Practically, you start with a well-marbled rib eye, pat it dry to remove surface moisture, and season generously to build a robust crust from the first bite. This approach scales with thickness and works well with butter-baste finishes and herb oils for added aroma. If you’re cooking for guests, the oven method reduces guesswork and yields repeatable results, especially when you monitor temp closely with a thermometer.
In this guide, you’ll see how marbling, temperature, and resting interplay to deliver a steak that’s crusty on the outside and tender inside. You’ll also learn practical timings, tool choices, and common mistakes to avoid, all tailored for home cooks who want reliable, restaurant-like results.
Selecting the Right Rib Eye: Marbling, Thickness, and Prep
For best results, choose a rib eye with visible marbling—the small streaks of fat within the muscle. Marbling translates to more flavor and a juicier finish once the cut is cooked. Thickness matters: cuts around 1 to 1.5 inches cook more predictably in the oven, while thicker roasts demand longer sear times and careful temperature management. Look for a uniformly shaped steak to ensure even cooking. When you can’t find the exact thickness you want, adjust cooking times slightly and rely on a reliable thermometer rather than guessing. The Oven Cook Pro team notes that thicker cuts benefit most from a two-stage approach: a fast sear to set the crust, followed by an oven finish to bring the interior to a safe, delicious temperature. This section also covers how to identify if your rib eye is ready for searing and what to do if you’re starting with a slightly chilled steak.
Additionally, consider whether you want to season before or after the sear. Some cooks salt early to draw moisture and create a deeper crust, while others salt just before searing to keep the surface dry and focused on browning. The key is to minimize surface moisture before the hot pan hits the meat, which helps develop a robust crust.
Getting the Steak Ready: Room Temperature, Pat Dry, Seasoning
Preparation is the quiet hero of a perfect oven-cooked rib eye. Remove the steak from the fridge about 30 to 60 minutes before cooking so it comes closer to room temperature. This helps the interior cook more evenly instead of remaining cold in the center. Pat the surface dry with paper towels to remove any moisture that could steam rather than sear. Generously season with salt and pepper, and consider adding optional aromatics like garlic or fresh herbs for an extra layer of aroma. If you’re using butter or a finishing oil, keep it separate until after searing to avoid washing away the crust. Remember, the goal is a dry, seasoned surface that browns quickly when it meets the hot pan. This step sets up the Maillard reaction that creates the crust you expect from a good rib eye.
As you season, keep in mind that thinner cuts may benefit from slightly lighter salt, while thicker ones tolerate a bolder salt crust. The timing of salting can vary based on the salt type and thickness of the steak. The Oven Cook Pro guidance emphasizes consistency in surface condition—dry, seasoned skin is essential for crust development and even browning as the steak transitions from stove to oven.
Tools and Setup: The Right Pan, Thermometer, and Rack
A sturdy, oven-safe skillet—ideally cast iron—provides the best balance of heat retention and crust formation. Preheating the pan ensures a rapid initial sear that locks in juices. Have an accurate meat thermometer or an wired probe to monitor doneness without guessing. A wire rack placed on a rimmed baking sheet elevates the steak so heat circulates around it, promoting even cooking. Don’t forget tongs for flipping, a thick oven mitt, and a timer. While salt and pepper are universal, optional aromatics like garlic cloves or fresh thyme can be added near the end for fragrance. With the right tools, you’ll achieve a crusty exterior and a properly heated interior in a predictable sequence. This setup also makes it easier to baste the steak with any butter or oil you choose during finishing.
If you prefer not to use a rack, a heavy sheet pan works, but you may need to rotate the steak for even contact with the surface. The key is to keep the surface dry and the steak elevated enough to avoid pooling juices underneath.
The Sear-Then-Oven Method: Step-by-Step Overview
This method pairs a high-heat sear in a hot skillet with a precise oven finish to finish the cook. Start by heating your skillet with a small amount of high smoke point oil until the surface shimmers and begins to smoke slightly. Sear the steak for 1 to 2 minutes per side without moving it, allowing a deep crust to form. After searing, transfer the pan to a preheated oven and bake until the steak reaches the target internal temperature. If your oven has a convection setting, you can use it to promote even browning, but monitor closely to avoid over-browning the crust. The exact times depend on thickness, thickness, and your preferred doneness. Use the thermometer to confirm when the interior hits your goal. When you pull the steak, let it rest on a cutting board for several minutes before slicing. The contrast between a crust and a warm center is what makes this technique appealing to home cooks and pros alike.
If you don’t have a cast-iron skillet, a heavy stainless-steel pan can work, but you may need to adjust heat to avoid scorching. The essence of the approach is simple: create a crust, then finish cooking with controlled, ambient heat. For best results, consider using a small amount of butter or oil to baste at the end to add richness and gloss to the crust.
Oven Temperature, Doneness, and Timing Guidance
Temperature control is the backbone of a reliable oven finish. A hot oven around 425–450°F (218–232°C) is common for finishing, but you’ll want to tailor this to your steak thickness and oven performance. Thick steaks may benefit from starting with a higher sear, then dropping to a slightly lower finish temperature to avoid overcooking the outside. Doneness levels are best gauged with a thermometer rather than relying on time alone. A rough guide is 120–125°F (49–52°C) for rare, 130–135°F (54–57°C) for medium-rare, and 140–145°F (60–63°C) for medium, with residual heat pushing the final temp a few degrees as the meat rests. Resting after cooking allows juices to redistribute, helping the meat stay moist when sliced. The Oven Cook Pro approach stresses thermometer-based accuracy and calibrated timing to avoid overcooking, especially with more expensive cuts like rib eye.
If you prefer no thermometer, you can use finger test methods as a supplementary guide, but the thermometer remains the most reliable method for achieving consistent results across multiple cooks.
Resting and Serving: Why It Matters
Resting is not optional—it’s essential to a juicy rib eye. After removing the steak from the oven, tent it loosely with foil and let it rest for 5–10 minutes. This pause lets the juices reabsorb and the muscle fibers relax, resulting in a cleaner slice and a more even distribution of flavor. While resting, you can glaze the plate with a little melted butter or herbs for aroma without saturating the surface. Slice against the grain for maximum tenderness and accuracy in portioning. If you’ve let the steak rest too long, the cut may cool a bit; in that case, a quick rewarm of the edges can help restore warmth.
The timing of resting is as important as the cook itself. Resting too little can leave juices on the cutting board, while resting too long can drop the temperature too much. A short, deliberate rest is the sweet spot for rib eye prepared in the oven.
Common Mistakes and How to Fix Them
Rushing the sear, overcrowding the pan, or patting the surface dry too aggressively can derail a perfect rib eye in the oven. Ensure the pan is hot enough before the steak meets the surface to prevent sticking and to form a crust quickly. Avoid crowding the pan—give each steak space for heat to circulate. If the surface looks pale, allow a longer sear in small increments rather than rushing the process. Also, salt early enough to draw out surface moisture and then pat dry again for a better crust. If you’re using convection, reduce the oven temperature slightly to prevent over-browning. Always rely on a thermometer for doneness rather than time alone, especially with thicker cuts. The goal is a crusty exterior with a uniformly cooked interior, not an overdone outer layer paired with an underdone center. Following these steps and avoiding the common missteps will yield a satisfying rib eye every time.
Oven Cook Pro's Verdict and Practical Tips
The Oven Cook Pro team recommends embracing a two-stage approach: sear hot for crust formation, then finish with controlled oven heat for even doneness. This method reduces the risk of undercooked centers and overly charred exteriors. Practical tips include preheating your pan, patting the meat dry, and using a reliable thermometer to hit your target temperature with confidence. Oven Cook Pro Analysis, 2026 emphasizes consistency and patience over guessing, especially for rib eye where marbling demands careful heat management. If you want to push flavor further, finish with a tablespoon of herb butter during the last minute of oven time or baste with a garlic-infused oil to deepen aroma without overpowering the beef’s natural taste.
Conclusion: Bringing It All Together
In sum, mastering how to cook rib eye in the oven combines thoughtful preparation, precise searing, and careful oven finishing. The result is a crusty exterior with a juicy, evenly cooked interior. By selecting the right rib eye, preparing it properly, and using accurate temperature control, you can replicate a restaurant-style finish at home. The Oven Cook Pro team’s practical approach centers on consistent technique and thermometer-guided doneness, ensuring reliable outcomes in every kitchen.
Tools & Materials
- Cast-iron skillet (preheated)(Heavy skillet preferred for even browning)
- Oven-safe meat thermometer or wired probe(Monitor internal temp precisely)
- Tongs(For flipping without piercing the meat)
- Rimmed baking sheet and optional wire rack(Elevates steak for even heat circulation)
- Paper towels(Pat surface dry before seasoning)
- Salt and pepper(Season generously for crust)
- Optional aromatics (garlic, thyme/rosemary)(Add for aroma if desired)
- Butter or finishing oil(For basting and flavor at the end)
Steps
Estimated time: Total time: 25-40 minutes
- 1
Prepare the steak
Take the rib eye out of the fridge 30–60 minutes before cooking to help even cooking. Pat dry thoroughly, then season generously with salt and pepper. If using aromatics, apply them now for subtle flavor infusions. This step builds a rugged surface ready for a crust.
Tip: Salt the surface early to promote a deeper crust; pat dry again if moisture appears. - 2
Preheat and prep the pan
Preheat your skillet on medium-high heat until it just begins to shimmer. Add a small amount of high-smoke-point oil before laying the steak in. The pan should be hot enough to sear; you should hear a distinct sizzle when the meat contacts the surface.
Tip: A hot pan is essential for crust formation; don’t rush the sear by lowering the heat. - 3
Sear the steak
Sear each side for 1–2 minutes without moving the meat to form a deep crust. Don’t crowd the pan; if you’re cooking multiple steaks, do them in batches. If using butter, add during the last 30 seconds of searing for extra flavor.
Tip: Resist the urge to flip early; the crust needs time to set before lifting the steak. - 4
Finish in the oven
Transfer the skillet or move the steak to a preheated oven (425–450°F / 218–232°C). Bake until the internal temperature nears your target, then check with a thermometer. For thicker cuts, this stage may take longer; rely on temp rather than time alone.
Tip: If using convection, reduce oven temperature by about 25°F (14°C) to prevent over-browning. - 5
Rest and slice
Remove the steak from the heat and rest 5–10 minutes tented loosely with foil. Slice against the grain to maximize tenderness. If desired, spoon any pan juices over the slices for extra moisture and flavor.
Tip: Resting is crucial for juiciness; skipping this step makes the meat seem tougher.
Questions & Answers
What thickness is ideal for oven-cooked rib eye?
Rib eyes around 1 to 1.5 inches thick cook most predictably in the oven. Thicker cuts require longer searing and careful temperature control to avoid an over-charred crust while the interior finishes evenly.
For oven cooking, aim for a thickness around one to one and a half inches to balance crust and doneness. Thicker cuts need more careful timing and temperature control.
Should I sear before finishing in the oven?
Yes. Searing builds a flavorful crust and helps seal juices. Finish in the oven to bring the interior up to the desired temperature with even doneness.
Yes. Sear first to develop crust, then finish in the oven to reach the right doneness inside.
Can I cook rib eye from frozen in the oven?
Cooking from frozen is not recommended for rib eye. Thaw the steak properly to ensure even cooking and a proper crust.
No, it’s best to thaw the steak first; cooking from frozen can lead to uneven doneness and a poor crust.
What internal temperature signals doneness?
Use a thermometer: rare 120–125°F, medium-rare 130–135°F, medium 140–145°F. Remember that carryover cooking will raise the temp a few degrees after you remove it from the oven.
Check the thermometer: 120–125 for rare, 130–135 for medium-rare, 140–145 for medium, then rest to finish.
Is convection worth using for this?
Convection can help crust formation, but may dry out the surface if used at too high a temperature or for too long. If you use it, reduce oven temp slightly and keep a close eye on doneness.
Convection helps browning, but watch temps and times to avoid overdrying. Reduce heat a bit if using it.
How long should I rest after cooking?
Rest the rib eye for 5–10 minutes after removing from the oven. This allows the juices to redistribute and improves tenderness.
Rest 5 to 10 minutes to let the juices redistribute and keep the steak juicy.
Watch Video
Main Points
- Choose rib eye with visible marbling for flavor and juiciness
- Let steak come to room temperature before cooking
- Sear, then finish in a hot oven for crust and juicy center
- Monitor internal temperature with a thermometer
- Rest 5–10 minutes before slicing to retain juices