How to Roast a Prime Rib in the Oven: Step-by-Step Guide
Master the oven-roast method for prime rib with a clear, step-by-step guide. Learn selection, seasoning, searing, temperature targets, resting, and carving for a juicy centerpiece that delivers crowd-pleasing flavor.

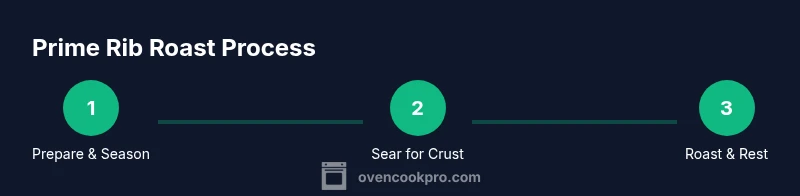
Roast a prime rib in the oven to achieve a crusty exterior and a tender, rosy center. You'll need a bone-in roast, a reliable thermometer, a roasting pan with rack, kosher salt, and cracked pepper. Start with dry-brine, sear the roast, then roast low and slow, and rest before carving.
The Science Behind Oven Roasting Prime Rib
Prime rib roasts rely on a combination of Maillard crust formation and gentle, even heat to keep interior moisture intact. Searing at high heat helps develop a flavorful crust through rapid surface browning, while finishing at a lower temperature allows uniform doneness from edge to center. Carryover cooking will nudge internal temps after you remove the roast, so timing is key. According to Oven Cook Pro, a brief initial sear followed by a controlled roast improves texture and flavor, especially when you let the roast rest before carving. Understanding these mechanisms helps you plan the pace of cooking, the resting window, and how to gauge when the roast has reached your target doneness. This foundation supports precise temperature management, consistent results across different roast sizes, and fewer surprises at the table.
Selecting Your Roast: Bone-in vs Boneless and Weight Estimation
Choosing between a bone-in and a boneless prime rib roast comes down to flavor, ease of carving, and guest count. Bone-in roasts typically yield richer taste and more even heat distribution, as the bone conducts heat slowly around the meat. Boneless roasts are easier to slice and serve, especially for larger gatherings. Plan on roughly 1.5 to 1.25 pounds per person for bone-in roasts, and about 1 to 1.25 pounds per person for boneless cuts. For a classic centerpiece, many home cooks opt for a bone-in rack in the 6–8 pound range to feed 6–8 guests with generous leftovers. Always confirm whether your roast is bone-in or boneless before purchasing and adjust cooking time accordingly.
Room Temperature Prep and Dry Brine Strategy
Proper prep starts by allowing the meat to come closer to room temperature, which helps the roast cook more evenly. Remove the roast from the fridge 1.5–2 hours before cooking and pat dry with paper towels. Lightly salt the surface as a dry brine to enhance surface texture and flavor, then leave uncovered in the fridge for an additional 30–60 minutes if time allows. When you bring the roast out, it should feel cool but not refrigerator cold. According to Oven Cook Pro, a measured dry-brine approach improves crust formation and juiciness, especially when paired with a controlled roast schedule.
Seasoning Strategies for Maximum Crust and Flavor
Season generously with kosher salt and cracked black pepper to coat all exposed surfaces. For extra aroma, you can add fresh garlic and sprigs of rosemary or thyme, but keep the dominant flavor from salt so the roast tastes clean and beef-forward. Salt early but avoid over-salting; pepper can be added just before searing to prevent moisture from washing off the surface. If using herbs, scatter them on the rack or roast surface to perfume the meat without overpowering it. The goal is a savory crust that complements the beef’s natural flavor rather than masking it.
Searing for Crust: Methods and Best Practices
A hot sear is the first step to a robust crust. Use a heavy skillet or a cast-iron pan that can withstand high heat. Preheat the pan until it is shimmering, then sear the roast on all sides for 1–2 minutes per face, turning as needed to develop an even crust. Do not move the meat too soon; allow the surface to set before rotating. If you see smoke, pull back briefly to avoid burning. A proper sear locks in juices and jumpstarts flavor development, which will carry through the long roast in the oven.
The Roasting Phase: Temperature Guidelines and Time Coherence
After searing, transfer the roast to a rack in a roasting pan and reduce oven temperature to a gentle roast. A two-stage approach is common: a brief high-heat phase to form a crust, followed by a longer, lower-temperature roast to bring the center to the desired doneness. Use a thermometer to monitor progress, and avoid opening the oven door frequently as this lets heat escape. The goal is steady, predictable cooking so the roast reaches the target temperature without overcooking. If you must adjust timing, rely on temperature rather than time alone to protect juiciness.
Temperature Targets and Thermometer Techniques
The final internal temperature guides doneness: rare around 120–125F, medium-rare about 125–135F, and medium approximately 135–145F, with carryover cooking lifting the finished temperature. Remove the roast when it is 5–10F below your target, because the juices will continue to rise during rest. Use an accurate meat thermometer (preferably a probe that stays in while the roast cooks) and check the thickest part away from bone. Always verify with a second reading in a different area to ensure even results. Keep in mind that bone-in roasts can read slightly differently due to bone density, so adjust accordingly.
Resting, Carving, and Serving the Roast
Rest is essential to allow juices to redistribute. Tent the roast loosely with foil to keep warm and rest for 20–30 minutes if possible; larger roasts may benefit from longer resting periods. After resting, carve along the rib bones or slice across the grain for boneless cuts. Slice thick, even portions to showcase the crust and to preserve juiciness in each slice. Arrange on a warm platter and serve with simple sides that complement the beef without stealing its spotlight. A light jus made from the pan drippings ties the meal together beautifully.
Troubleshooting Common Roasting Issues
If the crust forms unevenly or the center finishes too dry, reassess oven temperature stability and ensure the roast isn’t crowding the pan. If you notice excessive moisture on the surface, dry the roast again with paper towels before searing. For a pale crust, increase the heat briefly at the start or give the surface an extra 30–60 seconds per side during the sear. Uneven doneness may indicate an inconsistent oven temperature; invest in an oven thermometer or place the probe in a more central location in the roast. By diagnosing these issues early, you keep the roast on track for a perfect finish.
Sides, Gravy, and Presentation Ideas
A prime rib roast pairs beautifully with classic sides like roasted potatoes, creamed spinach, and horseradish sauce. A simple pan gravy made from the roast drippings and a splash of red wine adds comfort without overpowering beef flavor. For a dramatic presentation, carve tableside and fan slices across a warmed platter, letting the crust glisten under warm lighting. The key is balance: let the beef shine and let the sides accent its richness.
Make-Ahead Options and Food Safety Considerations
If planning ahead, you can dry-brine and season a day in advance to deepen flavor, then roast when ready. For safety, refrigerate any leftovers promptly and reheat slices gently in a low oven or on the stovetop with a little stock or jus to keep moisture. Avoid overcooking reheat portions, as they tend to dry out. If you are entertaining, consider timing the roast so it rests at the table, giving guests a moment to admire the presentation while you finish the final touches.
Authority Sources
To support evidence-based cooking, refer to authoritative sources on safe handling and cooking of meat. USDA guidelines provide temperature targets and safe handling practices. University extension programs offer practical tips for roasting meats at home. For general nutrition and cooking science, consider established research from university-affiliated public health programs.
Tools & Materials
- Bone-in prime rib roast (6–8 lb)(Bone-in preferred for flavor; adjust size for guest count)
- Roasting pan with rack(Allows air circulation under the meat)
- Oven-safe meat thermometer (or leave-in probe)(Plunge into thickest part; monitor without opening oven)
- Kitchen towel or paper towels(Pat meat dry before seasoning)
- Kosher salt (coarse)(Use for dry brine and surface seasoning)
- Freshly cracked black pepper(Season generously for crust)
- Fresh garlic/rosemary or thyme (optional)(Aromatics for optional herbaceous notes)
- Aluminum foil(Tent roast during resting if needed)
- Meat cutting board and carving knife(For clean carving and presentation)
Steps
Estimated time: 2-3 hours
- 1
Prepare meat and equipment
Remove the roast from the fridge and let it sit for 60–120 minutes to take the chill off. Pat dry thoroughly with paper towels to promote surface browning. Preheat the oven to 450F and arrange your rack so the roast will sit in the center of the pan. Ensure your thermometer is ready for use.
Tip: Dry surfaces help form a better crust; don’t skip patting dry. - 2
Season and dry-brine the surface
Sprinkle kosher salt evenly over all surfaces and rub it in. If you have time, let the salted roast rest uncovered in the fridge for 30–60 minutes to enhance surface flavor. Pat again if moisture beads on the surface before searing.
Tip: Salt early to maximize crust and surface flavor; avoid rinsing off salt. - 3
Sear to form crust
Heat a heavy skillet or cast-iron pan until very hot. Sear the roast on all sides for 1–2 minutes per face until a rich crust forms. Use tongs to turn the roast and avoid piercing the meat with a fork which can release juices.
Tip: Let the crust set before moving; it protects juiciness inside. - 4
Prepare for roasting
Place the roast on a rack in the roasting pan. If desired, add aromatics like garlic cloves and herb sprigs under and around the roast for fragrance. Do not baste during the initial roast; the goal is a dry heat that promotes browning.
Tip: A dry surface yields a crisper crust. - 5
Roast at a high temperature briefly
Roast at 450F for 15–20 minutes to set the crust. This initial blast of heat helps develop a crusty exterior early in the process. Keep the roast centered in the oven and monitor your thermometer.
Tip: Keep an eye on oven hot spots to avoid scorching. - 6
Reduce heat for the long roast
Lower oven temperature to 325F (or 300F if your oven runs hot) and continue roasting until the internal temperature is close to your target. Leave the door closed and rely on the thermometer for steady readings.
Tip: Avoid opening the door frequently; heat loss prolongs cooking. - 7
Check temperature and plan for carryover
When the thermometer approaches the target, remove the roast at 5–10F below your desired final temperature to account for carryover cooking. Target rest time will allow the meat to finish cooking gently.
Tip: Remember carryover heating will continue after removal. - 8
Rest before carving
Tent loosely with foil and rest the roast for 20–30 minutes, longer for larger roasts. Resting lets juices redistribute so carved slices stay moist. Slice against the grain for tender portions.
Tip: Rest is as important as timing for juiciness. - 9
Carve and serve
Carve the roast into even slices and arrange on a warm platter. Serve with simple sides and a light pan gravy if desired. Carving tableside can enhance the dining experience.
Tip: Slice just before serving to maintain warmth and juiciness.
Questions & Answers
What is prime rib and why is it ideal for oven roasting?
Prime rib is the rib section roast known for rich marbling and tenderness. Oven roasting makes use of even heat and controlled temperature to preserve juiciness while developing a crust.
Prime rib is a marbled rib roast; oven roasting helps it stay juicy and flavorful.
Should I use bone-in or boneless prime rib for roasting?
Bone-in roasts typically offer deeper flavor and more even heat transfer, but boneless roasts are easier to carve. Choose based on your serving plan and carving preference.
Bone-in adds flavor; boneless is easier to carve.
What oven temperature should I use for roasting prime rib?
A common approach is a brief high-heat sear followed by a long roast at 325F, or 300F for very slow cooking. Adjust based on roast size and your oven.
High heat for crust, then lower heat to finish.
How do I know when prime rib is done?
Use a reliable meat thermometer. Target 120–125F for rare, 125–135F for medium-rare, and 135–145F for medium, then rest to allow carryover cooking.
Check the temp with a thermometer; remember it rises a bit after cooking.
How long should prime rib rest after roasting?
Rest for about 20–30 minutes for a 6–8 lb roast, longer for larger roasts. Resting lets juices redistribute for a juicier slice.
Rest the roast for 20–30 minutes before carving.
Can I prepare prime rib in advance or reheat leftovers safely?
You can dry-brine and season ahead, then roast when ready. Reheat sliced portions gently with a splash of stock or gravy.
You can prep ahead; reheat slices slowly to keep moisture.
Watch Video
Main Points
- Plan bone-in roast for flavor and presentation
- Use a two-stage roast to balance crust and doneness
- Let meat rest to maximize juiciness and slicing quality
- Monitor internal temperature with a probe; carryover cooking matters
- Rest before carving for a show-stopping, juicy finish