What Oven Rack for Prime Rib: A Master Guide to Perfect Roasts
Learn how to choose and use the right oven rack for prime rib to maximize browning, airflow, and juicy doneness. Practical setup, rack heights, and temperature guidance from Oven Cook Pro.

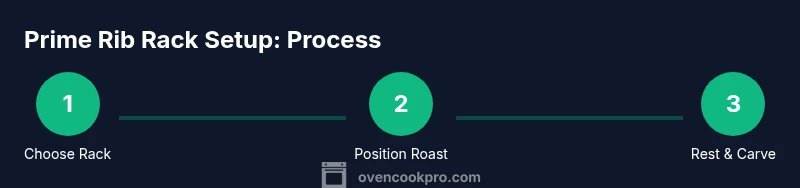
You’ll learn exactly how to choose and position the right oven rack for prime rib to maximize browning and even doneness. Start with a sturdy roasting rack inside a rimmed pan, elevating the roast at least 1 inch off the bottom. Preheat as needed and finish with a controlled roast; rest before carving. According to Oven Cook Pro, rack height and proper airflow are the keys to a juicy, evenly roasted prime rib.
Why the Right Oven Rack Matters for Prime Rib
The rack you choose shapes airflow around the roast, which directly influences browning, crust formation, and even heat distribution. A raised rack keeps fat from saturating the bottom of the pan and directs hot air around and under the meat for uniform cooking. This arrangement helps achieve a robust crust while preserving a juicy interior. According to Oven Cook Pro, proper airflow is often just as important as the oven temperature when roasting a large cut like prime rib. If you skip the rack and set the roast directly on a pan, you’ll commonly get steaming instead of browning, leading to dull edges and uneven doneness. In practice, a good rack-and-pan setup reduces hot spots and supports a consistent finish from edge to center.
Understanding Rack Types for Prime Rib
There are a few rack options that work well with prime rib. The most reliable is a sturdy wire roasting rack that fits inside a rimmed roasting pan. This setup elevates the meat and promotes air circulation on all sides. A solid roasting rack or a cast-iron rack that rests inside a pan can also work, but the key is stability and spacing so air can reach the bottom of the roast. Avoid beds of standing liquid under the roast, which can lead to uneven browning. If you don’t own a rack, you can improvise with a shallow cooling rack placed inside a shallow pan, provided it’s oven-safe and stable. The bottom line: you want a clean gap between the meat and the pan so heat can circulate freely.
Ideal Rack Height and Positioning in a Conventional Oven
Position the rack so the prime rib sits elevated at least 1 inch (2.5 cm) above the bottom of the pan for optimal air exposure and drippings management. Center the roast to ensure even heat exposure from all sides. If your oven has hot spots, rotate the pan halfway through cooking to maintain uniform browning. Keep the roast away from oven walls when possible to avoid direct contact with uneven heat. A well-positioned rack helps the fat render efficiently and the meat to develop a flavorful crust without drying out the interior.
Using a Roasting Pan with a Rack for Prime Rib
A good roasting pan should be heavy-gauge, with high sides to catch drippings and a rack that elevates the meat. The pan collects juices for gravy or au jus while the rack permits air to circulate around the roast. When using a shallow pan after browning, pour a small amount of liquid (water, broth, or wine) into the pan to create moisture and prevent scorching. If you use a rib roast with bone-in, be mindful of bone proximity to the thermometer and pan edges; place the bone ends toward the pan corners to prevent scorching. The combination of proper rack height and a sturdy pan is foundational for even cooking and robust crust.
Temperature Strategy and Doneness Targets
Roasting prime rib on a rack benefits from temperature management that emphasizes a crusty exterior and a tender interior. Many cooks start with a brief high-heat sear (for example, 450°F/232°C for 15–20 minutes) to develop crust, then reduce to a moderate roast (around 325–350°F/163–177°C) to finish. Target internal temps are roughly 120–125°F (49–52°C) for rare, 130–135°F (54–57°C) for medium-rare, and 135–145°F (57–63°C) for medium, with carryover cooking adding a few degrees during resting. Remember to remove the roast a few degrees before reaching the final target, as residual heat will continue to cook the meat. Adjust times based on roast size and oven performance; use one thermometer for the center and another for monitoring the pan juices if desired. This approach yields a reliable, juicy prime rib with a crisp exterior.
Practical Setup: Step-by-Step Checklist
Before you begin, confirm you have all essential items within reach and the roast is thawed and patted dry. Place the rack in the pan and position the pan so the roast sits centered on the rack. Season generously, insert a meat thermometer into the thickest part, and optionally reserve a small amount of salt for late seasoning after the rest. If you choose to sear, preheat to a high temperature, then reduce after the sear. Throughout roasting, rotate the pan if your oven has a noticeable hot spot. After removing from the oven, tent with foil and let rest to allow juices to redistribute. Finally, carve with a sharp knife and slice against the grain to maximize tenderness.
Common Mistakes to Avoid with Prime Rib Rack Setup
Avoid placing the roast directly on the pan without a rack, as this restricts airflow and can lead to a soggy bottom crust. Do not rely on surface browning alone; manage the internal temperature with a thermometer to prevent overcooking. Avoid overfilling the pan with liquids, which can steam the roast instead of browning it. Don’t repeatedly open the oven door—each opening causes a temperature drop that lengthens cooking time and increases the risk of uneven results. Lastly, ensure the rack is stable and centered to prevent tipping when turning or slicing.
Post-Roast Rest and Carving Tips
Resting is essential for juiciness. Tent the roast loosely with foil and let it rest for 15–20 minutes; during this time, carryover cooking will complete final doneness. Carve the roast across the grain in thin, even slices for maximum tenderness, and serve with the pan juices or a prepared au jus. If you used a thermometer, verify the final internal temp before serving; adjust future cooking times based on the outcome to improve consistency.
Cleaning and Maintenance After Roasting
Allow the pan to cool completely before cleaning. Soak any stubborn crusts in warm, soapy water, then scrub with non-abrasive scrubbers to preserve the rack’s finish. Dry thoroughly to prevent rust on metal racks. It’s a good habit to scrub the pan edges and the underside of the rack to remove lingering fat and ensure the setup remains clean for next use. Regular maintenance extends the life of your roasting equipment and ensures consistent future results.
Quick Reference Checklist for Prime Rib Rack Setup
- Use a sturdy roasting rack inside a rimmed pan.
- Elevate roast by at least 1 inch for airflow.
- Preheat appropriately and consider a brief sear for crust.
- Use an instant-read thermometer to monitor doneness.
- Rest the roast 15–20 minutes before carving.
- Clean and dry gear after use to maintain performance.
Tools & Materials
- roasting pan with rack(Heavy-gauge steel, 1-inch rack clearance; fits standard oven racks)
- instant-read meat thermometer(Probe should reach center of thickest part without hitting bone)
- aluminum foil(For tenting during rest)
- kitchen towels(Blot dry roast and handle hot equipment)
- tongs(For safe handling when transferring roast)
- chef’s knife(Sharp blade for clean carving)
- pan scraper/sponges(For post-roast cleanup)
- room-temperature roast allowance(Thaw completely and pat dry before roasting)
Steps
Estimated time: Total: 1h40m - 2h40m
- 1
Preheat and prep
Preheat the oven to the roasting temperature you plan to use (searing followed by moderate roasting is common). Gather a sturdy roasting pan, rack, thermometer, towels, and knife. Bring the roast to room temperature to promote even cooking.
Tip: Having everything ready reduces handling time and helps maintain even oven temperature. - 2
Position the rack
Place the rack inside the pan so the roast will sit about 1 inch above the bottom. Center the rack and ensure it is stable before adding the meat.
Tip: Test stability by gently shifting the roast once placed. - 3
Season and prepare
Pat the rib roast dry with towels and season generously with salt and pepper or your preferred rub. This creates a flavorful crust as the roast browns.
Tip: Season ahead of time to allow surface moisture to evaporate for better browning. - 4
Place roast and insert thermometer
Set the roast on the rack, insert the thermometer into the thickest part away from bone, and avoid bone contact for accurate readings.
Tip: If bone-in, angle the thermometer away from the bone to avoid false readings. - 5
Sear (optional) and reduce heat
If you choose a sear, roast at high heat for 15–20 minutes to form a crust, then reduce to a moderate roasting temperature for the remainder.
Tip: A quick sear adds flavor but keep a close eye to prevent burning. - 6
Roast to doneness and rest
Roast until the thermometer reaches the target doneness (remember carryover cooking will raise temp). Remove, tent with foil, and rest 15–20 minutes before carving.
Tip: Resting redistributes juices; never skip this step for optimal juiciness.
Questions & Answers
Do I need a rack for prime rib?
Using a rack is highly recommended because it improves airflow and helps form a crust. A rack also keeps the roast elevated above drippings for even cooking.
Yes. A rack is highly recommended to improve airflow and browning, plus keep the roast elevated for even cooking.
What rack height is best for prime rib?
Aim for the roast to sit about 1 inch above the bottom of the pan, centered so heat reaches all sides evenly.
Aim for about one inch of clearance below the roast, centered in the pan.
Can I cook prime rib without a rack?
You can cook without a rack, but you’ll likely get less even browning and a soggier bottom. A rack is preferred for best results.
You can, but the crust and evenness suffer without a rack.
Should I use a thermometer when roasting prime rib?
Yes. An instant-read thermometer helps you hit your target doneness precisely and reduces guesswork.
Definitely use a thermometer to dial in doneness.
What pan setup works best with a rack?
A sturdy rimmed roasting pan with a rack offers stable support, proper airflow, and easy collection of drippings for gravy.
A roasting pan with a rack is ideal.
How long should prime rib rest after roasting?
Rest the roast for 15–20 minutes to allow juices to redistribute and finalize doneness.
Rest it for 15 to 20 minutes before carving.
Watch Video
Main Points
- Choose a rack that elevates the roast by at least 1 inch.
- Use a rimmed pan and ensure stable rack positioning.
- Monitor doneness with an instant-read thermometer for best results.
- Rest the roast 15-20 minutes before carving.