Oven Cook Rib Eye Steak: The Ultimate Step-by-Step Guide
Master oven cook rib eye steak with a crusty sear and juicy center. This Oven Cook Pro guide walks you through seasoning, searing, oven finishing, and resting for best results.

You can oven-cook rib eye steak to a perfect crust and juicy center by searing first and finishing in a hot oven. Preheat a cast-iron skillet or broiler to high, sear 2-3 minutes per side, then transfer to 400°F for 6-12 minutes depending on thickness. Rest before slicing.
Why Oven-Cooking Rib Eye Steak Delivers Superior Flavor
Oven cooking rib eye steak is a reliable way to achieve a beefy crust while preserving tenderness. The technique leverages the Maillard reaction on a hot surface, followed by gentle, even heat in the oven to finish. When you combine a high-heat sear with precise oven finishing, you can control doneness with less guesswork. According to Oven Cook Pro, this approach minimizes overcooking and helps you hit your target internal temperature consistently. With a well-chosen rib eye (1 to 1.5 inches thick) and proper resting, you’ll enjoy a slice that’s deeply caramelized on the outside and juicy on the inside. In this guide, we’ll break down the steps, equipment, timing, and flavor boosters to help you replicate steakhouse quality at home.
Key Principles for Beef Perfection in the Oven
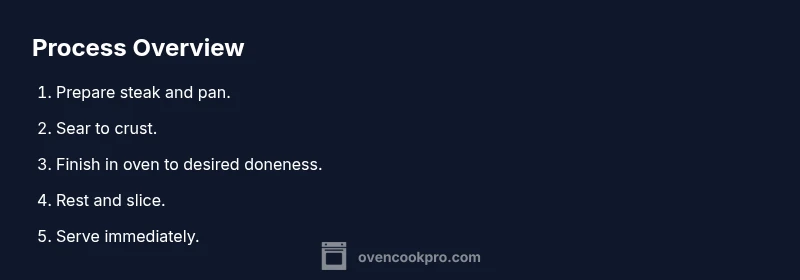
The core idea behind oven-cooked rib eye steak is to use a two-stage heat approach: a sear to develop aroma and crust, followed by gentle oven heat to bring the center to the desired doneness. Drying the surface before cooking promotes browning, while a hot, evenly heated pan creates a robust crust quickly. Temperature control is essential; a reliable meat thermometer turns guesswork into precision, ensuring you land on your target doneness without overcooking. Oven Cook Pro emphasizes rested meat, even heat distribution, and minimal interference during the finish to maximize juiciness and flavor retention.
Prepping Your Rib Eye: Selection, Seasoning, and Temperature
Begin with a high-quality rib eye, ideally 1 to 1.5 inches thick, with good marbling for flavor. Pat the surface dry with paper towels to remove excess moisture that can steam the meat instead of sear. Season generously with salt and pepper, and add a light coating of oil to help browning. If you have time, let the steak come to room temperature for 30–60 minutes prior to cooking; this fosters even cooking. Avoid overcrowding the pan, which can lower the searing temperature and prevent crust formation. These steps set the foundation for a reliable, repeatable result.
Searing Techniques: Cast-Iron, Pan-Broil, and Broil Options
A heavy cast-iron skillet is ideal for a robust crust thanks to excellent heat retention. Preheat the pan until it begins to smoke lightly, then place the steak in the pan and resist the urge to move it for the first 1–2 minutes to form a solid crust. Flip and sear the opposite side with the same care. If you don’t have a cast iron, a heavy stainless pan can work, but avoid thinner pans that heat unevenly. Some cooks use a quick broil at the end for extra crust, but monitor closely to prevent charring. The goal is a deep, even crust that seals juices inside.
Finishing in the Oven: Temperature, Time, and Doneness Targets
Transfer the pan to a preheated oven (around 400°F) to finish cooking. The exact time depends on thickness and your preferred doneness. Use a meat thermometer to check internal temperatures as you approach your target: roughly 120–125°F for rare, 130–135°F for medium-rare, and 140–145°F for medium. Remember that carryover cooking will raise the final temp by a few degrees after you remove the steak. Remove from heat just shy of your target, then rest to let juices redistribute.
Resting and Carving: Letting Juices Settle
Resting is essential to preserve juiciness after removing the steak from the oven. Tent it loosely with foil and let it rest for 5–10 minutes; this allows the juices to reintegrate into the meat and the flavors to settle. Slice against the grain in thin, even slices to maximize tenderness. A properly rested rib eye will yield a satisfying bite with a balanced crust and juicy interior.
Common Mistakes and How to Avoid Them
Common missteps include under-seasoning, not drying the surface, overcrowding the pan, and removing the steak too soon. Pat drying is as important as accurate timing; a wet surface steams rather than browns. Avoid partial temperatures or guesswork by using a probe thermometer. If the crust isn’t as deep as you’d like, a quick extra sear after resting can refresh the exterior without overcooking the center. Following a consistent method minimizes these pitfalls.
Flavor Variations: Butter Baste, Garlic, and Herbs
Butter baste during the final minutes of searing or finish with a pat of herb-butter. Add crushed garlic cloves and fresh thyme or rosemary to the pan while finishing in the oven for a fragrant lift. If you prefer spice, a light sprinkle of smoked paprika or chili flakes can complement beef without overpowering it. The key is to balance fat, aroma, and herbs so they enhance rather than mask the beef’s natural flavor.
Equipment and Setup: Oven, Thermometer, and Tools
A reliable oven thermometer helps you gauge actual temperature, which is crucial for precision. A heavy cast-iron skillet remains the preferred tool for crust formation, though a high-quality stainless steel pan can work. Use long tongs to handle the steak safely, a meat thermometer for monitoring doneness, and a clean cutting board for resting and slicing. Keep a small dish of melted butter or herb oil handy for finishing touches.
Practical Timing: How to Plan a Steak Dinner
Plan for roughly 45–60 minutes from start to finish, depending on steak thickness and resting time. Allow 30–60 minutes of surface drying and room-temperature rest before cooking, then 8–12 minutes of oven time for a 1-inch steak, with adjustments for thickness. The key is to start with a hot surface, then finish in an oven preheated to about 400°F. With a little practice, you can time the sear, oven finish, and rest to serve a perfect rib eye every time.
Troubleshooting: What If Your Steak Isn’t Perfect
If the exterior isn’t crusty enough, give it a brief extra sear in a hot pan. If the center is underdone, return to the oven for a few more minutes and recheck temperature. If juices pool when you cut, the steak may have overcooked or rested improperly; next time shorten the resting time or adjust the oven finish. Consistently good results come from a reliable thermometer, precise timing, and careful handling.
Final Tips for Consistent Results
Consistency comes from a repeatable routine: dry, season, sear, finish, rest, slice. Maintain steady heat and avoid rushing steps. Use a timer and thermometer for accuracy, and keep your pan well-seasoned or oiled to prevent sticking. With practice, this oven cook rib eye steak method becomes a dependable way to recreate steakhouse quality at home, every time with confidence.
Tools & Materials
- Cast-iron skillet (12-inch recommended)(Heavy, capable of high-heat sear; provide even contact with steak.)
- Tongs (long-handled)(For safe turning and to preserve crust.)
- Meat thermometer (instant-read)(Monitor internal temp; target doneness precisely.)
- Oven-safe rack or skillet handle protection(Promotes air circulation under the steak in the oven.)
- Paper towels(Pat the steak dry to promote browning.)
- Cooking oil with high smoke point(Examples: canola, grapeseed; helps searing.)
- Aluminum foil (for resting)(Tent the steak lightly during resting.)
- Knife and cutting board(For slicing against the grain after resting.)
Steps
Estimated time: Total time: 45-60 minutes
- 1
Prepare the steak
Remove the steak from the fridge and pat dry. Let it sit at room temperature for 30–60 minutes. This helps the flesh heat more evenly and improves searing performance.
Tip: Dry surface is essential for a good crust. - 2
Season generously
Season all sides with salt and pepper, and a light coat of oil or fat. If using garlic powder or herbs, add them now for a subtle aroma.
Tip: Salt 40 minutes early or right before cooking for flavor; avoid under-salting. - 3
Preheat the pan
Place a cast-iron skillet on the stove and heat it until the surface is hot and shimmering. A drop of water should dance and evaporate quickly.
Tip: A hot pan is key to a deep crust. - 4
Sear the first side
Lay the steak in the pan and resist moving it for 1-2 minutes until a crust forms. Flip carefully and sear the other side for another 1-2 minutes.
Tip: Use tongs to flip; avoid piercing the meat with a fork. - 5
Sear the edges
If your steak has a thick edge, roll it on its side to render any fat edge slightly and help even browning.
Tip: This creates a more uniform crust around the steak. - 6
Finish in the oven
Transfer the pan to a preheated oven (around 400°F) and cook until the internal temperature reaches your target doneness.
Tip: Keep the thermometer handy and check early. - 7
Check temperature
Check the steak with a thermometer as it nears the desired doneness; remember carryover heat will continue cooking after removal.
Tip: Remove a few degrees before the target to account for carryover. - 8
Rest the steak
Remove the steak from heat and let it rest on a cutting board loosely tented with foil for 5–10 minutes.
Tip: Resting redistributes juices for a tender bite. - 9
Slice correctly
Slice against the grain into 1/4-inch slices for maximum tenderness.
Tip: A sharp knife makes clean cuts and preserves crust. - 10
Optional butter baste
During the last minute, swirl in a small pat of butter with garlic and herbs for extra richness.
Tip: Watch butter carefully to avoid burning. - 11
Serve with complementary sides
Pair with simple sides like roasted vegetables or a light salad to balance richness.
Tip: Acidic or bright sides cut through the fat. - 12
Store leftovers properly
Wrap any remaining steak and refrigerate within two hours of cooking; reheat gently if needed.
Tip: Slice before refrigerating to maximize quick reheats.
Questions & Answers
What is the best temperature to oven cook rib eye steak?
Begin with a hot sear on the stove, then finish in a hot oven, commonly around 400°F, until the steak reaches your desired doneness. Use a meat thermometer for accuracy.
Sear the steak on the stove and finish in a hot oven, typically about 400 degrees, until you reach your target doneness with a thermometer.
Should I bring the steak to room temperature before cooking?
Yes. Let the steak sit at room temperature for about 30 to 60 minutes before cooking to promote even cooking and a better sear.
Yes—let it sit at room temperature for about half an hour before you cook for more even doneness.
Is pan-searing required if I plan to finish in the oven?
Searing is highly recommended for a crust and flavor, but you can finish in the oven without it if you monitor crust development carefully.
Seared first for best crust, then finish in the oven. If you skip sear, you’ll miss that crust and aroma.
How thick should the rib eye be for oven cooking?
Thick steaks (about 1 to 1.5 inches) cook well in the oven after searing; thinner steaks finish more quickly and require closer temperature monitoring.
About one to one and a half inches thick works best for oven cooking.
How long should I rest the steak after cooking?
Rest the steak for 5–10 minutes after removing from the oven to allow juices to redistribute for a tender bite.
Rest it for 5 to 10 minutes so juices settle and you get a juicy slice.
Can I add butter or herbs during the finish?
Yes. A quick butter baste with garlic and fresh herbs in the last minute adds richness and aroma without overpowering the beef.
Yes—finish with butter and fresh herbs for extra flavor in the last minute.
Watch Video
Main Points
- Season and pat dry before cooking.
- Sear for crust, finish in hot oven for doneness control.
- Use a thermometer to hit precise doneness.
- Rest 5–10 minutes before slicing.
- Experiment with butter and herbs for flavor boosts.