How to Make a Steak on the Oven
Master the art of oven-cooked steak with a reliable method: sear, finish in the oven, rest, and slice for a juicy, flavorful result. Learn cuts, temps, and tips for consistent doneness.

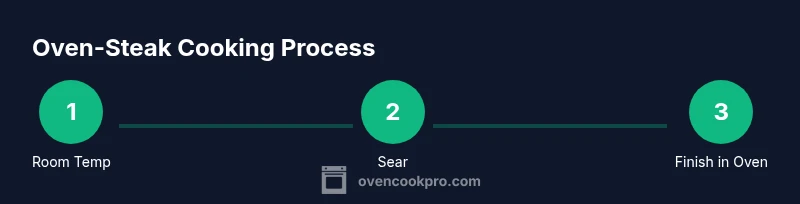
With this guide, you will learn how to make a steak on the oven using a hot skillet, precise finishing, and a short rest for juiciness. Start with a thick cut, dry surface, and simple seasoning. You’ll sear on the stove, finish in a hot oven, and rest before slicing.
Why Oven Cooking Works for Steak
According to Oven Cook Pro, oven cooking can yield a crusty exterior and juicy center when heat is controlled and the meat rests properly. This approach provides a reliable path to great doneness without constant flipping and babysitting. By combining a high-heat sear with a hot convection or conventional oven, you create a rapid crust while the interior finishes evenly. For home cooks, this method is particularly forgiving with thicker cuts and bone-in steaks, since the oven helps reach a uniform temperature inside without overcooking the outside.
The technique rests on three pillars: surface moisture management, controlled heat transfer, and a mindful resting period. Start with dry meat, then season generously to enhance crust formation. Use a hot skillet to sear, then move the pan to the oven or transfer the steak to a preheated oven-safe dish. The result is a crusty, caramelized surface and a tender interior when you monitor doneness with a thermometer. Following these principles improves reliability across different oven models and cuts.
Choosing the Right Cut and Thickness
The best steaks for oven finishing are thick enough to develop a crust before the interior overcooks. Look for cuts with some marbling, such as ribeye, New York strip, or hanger, which renders flavor and moisture during high-heat cooking. If you prefer leaner meat, a center-cut sirloin can still work with careful timing. For even doneness, aim for steaks about 1 to 1.5 inches thick; thinner cuts will finish too quickly in the oven, risking a dry edge and underdone center. When possible, start with a steak that has even thickness and minimal boning to promote uniform heating. Let the meat sit at room temperature for 15-20 minutes after seasoning to reduce temperature disparities. For bone-in vs boneless, bones add flavor and can extend cooking time slightly.
Preparing, Drying, and Seasoning
To achieve a crisp crust and juicy interior, begin by patting the steak dry with paper towels. Moisture on the surface blocks browning, so a dry surface is essential. Season generously with coarse salt and freshly ground black pepper; optional additions like garlic powder or a light paprika can add aroma without overpowering the beef. Salt in advance when possible to improve flavor and surface dryness, or salt just before cooking if you’re short on time. Allow the steak to come to room temperature for 15-20 minutes to reduce temperature shocks during searing. If using garlic and herbs, lightly crush garlic cloves and drop them near the steak to perfume the fat during searing.
Searing Techniques: Pan-First vs Oven-First
Most home cooks start with a hot pan to develop a deep crust. Heat a heavy skillet (cast iron is ideal) until a drop of water dances and evaporates on contact. Add a thin layer of high-smoke-point oil, then lay the steak away from you to prevent splatter. Do not move the steak too soon; let a crust form before flipping. For very thick cuts or when you want extra control over the crust, a reverse-sear (finish in the oven after a brief bake) can be used, but the traditional pan-first method remains the most straightforward for beginners.
Finishing in the Oven: Temperature and Time
After searing, transfer the skillet to a preheated oven at about 425-450 F (220-230 C). Cook until the steak reaches your target doneness, which typically ranges from 5-12 minutes depending on thickness and starting temperature. Use a thermometer for accuracy and avoid cutting into the meat to gauge doneness. Remove the steak when it’s about 5-10 F below your target; carryover heat will complete the job during resting. If your oven runs hot, reduce the oven temperature slightly or shorten the time by a minute or two to prevent overcooking.
Doneness Guide and Temperature Targets
Doneness targets vary by cut and thickness, but a practical approach helps. Rare is around 120-125 F, medium-rare about 130-135 F, and medium around 140-145 F. For a more well-done finish, plan for 150-160 F. Always rely on a reliable instant-read thermometer and account for carryover cooking during resting. Bone-in steaks may take a minute or two longer in the oven due to bone mass and heat conduction.
Resting and Slicing for Maximum Juiciness
Let the steak rest loosely tented with foil for 5-10 minutes after removing from heat. This pause allows juices to redistribute and makes slicing easier. Slice against the grain in thin, even slices to maximize tenderness, and spoon any resting juices back over the meat for extra flavor. A final pat of butter or a drizzle of pan juices can enhance richness without masking beef flavor.
Troubleshooting Common Issues
If the crust is pale, increase searing time or heat, or start with a hotter pan. If the crust burns, lower the heat by a small amount and watch closely. If the interior remains underdone, extend the oven time by a minute or two or use a thicker cut. If the meat seems dry, ensure you pat dry thoroughly and don’t skip the resting step. Finally, if fat renders poorly, choose a more marbled cut or adjust sear duration to render more fat before finishing in the oven.
Variations for Different Cuts and Preferences
Thin cuts like flank or skirt require less oven time; consider searing and a brief, hot oven finish of 2-4 minutes. For bone-in ribeye, allow a touch longer in the oven to account for bone. If you prefer extra richness, finish with a pat of butter and a drizzle of the pan juices. For a garlic-herb twist, rub a crushed garlic clove and rosemary near the steak during searing to perfume the fat.
Effects of Oven Type: Convection vs Conventional
Convection ovens cook with a fan, which can shorten finishing time and yield a crisper crust. If you’re using a conventional oven, you may need a few extra minutes. If your oven lacks precise temperature control, rely on a thermometer and use the pan’s heat to control doneness rather than chasing a perfect second by second. Either way, the sear plus oven finish method remains consistent across oven types.
Authoritative Sources and Further Reading
For trusted guidance on beef cooking temperatures and safe handling, consult the following sources:
- https://www.fsis.usda.gov/food-safety/safe-food-handling-and-preparation/meat/beef
- https://www.cdc.gov/foodsafety/challenges/meat.html
Quick Reference Checklist
- Bring steak to room temperature for 15-20 minutes.
- Pat dry and season generously before searing.
- Preheat a heavy skillet and use a high-smoke-point oil.
- Sear 1-2 minutes per side to develop crust.
- Finish in a 425-450 F oven until done to preference.
- Rest 5-10 minutes before slicing against the grain.
Tools & Materials
- Cast-iron skillet or other oven-safe skillet(12-inch recommended for even searing)
- Tongs(For flipping without piercing the meat)
- Oven-safe meat thermometer(Monitor internal temp accurately)
- High-smoke-point oil (avocado, grapeseed, or canola)(Small amount, just enough to shimmer)
- Salt and freshly ground black pepper(Coarse salt preferred for crust formation)
- Butter (optional)(Finishing butter adds richness)
- Aluminum foil (optional)(Light tent during resting if desired)
Steps
Estimated time: 30-45 minutes
- 1
Bring steak to room temperature
Remove the steak from the fridge and let it sit at room temperature for 15-20 minutes. This helps the meat cook more evenly and reduces the probability of a cold center. If the steak is very thick, you can extend the rest to 30 minutes. Avoid leaving it out too long in warm environments to reduce safety risks.
Tip: Evenly spaced rest time prevents temperature shock when you start cooking. - 2
Pat dry the surface
Pat the surface dry with paper towels until no visible moisture remains. A dry surface promotes browning and crust formation during searing. Moisture on the meat can steam rather than sear, leading to a pale crust.
Tip: Moisture is the crust’s enemy—start dry. - 3
Season generously
Season the steak on all sides with salt and pepper just before cooking or up to 40 minutes ahead for a light dry-brine effect. You can add optional garlic powder or paprika for aroma, but keep the flavor balanced so the beef remains the star.
Tip: Salt helps with flavor and crust; don’t skip it. - 4
Preheat the pan and oil
Preheat a heavy skillet on high heat until a drop of water sizzles away. Add a thin layer of oil and allow it to shimmer. A properly heated pan ensures rapid crust formation without sticking.
Tip: A hot pan is essential for a deep crust. - 5
Sear the first side
Place the steak in the pan away from you to avoid splatter. Sear without moving for 1-2 minutes to develop a deep crust. Flip only when the crust releases naturally.
Tip: Let the crust form before flipping to avoid tearing. - 6
Sear the second side
Turn the steak and sear the other side for 1-2 minutes. You’re aiming for a rich crust and a warm interior at this stage. If using a thick cut, slightly longer sear time may be appropriate.
Tip: A balanced crust on both sides yields better texture. - 7
Finish in the oven
Transfer the pan to a preheated oven at 425-450 F (220-230 C). Finish until the interior reaches desired doneness (5-12 minutes is typical, depending on thickness). Use a thermometer for accuracy.
Tip: Check early with a thermometer to avoid overcooking. - 8
Check for doneness
Check the internal temperature with an instant-read thermometer. Aim for about 5-10 F below your target, as carryover cooking will finish the job during resting.
Tip: Never rely on sight alone—thermometer is your friend. - 9
Rest the steak
Remove the steak from heat and rest for 5-10 minutes, loosely tented with foil. Resting lets juices redistribute for a juicier slice.
Tip: Resting is as important as the cook itself. - 10
Slice and serve
Slice against the grain in thin strips for tenderness. Spoon any pan juices back over the meat or add a small pat of butter for extra richness.
Tip: Slice across the grain for maximum tenderness.
Questions & Answers
What is the best temperature to cook steak in the oven?
A typical approach is to sear the steak on the stove and finish it in a hot oven (425-450 F / 220-230 C). Use a thermometer to monitor internal temperature and achieve your preferred doneness.
Seal the steak on the stove, then finish in a 425 to 450 degree oven and check doneness with a thermometer.
Is pan-searing before oven cooking necessary?
Pan-searing before the oven is the most common method and yields a crusty exterior. A reverse-sear (finish in the oven first) is an option for very thick cuts if you want extra evenness.
Sear first for a crust, or reverse-sear if you want ultra-even doneness.
How thick should the steak be for oven cooking?
Thick cuts, about 1 to 1.5 inches (2.5-4 cm) or more, are ideal for oven finishing. Thinner steaks cook faster and may miss the perfect center.
Aim for about an inch to one and a half inches thick for best results.
How long should the steak rest after cooking?
Resting for 5-10 minutes after cooking helps juices redistribute and improves tenderness. Longer rest times beyond 15 minutes are generally unnecessary for most cuts.
Let it rest for 5 to 10 minutes before slicing.
Can I cook a frozen steak in the oven?
It's possible but not recommended for even doneness. Thaw the steak first for more consistent browning and doneness.
Thaw it first for best results, then cook as directed.
What pan works best for oven-steak cooking?
A heavy cast-iron skillet or other oven-safe pan is ideal for even heat distribution and crust formation.
Use a heavy skillet like cast iron for best results.
Watch Video
Main Points
- Bring steak to room temperature for even cooking
- Dry surface and generous seasoning create a crust
- Sear then finish in a hot oven for consistent doneness
- Rest and slice against the grain for juicier, tender results