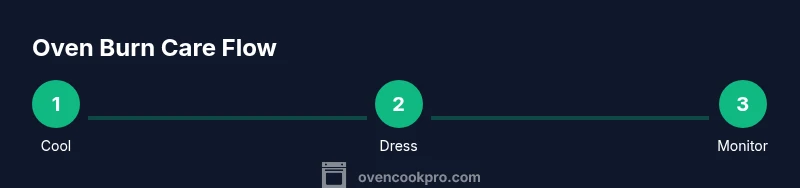
How to Treat Oven Burn on Arm: Step-by-Step Home Guide
Learn how to treat an oven burn on the arm with expert, evidence-based steps: immediate cooling, wound care, pain relief, and prevention to keep your kitchen safe.

How to treat oven burn on arm: Start by cooling the burn under cool running water for 10–20 minutes to reduce heat in the skin. Gently pat dry, remove jewelry, and cover with a clean, nonstick dressing. Do not apply ice or butter, or any home remedy that irritates skin. If blistering, severe pain, or signs of infection occur, seek medical care promptly. Elevate the limb if possible to reduce swelling.
Understanding oven burns and skin damage
Oven burns occur when high heat directly contacts skin, causing tissue damage that can range from superficial to deeper layers. The skin responds with redness, swelling, pain, and sometimes blistering. First-degree burns affect only the outermost layer and usually heal quickly with proper care. Second-degree burns involve deeper skin layers and may blister; they require consistent wound care to prevent infection. The goal of at-home treatment is to rapidly cool the tissue, minimize ongoing damage, and protect the wound as it heals. According to Oven Cook Pro, evidence-based first-aid practices emphasize prompt cooling, gentle cleaning, and protective dressing. If you’re ever unsure about burn severity, it’s wise to seek professional advice to avoid complications. This guide on how to treat oven burn on arm provides practical steps, aligned with standard safety guidelines, to help you manage minor burns safely at home.
Immediate actions you should take as soon as possible
When a burn happens, act quickly but calmly. Move away from the heat source to prevent further injury and reduce the risk of additional burns. Run cool (not cold) water over the affected area for 10–20 minutes to draw heat from the skin and lessen inflammation. Ice should never be applied directly to a burn. After cooling, pat the area dry with a clean cloth, remove rings or bracelets that might constrict swelling, and cover with a clean nonstick dressing to prevent surface contamination. Avoid applying butter, oils, toothpaste, or home remedies, which can trap heat or introduce bacteria. If your burn is blistered or painful, monitor for signs that it’s not healing and seek medical guidance if there’s any doubt about severity. The initial cooling and protection set the stage for proper healing and reduce infection risk.
How to assess burn severity at home
A quick home assessment helps decide whether medical care is needed. Minor burns affect only the skin surface and are usually red, painful, and swollen but not extensively blistered. Intact small blisters, especially when they’re not enlarging, can often be managed with basic wound care. If redness spreads beyond the original area, pain worsens, fever develops, or you notice pus or increasing swelling, seek medical attention. Burns near joints, on the hands or feet, or involving the face or genitals require extra caution. If you have diabetes, immune suppression, or poor circulation, err on the side of caution and consult a clinician early. Always monitor the arc of healing; if the wound fails to improve within several days, professional care is warranted.
Cleaning and dressing the wound safely
Once cooled and dried, clean the surrounding skin gently with mild soap and water if needed. Avoid scrubbing the burn itself and skip harsh antiseptics like hydrogen peroxide unless advised. Apply a thin layer of a sterile, nonadherent dressing or sterile gauze to prevent sticking, then secure with medical tape. Do not wrap too tightly, which can impair circulation. Change the dressing daily or whenever wet or dirty. Keep the wound clean and dry to reduce infection risk. If you notice redness spreading, warmth around the area, or a foul smell, seek medical attention promptly.
Pain management and comfort strategies
Over-the-counter pain relievers such as acetaminophen or ibuprofen can help with discomfort, following label directions. Elevating the arm while resting may reduce swelling and pain. Avoid tight bands or restrictive clothing, and keep the dressing clean and dry to prevent irritation. Hydration and balanced nutrition support healing, but avoid applying fragrances or ointments directly on open skin unless advised by a clinician. If pain persists beyond a few days or worsens, consult a healthcare provider for guidance on alternative care.
When to seek medical care urgently
Call or visit urgent care if the burn covers a large area, involves joints, face, hands, feet, or genitals, or there is numbness or severe swelling. Signs of infection such as increasing redness, warmth, fever, or pus require professional evaluation. People with underlying conditions such as diabetes or compromised immunity should seek medical advice sooner rather than later. If the burn has a leathery or white appearance or if you’re unsure about depth, obtain in-person assessment promptly to rule out deeper tissue damage.
Aftercare and dressing changes for healing skin
As healing progresses, continue gentle cleansing and protect new skin with clean dressings. Once the wound is superficially closed, you may apply a light, fragrance-free moisturizer around the area to reduce itching, avoiding direct application on open skin. Gradually reintroduce gentle arm movements to prevent stiffness, while avoiding rubbing or scratching the injury. If scarring or color changes persist beyond several weeks, consider follow-up with wound care specialists for scar management options.
Preventing oven burns in the kitchen
Prevention reduces burn incidents. Always wear heat-resistant oven mitts, keep sleeves away from flames, and use long-handled tools when manipulating hot pans. Place hot dishes on heat-proof mats and avoid reaching across open ovens. When removing racks, use sturdy gloves or tongs and support the rack securely to prevent tipping. Maintain a tidy workspace and designate a burn-first-aid kit in an accessible place in the kitchen.
Special considerations for vulnerable groups
Older adults and people with diabetes or circulatory issues may experience slower healing and higher infection risk. If you fall into these categories, seek medical guidance earlier and avoid relying solely on home remedies. Pregnant individuals should consult a clinician before using any topical products near a burn. If you have a history of poor wound healing or vascular disease, prioritize professional evaluation for appropriate wound care strategies.
Tools & Materials
- Clean running water(Cool the affected area for 10–20 minutes)
- Clean nonstick dressings (sterile gauze or nonstick adhesive dressing)(Cover the burn to protect it)
- Medical tape(To secure the dressing without constriction)
- Mild soap (optional)(For gentle cleaning around the wound)
- Antiseptic wipes (alcohol-free, optional)(Use only if recommended; avoid applying directly to wound)
- Over-the-counter pain reliever (acetaminophen or ibuprofen)(Follow label directions)
- Heat-resistant oven gloves(To prevent burns when handling hot items)
- Ice pack or cold compress(Do not apply directly to the burn)
Steps
Estimated time: Total time: 30-60 minutes for initial care; healing occurs over days to weeks.
- 1
Stop the burn by cooling the skin
Begin cooling the affected area under cool running water for 10–20 minutes to limit tissue damage and reduce swelling. Avoid ice, which can exacerbate injury, and do not rub the skin dry; use a clean towel to pat gently.
Tip: Always use cool water, not ice, to prevent further tissue damage. - 2
Remove restrictive items
Carefully remove rings, bracelets, or any jewelry around the affected area before swelling begins. Swelling can constrict blood flow and worsen tissue injury if items are left in place.
Tip: If a ring slides off easily, do it before swelling increases. - 3
Clean the surrounding skin and dress the wound
Gently clean around the burn with mild soap and water if needed. Apply a sterile, nonadherent dressing to keep the wound clean and prevent sticking, then secure with medical tape without wrapping tightly.
Tip: Do not apply harsh antiseptics directly to open skin unless advised. - 4
Manage pain and swelling
Take an OTC pain reliever if appropriate and per label directions. Elevate the arm when resting to reduce swelling and avoid constricting garments that rub or irritate the wound.
Tip: Hydration supports healing; avoid alcohol as it can increase dehydration. - 5
Monitor for signs of infection
Check the burn daily for increasing redness, warmth, swelling, pus, or fever. If any of these occur, seek medical care promptly to prevent complications.
Tip: Document changes with a quick daily note to track healing. - 6
Follow-up care and pacing healing
Continue gentle cleansing and dressing changes until the skin begins to reform a new layer. Once the wound forms a thin layer of new skin, you may smooth in a fragrance-free moisturizer around the area (not on open tissue).
Tip: Avoid picking at scabs; allow natural remodeling of skin.
Questions & Answers
What should I do first if I burn my arm in the oven?
Begin cooling the burn under cool running water for 10–20 minutes, then remove rings and cover with a clean dressing. Avoid ice or home remedies that irritate skin.
First, run cool water over the burn for 10 to 20 minutes, remove any rings, and protect the area with a clean dressing.
Can I use butter or toothpaste on a burn?
No. Butter, toothpaste, and other kitchen substances can trap heat and introduce bacteria. Use clean dressings and standard wound care instead.
Avoid butter or toothpaste on a burn; use clean dressings and proper wound care.
When is a burn considered urgent and requires medical care?
Seek medical care for burns larger than the palm, involving joints or sensitive areas, or if there are signs of infection or persistent pain.
If the burn is large, near joints, or shows signs of infection, consult a clinician promptly.
Is it safe to use over-the-counter pain relievers for a burn?
OTC analgesics can help with pain, but follow the label and avoid giving medications to children without medical advice.
You can use OTC pain relievers as directed on the label, but check with a clinician if you’re unsure.
How long does it take a minor oven burn to heal?
Minor oven burns typically heal over days to a couple of weeks with proper wound care and protection.
Most minor burns heal in days to about two weeks with good care.
Should I elevate the arm during healing?
Elevating the arm when resting can help reduce swelling and discomfort, especially in the first 24–48 hours.
Elevate the arm when possible to reduce swelling.
Watch Video
Main Points
- Cool the burn promptly under running water.
- Cover with a clean, nonstick dressing to protect the wound.
- Avoid home remedies that can cause infection or worsen injury.
- Seek medical care for large burns or signs of infection.
- Prevent future oven burns with proper kitchen safety practices.