How to Get Rid of Oven Burn Marks on Skin: Step-by-Step Guide
Learn safe, practical steps to treat oven burns on skin, prevent infection, and minimize scarring. This expert guide from Oven Cook Pro covers immediate first aid, home care, and when to seek medical help.

This guide explains how to get rid of oven burn marks on skin with safe, practical steps. You will learn immediate first aid, how to clean and protect the wound, and how to care for healing skin to minimize scarring. Follow the step by step process for reliable, skin friendly healing.
Understanding how to get rid of oven burn marks on skin
Oven burn marks on skin happen when heat transfers to the outer layers of the skin during cooking mishaps, oven spills, or steam exposure. The goal is to reduce damage, prevent infection, and support the skin as it heals. According to Oven Cook Pro, beginning with proper cleansing and protection is the foundation of effective burn care. This guide focuses on safe, practical actions anyone can take at home, with clear signs that indicate when to seek professional help. By understanding the burn type and following a steady care plan, you can minimize pain and improve cosmetic outcomes over time.
Throughout this guide you will see the term how to get rid of oven burn marks on skin used to emphasize the specific context of oven related burns, rather than other heat injuries. Remember that every burn event has its own details, so adapt these steps to your situation while staying within safe limits.
Quick assessment and triage for skin burns
Not all oven burns are the same. Most minor burns affect only the top layer of skin and heal with basic care, while deeper burns or burns on sensitive areas require more attention. Look for redness, warmth, and pain, as well as blister formation. If the burn covers a large area, blisters are extensive, or the skin looks white or charred, treat it as more serious and seek medical help promptly. The Oven Cook Pro team emphasizes that early evaluation helps prevent complications and poor outcomes. If you are unsure about the burn severity, err on the side of caution and contact a healthcare professional.
Immediate first aid steps for minor oven burns
Begin with cooling the affected area under cool running water for 10 to 20 minutes to dissipate heat and limit tissue damage. Remove rings or bracelets from the affected limb before swelling starts. Gently pat dry with a clean cloth and avoid rubbing. Do not apply ice, toothpaste, butter, or other home remedies directly to the wound, as these can irritate tissue or trap bacteria. After cooling, lightly apply a fragrance free moisturizer or aloe vera only if the skin is not blistered, to soothe the surface and reduce dryness. Finally, cover with a clean nonstick dressing if needed. This sequence reduces pain and protects healing skin.
Cleaning the area and preventing infection
Proper cleansing reduces the risk of infection and supports healing. Wash your hands first, then clean the burn with mild soap and lukewarm water for a gentle cleanse. Pat dry with a clean towel. If debris is present, rinse with sterile saline solution rather than rubbing. Avoid breaking any blisters, and do not peel crusts that form as the skin heals. Applying a thin layer of antibiotic ointment is optional and should be avoided on broken skin unless advised by a clinician. Keep the area clean and dry between dressing changes to minimize microbial growth.
Dressing options and wound coverings
Choosing the right dressing helps protect the wound and prevent friction that can reopen the burn. Use a sterile, nonadherent dressing to prevent sticking to the wound surface. Change dressings at least daily or when wet or dirty. If you observe increasing redness, swelling, or pus, switch to a medical grade dressing and seek advice. A simple, breathable cover reduces irritation and supports comfortable healing while you remain active in daily life. Always wash hands before dressing changes and avoid reintroducing irritants to the wound.
Safe home remedies for soothing burn skin (what works and what to avoid)
Pure aloe vera gel can provide cooling relief without clogging pores, as long as it is free of added scents. A small amount of medical grade honey can offer antimicrobial protection for clean minor wounds, but avoid this on open bleeding skin if you have allergies. Petroleum jelly can seal the surface and keep moisture in, which supports healing. Be cautious with remedies like essential oils, toothpaste, toothpaste based pastes, or butter, which can irritate or trap dirt. The best approach is conservative care and barrier protection rather than aggressive home cures.
Protecting healing skin and minimizing scarring
As the wound heals, protect the area from sunlight because UV exposure can darken scars. Use a broad spectrum sunscreen with SPF 30 or higher, and reapply as directed when outdoors. Once the skin is able to tolerate gentle massage, a light, fragrance free moisturizer can be massaged around the burn to improve flexibility and texture. Avoid aggressive scrubbing, hot water, or strong chemicals while the burn is still healing. Mild pressure and gentle movement can help prevent stiffness in affected areas, particularly for burns on hands, wrists, or fingers.
When to seek medical care for oven burns
If the burn is deep, covers a large area, or involves the face, hands, feet, joints, or genitals, seek medical attention promptly. Signs of infection such as increasing pain, warmth, redness around the edges, fever, or oozing fluids require professional assessment. For children, older adults, or individuals with diabetes or compromised immunity, even small burns should be evaluated by a clinician. When in doubt, contact your healthcare provider or an urgent care clinic to discuss the burn and determine the safest next steps, especially if the skin shows signs of severe damage.
Prevention tips to avoid future oven burns
Preventing burns starts with preparation and awareness. Always wear heat resistant gloves or mitts when handling hot dishes, racks, or trays. Keep children and pets away from the cooking area, and tie back long hair to prevent contact with hot surfaces. Use oven door guards if needed and place hot items on heat safe mats. Preheating and test runs should be done with caution, and always allow hot items to rest before transferring to countertops. A small protective routine now reduces future injuries and burn marks.
Healing timeline expectations and what to watch for
Minor oven burns typically show improvement over several days with proper care, and most marks fade gradually as the skin renews itself. The timeline can vary based on skin type and burn depth. If new red areas appear or pain worsens after several days, this may indicate delayed healing or infection and should be checked by a clinician. Your daily care routine, including gentle cleansing and protective coverings, facilitates a comfortable healing process and helps minimize long term scarring.
Common mistakes that slow healing or worsen burns
Avoid popping blisters, which can lead to infection. Do not apply ice, butter, or oils to an open wound. Refrain from using harsh antiseptics such as hydrogen peroxide repeatedly on intact skin, as this can delay healing. Do not scrub aggressively or pull off crusts; instead let the skin heal naturally while protecting it with a barrier. Finally, do not ignore signs that the burn is not improving or appears to worsen over time.
Tools & Materials
- Cool, clean running water(Run over the burn for 10-20 minutes)
- Mild soap(Gentle cleanser for cleansing the surrounding skin)
- Clean towels or gauze(Pat dry without rubbing)
- Sterile saline solution(For wound irrigation if needed)
- Nonadherent sterile dressing(Protects blistered or clean wound)
- Medical adhesive tape(To secure dressings without sticking to wound)
- Antibiotic ointment (optional)(Only if advised by a clinician)
- Petroleum jelly (Vaseline)(Protects moisture on non blistered areas)
- Pure aloe vera gel(Fragrance-free option for soothing relief)
- Medical grade honey(Antimicrobial option for minor wounds with caution)
- Sunscreen SPF 30+(Protects healing skin from sun exposure)
- Fragrance-free moisturizer(Keeps skin hydrated as it heals)
- Over the counter pain reliever (acetaminophen or ibuprofen)(May help with pain and inflammation)
Steps
Estimated time: 30-60 minutes
- 1
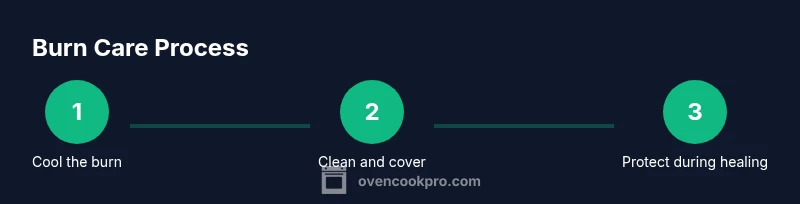
Cool the burn
Rinse the area with cool running water for 10-20 minutes to halt the burning process and reduce swelling. Do not use ice, which can cause tissue damage. If the burn is on the hand, keep fingers elevated to limit swelling. This initial cooling step sets the foundation for safe healing.
Tip: Be gentle with the affected area and avoid rubbing. - 2
Remove restrictive items
Take off jewelry or rings from the area before swelling begins. These items can become tight and worsen circulation problems as the skin inflates. If removal is difficult due to swelling, leave them in place and seek help from a clinician.
Tip: If you cannot remove jewelry safely, seek urgent care. - 3
Clean the wound
After cooling, wash the area with mild soap and lukewarm water. Use clean hands and avoid scrubbing. Gently pat dry with a clean towel. Do not pop blisters or peel crusts that form, since this can introduce bacteria.
Tip: Keep the area clean to prevent infection. - 4
Apply a protective layer
If the skin is unbroken, you may apply a thin layer of fragrance-free moisturizer or aloe vera gel. For blistered skin, use a nonadherent dressing to prevent sticking. Avoid applying antibiotics on intact skin unless advised by a clinician.
Tip: Choose a product with minimal additives to avoid irritation. - 5
Dress the burn
Cover with a sterile nonadherent dressing if the area is at risk of rubbing or contamination. Secure with medical tape without pressing on the wound. Change dressings daily or when they get wet or dirty, and wash hands before each change.
Tip: Be careful not to seal in moisture too tightly. - 6
Consider safe remedies
Limit the use of home remedies to simple measures like pure aloe vera or fragrance-free moisturizers. Do not rely on butter, toothpaste or essential oils on open skin. Honey may be used only if the wound is clean and there is no allergy.
Tip: Always test a small area first for sensitivity. - 7
Protect during healing
Keep healing skin out of direct sunlight and use sunscreen on exposed areas after the initial healing phase. Hydrate the skin with gentle moisturizers and avoid hot water when washing the area. Proper protection reduces long term discoloration.
Tip: Sun protection is key to reducing scar visibility. - 8
Pain and swelling management
Over the counter pain relievers such as acetaminophen or ibuprofen can help with discomfort and inflammation. Do not exceed recommended doses. If pain worsens despite treatment, consult a clinician.
Tip: Follow dosing instructions on the label. - 9
Monitor healing and signs of infection
Watch for increasing redness, warmth, swelling, pus, or fever. If any signs of infection appear, seek medical care promptly. For children or adults with chronic illnesses, err on the side of caution and contact a provider earlier.
Tip: Early detection prevents complications. - 10
Follow up care
As healing progresses, continue gentle cleansing and barrier protection. If scarring concerns persist, discuss options with a clinician after the wound has closed. Consistency in care supports better long term results.
Tip: Consistency beats aggressive but inconsistent care.
Questions & Answers
What qualifies as an oven burn and when should I worry?
An oven burn typically involves skin damage from heat exposure during cooking. Minor burns affect only the outer layer and heal with basic care, while deep or extensive burns may require medical evaluation. When in doubt, contact a clinician for guidance.
Oven burns range from minor to serious. If you are unsure, seek medical advice to be safe.
Should I pop blisters after an oven burn?
No. Popping blisters can introduce bacteria and slow healing. Let blisters heal naturally or seek medical advice if you see signs of infection or if a blister is large and very painful.
Do not pop blisters. Let them heal unless a clinician advises otherwise.
Can I use toothpaste or butter on an oven burn?
No. Toothpaste and butter can trap heat and bacteria or irritate the wound. Use plain cleansers, nonstick dressings, and approved ointments as directed by a clinician.
Avoid toothpaste or butter on burns as they can worsen healing.
When should I seek emergency care for an oven burn?
Seek emergency care if the burn covers a large area, is deep, involves the face or joints, or shows signs of infection such as fever or pus. Early professional evaluation can prevent complications.
If you see deep burns or infection signs, seek urgent care right away.
Can oven burns leave lasting scars?
Mild burns may fade over time with proper care, while deeper or larger burns can leave marks. Sun protection and gentle skincare can help minimize scarring over weeks to months.
Most minor burns fade with time, but deeper burns may scar; protect healing skin from sun.
Is sunscreen needed during the healing process?
Yes. After the initial healing stage, protect the area from sun exposure with sunscreen to reduce pigment changes and scar visibility. Reapply as directed when outdoors.
Once your skin starts healing, use sunscreen to prevent dark spots.
Watch Video
Main Points
- Cool the burn promptly with running water
- Protect the wound with nonstick dressings
- Avoid home remedies that irritate skin
- Seek medical help for deep or extensive burns
- Protect healing skin from sun exposure