Parts for Gas Oven: Identification, Replacement, and Maintenance
A thorough guide to identifying, sourcing, and replacing parts for gas ovens, with safety tips and practical maintenance steps for homeowners.

Parts for gas oven include the ignition system (spark igniter or standing pilot), gas valve and manifold, oven thermostat and temperature sensor, bake and broil elements, burner head, flame spreader, and safety components like the flame sensor and limit switch. Replacements vary by model, but most parts are sold as assemblies or individual components from standard appliance parts suppliers.
Understanding Gas Oven Anatomy
A gas oven is a blend of gas delivery, flame management, and temperature control. For homeowners, a mental map of its major subsystems makes it easier to diagnose problems and identify the right replacements. The core components fall into three broad categories: the ignition and gas-supply system, the temperature-sensing and control hardware, and the safety-related features that prevent hazardous conditions. For the purposes of discussing parts for gas oven, think about the oven as a chamber where fuel, air, and heat interact under controlled conditions. The ignition system starts the flame when you dial to bake or broil, the gas valve and manifold regulate fuel flow, and the burner distributes the flame inside the oven cavity. Temperature sensing—via the thermostat and sensor—tells the control board when to maintain or adjust heat. Safety devices, such as flame sensors or limit switches, cut gas if something goes wrong. When you look at the parts for gas oven, map them to ignition, sensing, and safety subsystems. Understanding how these pieces relate helps you plan maintenance, verify compatibility of replacements, and avoid guessing during a repair. In the context of a home kitchen, many repairs revolve around these core parts, so starting here is practical and time-saving.
Common Parts by Function
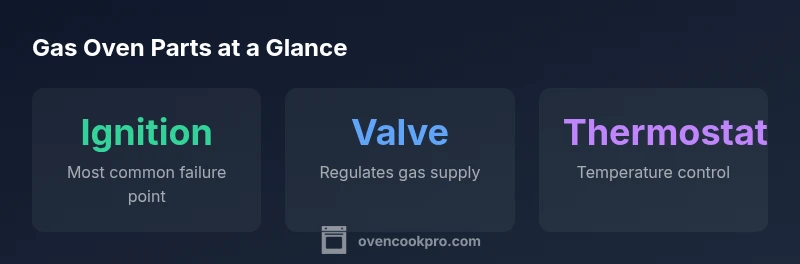
Gas oven parts can be grouped by function to simplify sourcing and replacement. The ignition system is responsible for lighting the gas — it may use a spark igniter or a standing pilot. The gas valve and manifold regulate fuel to the burner, and the burner head distributes the flame for even heating. Temperature control relies on the oven thermostat and temperature sensor to compare actual heat with the desired setpoint. Safety components include flame sensors, limit switches, and other interlock devices that shut off gas if a fault is detected. Electromechanical components such as relays or sensor circuits may be present on newer models, interfacing with the control board. Electric bake/broil elements may accompany a gas oven in some designs, providing electric heat when required. Regardless of model, most parts fall into one of these categories, making it easier to identify what you need when a symptom arises. Always verify compatibility with your oven’s model number and consult the OEM catalog for precise part numbers.
Diagnosing Problems: Signs and Simple Tests
When a gas oven shows issues, a structured approach reduces guesswork. Ignition problems commonly manifest as no flame at start, or frequent clicking without ignition. Temperature-related faults include the oven failing to reach or hold the set temperature, or readings that drift significantly from the dial. Burner symptoms such as uneven flame, yellow or orange coloration, or a burner that fails to stay lit point to gas delivery or burner assembly concerns. Electrical symptoms—unresponsive control panels, erroneous sensor readings, or intermittent operation—hint at thermostat or sensor faults, or control-board issues. Always start with safety checks: ensure gas supply is uninterrupted, verify the oven is not leaking, and test the burner visually in a well-ventilated area. For most homeowners, a careful inspection of the ignition system, gas valve, and thermostat covers the majority of common failures. If you detect a gas leak or strong odor, evacuate and call the utility or emergency services immediately.
Replacement Options: OEM vs Aftermarket and How to Source the Right Part
Source decisions hinge on model compatibility, warranty considerations, and budget. OEM (original equipment manufacturer) parts guarantee exact fit and function but can be pricier. Aftermarket parts, produced by third-party manufacturers, can offer substantial savings but may vary in fit or longevity. A practical rule is to start with OEM catalogs for critical components like gas valves and ignition modules, then evaluate reputable aftermarket options for less critical elements such as gaskets or brackets. Always cross-check part numbers against your oven’s model and serial number, and confirm warranty terms before purchasing. If a direct cross-reference isn’t available, look for compatible equivalents from trusted brands and confirm return policies. When replacing a part, document the service steps and retain the old part for warranty claims if needed. The goal is to maintain a safe, reliable appliance while minimizing downtime and cost.
Sourcing the Right Part and Cross-Compatibility
Reliable sourcing hinges on model-specific part numbers and clear compatibility notes. Start with your oven’s data plate (often located inside the door frame or on the frame near the hinge) to capture the model and serial numbers. Then consult the OEM parts list or a trusted parts distributor to locate the exact match. If the exact number is unavailable, look for an alternate part with the same electrical connections and mechanical dimensions, and verify the fit in a non-destructive way. Some parts, like flame sensors or limit switches, are widely used across multiple brands, easing replacement. Always compare the installation instructions and torque specs, and consider replacing gaskets or seals at the same time to maximize efficiency and safety. When in doubt, contact a licensed technician for confirmation of compatibility and proper installation. A careful, methodical sourcing process saves time and reduces the risk of improper replacements.
Safety First: Handling Gas Oven Parts
Gas oven work carries significant safety considerations. Before performing any replacement, shut off the gas supply and unplug the unit if possible. If you detect a gas leak, do not operate electrical switches or create sparks; evacuate and call the gas company or emergency services. Work only in a well-ventilated area and wear protective gear such as safety glasses and gloves. Be mindful of electrical connections near the gas components, and follow manufacturer instructions to avoid damaging sensors or control boards. Keep working parts organized and reuse original fasteners where applicable. After replacement, perform a careful test for gas leaks using approved methods and verify that the oven ignites and cycles correctly. If any abnormal smell, odor, or flame behavior appears, stop and seek professional service. Safety is the highest priority when dealing with gas-related repairs, so when in doubt, hire a licensed technician.
DIY vs Professional Replacement: When to Call a Technician
Small maintenance tasks, like cleaning burner ports or replacing simple gaskets, can be manageable for a handy homeowner with proper instructions. However, gas-related work and electrical igniters involve higher risk. If you’re unsure about any step, especially those involving gas lines or combustion, stop and call a licensed technician. A professional can confirm gas line integrity, ensure proper ignition timing, and verify that safety interlocks function correctly. Attempting risky repairs without training can lead to leaks, fire hazards, or carbon-monoxide exposure. For long-term reliability, schedule periodic professional inspections—ideally yearly or whenever you notice performance changes. Planning ahead with a professional can reduce downtime and prevent dangerous situations.
Maintenance Practices to Extend Part Lifespan
Preventive maintenance is a cost-effective way to extend part life and keep your gas oven running safely. Regularly inspect the ignition system for corrosion or carbon buildup, clean the burner head and ports to maintain a clean flame, and test the thermostat calibration using a calibrated thermometer. Replace worn door gaskets and oven seals to preserve temperature efficiency and reduce stress on the heating system. Keep the interior and burners dry after cleaning to avoid moisture-related electrical issues. Schedule annual servicing, especially for older units, to catch wear before it leads to a failure. Finally, maintain a spare parts kit with essential items like replacement igniters, flame sensors, and seals for rapid response between professional visits.
Representative gas oven parts and typical cost ranges
| Part | Role | Typical Failure Signs | Replacement Cost (range) |
|---|---|---|---|
| Igniter (gas oven) | Ignites gas; triggers flame | No ignition; slow or delayed flame; clicking without flame | US$20-$150 |
| Thermocouple/thermostat sensor | Senses temperature; informs control | Oven runs hot or cold; unstable readings | US$25-$80 |
| Gas valve assembly | Regulates gas flow to burner | Gas smell; burner won't light; erratic flame | US$60-$200 |
| Burner head / burner port | Distributes flame inside cavity | Uneven flame; clogging; poor heat distribution | US$15-$70 |
| Bake/Broil electric element (if present) | Provides electric heat when needed | No heat on bake/broil; flickering element | US$30-$120 |
| Safety sensor / limit switch | Shuts off gas if unsafe | Gas stove shuts off unexpectedly; flameout | US$15-$60 |
Questions & Answers
What are the most common gas oven parts that fail?
Ignition systems, gas valves, and thermostat sensors are among the most common failure points in gas ovens. Symptoms include failure to ignite, inconsistent temperatures, or unexpected shutoffs. Replacing the failing part usually resolves the issue.
Ignition systems, valves, and thermostat sensors are the usual culprits.
Can I replace gas oven parts myself?
Basic components like knobs or minor gaskets may be replaceable by a confident homeowner. However, gas-related work and electrical igniters carry significant risk. If you’re not trained with gas connections or electrical systems, hire a licensed technician.
DIY is possible for simple parts, but gas work is risky—consider a pro.
How do I identify the right replacement part for my gas oven?
Check the oven’s model and serial number plate, then consult the OEM part catalog or trusted distributors for the exact part number. If a direct match isn’t available, look for compatible equivalents from reputable brands and verify fit with the installation instructions.
Always match model numbers and part numbers.
Where can I buy gas oven parts?
Authorized parts suppliers, major appliance retailers, and OEM catalogs are common sources. Avoid questionable sellers to reduce counterfeit or incompatible parts. Always check warranty terms before purchasing.
Buy from trusted suppliers or the original manufacturer.
Are aftermarket parts reliable for gas ovens?
Many aftermarket parts are reliable and cost less, but always verify compatibility and warranty coverage. Prefer components from established brands and ensure clear return policies.
Look for reputable brands and clear warranties.
How long do gas oven parts typically last?
Lifespan varies by part and usage. Ignition systems and valves may last several years with proper care. Regular inspection helps catch wear early and plan replacements before a breakdown.
It varies; regular checks help you catch wear early.
“Understanding each gas oven component is the first step to reliable maintenance. Choosing quality parts and following safe installation practices protects your home.”
Main Points
- Map gas oven parts to ignition, sensing, and safety subsystems.
- Check model numbers and part numbers to ensure compatibility.
- Opt for OEM parts for critical components; consider reputable aftermarket for non-critical pieces.
- Prioritize safety; contact a licensed technician for gas work.