GE Oven Parts Guide: Common Components and DIY Maintenance
This guide explains GE oven parts, from bake elements to control boards. Learn how they work, common failure signs, sourcing OEM components, and practical maintenance to extend oven life.

GE oven parts comprise a range of essential components—from bake elements and sensors to control boards and timers. Understanding these parts helps homeowners diagnose issues, estimate repair costs, and decide between DIY fixes or professional service. This guide covers the most common GE oven parts, typical failure signs, sourcing OEM components, and practical maintenance steps to extend oven life.
Understanding GE Oven Parts: A Practical Overview
When you hear GE oven parts, you might picture a single component, but a GE oven relies on a small ecosystem of parts that work together to bake, broil, and time meals. According to Oven Cook Pro, the most helpful way to approach repairs starts with a practical map of the key components and how they interact. The Oven Cook Pro team found that diagnosing problems is easier when you classify symptoms by the part most likely involved: heat sources (bake element, broil element), sensing (temperature sensor, thermal fuse), and control (timer, control board). In typical home kitchens, a fault in one area can cascade into unexpected oven behavior, so a methodical approach reduces guesswork and saves time and money.
Core Components: Bake Element, Temperature Sensor, and Control Board
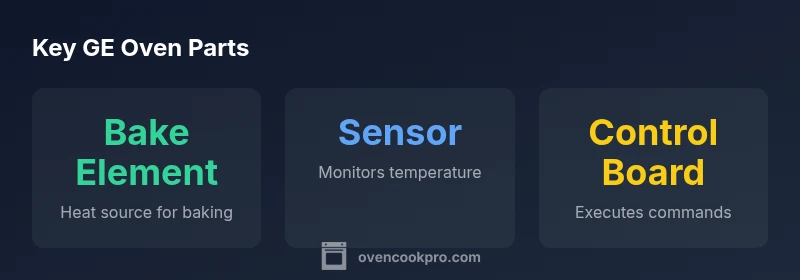
The bake element and broil element are the primary heat sources in most GE ovens. If your oven won’t heat evenly or at all, the bake element is often the first part to inspect, followed by the broil element for top-browning issues. Temperature sensors provide feedback to the oven’s microprocessor, and a failing sensor can lead to incorrect timestamps, improper heating, or early cooling. The control board interprets user commands and governs the oven mode, delay timer, and safety features. A malfunctioning control board can manifest as unresponsive controls, erratic timing, or a complete loss of power to the oven. Understanding the roles of these three parts makes it easier to triage issues and plan repairs efficiently.
Diagnosing Common Symptoms and Matching Them to Parts
Symptoms like uneven baking, no heat, or inaccurate temperature readings typically map to a subset of parts. If the oven heats, but you notice temperature discrepancies, focus on the temperature sensor and its wiring. If heat seems inconsistent across cavities or racks, inspect the bake element and its connections. For control-related symptoms, such as unresponsive buttons or a failure to enter a new mode, a look at the control board and related relays may be warranted. Always start with power safety checks—unplug the unit, wait for capacitors to discharge, and use insulated tools. A structured diagnostic flow reduces unnecessary part replacements and helps you target the right component.
Sourcing GE Oven Parts: OEM vs Aftermarket Options
OEM GE parts are designed to fit precisely and meet original performance standards, which can yield longer life and better compatibility. Aftermarket parts can offer cost savings but may vary in fit and longevity. When shopping, verify compatibility against your oven model number, check warranty terms, and read seller return policies. For high-stakes parts such as control boards or safety sensors, OEM parts are often the safer bet. If you choose aftermarket parts, select reputable suppliers with clear specifications and documented compatibility data. A careful sourcing approach protects your repair investment and minimizes downtime.
DIY vs Professional Repair: Weighing Costs and Risks
DIY repairs can be cost-effective for relatively simple parts like bulbs, door seals, or minor wiring connections, especially when you follow official service manuals and safety procedures. However, complex components such as bake elements, sensors, or control boards involve electrical circuits and sharp edges, so consider your comfort level and the oven’s voltage rating. If you’re unsure, consult a licensed technician who specializes in appliances. Remember that incorrect repairs can void warranties or create safety hazards, so weigh the potential savings against the risk and the time required.
Routine Maintenance to Extend GE Oven Life
Preventive maintenance goes a long way toward extending oven life and preserving performance. Regularly inspect door seals for leaks, clean burner ports (if applicable), and replace worn gaskets. Keep the interior clean to avoid residue that interferes with temperature readings. Periodically test the oven’s calibration using a simple thermometer and adjust if needed per the user manual. If your oven features a self-cleaning mode, use it sparingly and follow manufacturer guidelines to avoid excessive stress on gaskets and hinges. Routine checks on electrical connections, light bulbs, and the door latch can prevent minor issues from becoming costly repairs.
Safety and Handling When Working with Oven Parts
Working on electrical appliances requires attention to safety. Always unplug the unit before inspecting any components, and if the oven is gas-powered, ensure proper ventilation and shutoff procedures are understood. Use insulated tools, avoid wet hands near live terminals, and never bypass safety features or fuses. When removing panels, photograph wiring routes for reassembly and label wires if necessary. If you encounter damaged insulation, burning smells, or exposed conductors, stop and consult a professional technician.
Budgeting and Planning for GE Oven Part Replacements
Build a repair budget that accounts for common parts, potential labor, and unexpected issues. Expect to replace heat elements, sensors, or control boards at different life cycles, and budget for the cost of OEM parts to minimize risk. Some repairs can be staged—address the most critical issue first, then monitor performance before proceeding with additional replacements. Maintaining a small emergency fund for appliance repairs can reduce anxiety when a major component requires replacement, ensuring you keep your GE oven operating safely and reliably.
Common GE oven parts and their functions
| Part | Function | Common Symptoms |
|---|---|---|
| Bake Element | Provides heat for baking | No heat or uneven heat when baking |
| Temperature Sensor | Monitors oven temperature | Inaccurate temps or failure to preheat |
| Control Board | Executes user commands | Unresponsive controls or random heating patterns |
Questions & Answers
What are the most common GE oven parts that fail?
The most commonly failing GE oven parts are the bake element, temperature sensor, and control board. Symptoms typically include heat loss, inaccurate temperatures, or unresponsive controls. Start diagnostics with these components before moving to other areas.
The bake element, temperature sensor, and control board are the usual culprits.
Can I replace GE oven parts myself?
Yes, many homeowners can perform simple replacements (bulbs, seals, or wiring connections) with care and proper manuals. For electrical or control-board work, assess your comfort level and follow safety guidelines. When in doubt, hire a professional.
DIY is possible for simple parts, but for electrical components, proceed with caution.
Where can I source GE oven parts?
Source GE oven parts from official GE parts retailers, authorized distributors, or reputable aftermarket suppliers. Confirm model compatibility and review return policies and warranties before purchasing.
Buy from GE-authorized partners to ensure compatibility.
Are OEM GE parts worth the extra cost?
OEM parts typically offer the best fit and longest life, reducing the risk of premature failure. Aftermarket parts can be cost-effective for some repairs, but verify compatibility and warranty terms.
OEM parts usually fit best and last longer, though aftermarket parts can be cheaper.
What safety precautions should I take before inspecting the oven?
Unplug the oven, allow it to cool, and avoid touching live components. Use insulated tools and follow the manufacturer’s safety notes. If you smell burning or see damaged wiring, stop immediately and seek professional help.
Unplug, wait for cooling, and use insulated tools.
What if my GE oven won’t heat at all?
First check the power supply and fuses, then inspect the bake element and igniter if applicable. If the issue persists, a professional inspection may be necessary to diagnose control or safety component failures.
Check power and primary heat parts first; call a pro if needed.
“Knowing the most frequently failing GE oven parts helps homeowners plan repairs efficiently and minimize downtime.”
Main Points
- Identify fault by symptoms first, then target parts.
- Always unplug before inspecting electrical components.
- OEM parts generally fit best and last longer.
- Budget for parts and potential labor when planning repairs.