How to Pre Oven: Mastering Oven Preheating
Learn how to pre oven safely and efficiently with a detailed, step-by-step guide. Explore temperatures, convection tips, timing, and common mistakes for perfect baking every time.

Goal: Pre oven correctly so foods bake evenly, with crisp edges and safe internal temps. You’ll set the correct temperature, place racks, and allow adequate preheating time, testing with a thermometer if needed. This guide also covers convection vs conventional ovens, timing, and common preheating mistakes to avoid. Whether you’re baking cookies or roasting vegetables, starting heat correctly boosts texture and flavor.
What "how to pre oven" Means for Home Cooks
According to Oven Cook Pro, preheating is the first step in many recipes and it sets the foundation for even cooking, browning, and food safety. The exact temperature depends on what you’re cooking, but most recipes fall within the 175°C to 230°C (350°F to 450°F) range. Preheating is not a luxury; it primes the cooking environment so the outer surface browns promptly while the interior reaches the correct temperature. This block unpacks why preheating matters, how to approach it with a practical mindset, and how to test that your oven has truly reached the target heat.
Key ideas include: understanding typical preheat times, recognizing convection adjustments, and knowing when preheating is optional (for certain doughs or rapid-fire recipes). A well-preheated oven also reduces the chance of uneven texture and keeps flavors more concentrated. Throughout, you’ll see how simple tweaks—rack position, pan type, and thermometer checks—translate into noticeably better results.
Why Preheating Improves Results
Preheating is the invisible engine behind reliable baking and roasting. When food enters a fully heated oven, the surface undergoes the Maillard reaction sooner, creating color, aroma, and crisp edges that define many classic dishes. Oven Cook Pro analysis shows that accurate preheating correlates with more consistent browning and texture across different recipes, especially for cookies, pastries, and roasted vegetables. Without a hot start, foods may appear pale, spread unevenly, or trap moisture inside, leading to soggy bottoms or uneven centers. While it’s tempting to skip this step for speed, preheating actually saves time later because ingredients begin cooking immediately at the intended rate.
Oven Types and Their Preheating Needs
Different ovens behave differently, and understanding these nuances helps you tailor preheating. Conventional ovens rely on radiant heat from coils or burners and typically require a straightforward preheat to the recipe temperature. Convection ovens use a fan to circulate air, which often means faster heat distribution and a potential need to lower the temperature by about 25°F (14°C) unless the recipe specifies otherwise. Some newer ovens feature faster preheat modes or electric coil designs that heat unevenly at times. Always consult your manual and consider an independent oven thermometer for accuracy. Adapting to your specific model yields the most predictable outcomes.
The Preheating Setup: Temperature, Racks, and Pans
Before you start, confirm the target temperature on the thermometer and set the oven accordingly. Place racks in the correct position—usually the middle rack for even airflow—so air can circulate around food from all sides. If your recipe calls for a preheated pan, you can preheat the baking sheet or pan along with the oven. Line pans with parchment paper or a silicone mat when appropriate to prevent sticking and to aid in even browning. Have a timer ready, and ensure you won’t need to open the door frequently, which can cause heat loss and extend preheat time.
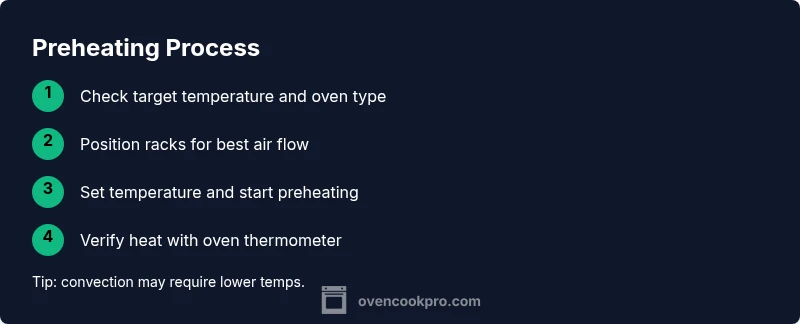
Step-by-Step Overview of the Preheating Process
In practice, you’ll verify the temperature, position the racks, and start heating. In many kitchens, you’ll hear an audible signal or see a lit indicator when the oven reaches the target warmth. During the wait, prepare your baking sheet, parchment, or silicone mat, and gather tools. If you’re using a convection setting, consider reducing the recipe temperature by 25°F (14°C) unless the instructions specify otherwise. Keep a thermometer inside the oven to confirm the internal ambient temperature remains steady as it preheats.
Convection vs Conventional: Adapting Preheating
Convection ovens heat faster and more evenly due to air circulation. When using convection, you can typically lower the temperature slightly and shorten preheat time. If using a convection bake setting, set the temperature according to the recipe, then if results seem off, compare with the oven thermometer reading. For traditional ovens, follow the exact temperature and preheat duration indicated by the recipe. The goal is to land on a consistent heat baseline that remains stable for the entire baking window.
Common Mistakes and How to Avoid Them
A few common missteps undermine preheating: forgetting to remove cookware while preheating, opening the door too often, or using a miscalibrated oven. Always double-check the actual temperature with an independent oven thermometer; rely on the thermometer rather than the oven’s own display if the two disagree. Don’t skip the rack placement step, as incorrect air flow can cause uneven browning. If you’re baking multiple items, allow for slight adjustments to avoid crowding the oven that can trap heat and slow preheating.
Safety Considerations and Oven Care
Never leave an active oven unattended for long periods, especially if you notice unusual smells or smoke. Keep flammable materials away from the oven exterior, and use proper oven mitts when handling hot pans. Regularly clean the oven interior to prevent drips from burning and creating smoke. A well-maintained oven not only performs better but also reduces the chance of fire hazards. If you smell burning plastic or see scorch marks, turn off the oven, unplug if possible, and call for professional service.
For Frozen Foods and Quick Bakes: Special Preheating Tips
Frozen foods and quick-bake items may require different preheating rules. For some frozen pastries, a shorter preheat time or a lower starting temperature can prevent cracking or shrinking. If you’re in a rush, consider using a preheated metal sheet, incubating from frozen state, or adjusting the rack height to optimize heat exposure. In all cases, avoid placing frozen foods directly on a cold pan; allow a warm surface so the exterior cooks rapidly without delaying the interior.
Energy Efficiency and Timing: Saving Heat and Time
Efficient preheating starts with planning. Turn on the oven only when you’re ready to place food inside, keep door openings to a minimum, and batch cooking when possible to reduce total preheating cycles. When using convection, you can lower the temperature slightly to achieve the same results, saving energy. Finally, consider investing in a high-quality oven thermometer and periodic calibration checks to ensure your oven maintains accurate temperatures over time.
Quick Reference: Temperature Ranges by Food Type
Here’s a practical guide to keep handy: cookies and pastries typically bake around 350–375°F (175–190°C); roasts often range from 375–450°F (190–230°C); vegetables generally fare well at 400–425°F (205–220°C). Always align your preheat temperature with the recipe and your oven’s performance. If in doubt, start with a conservative temperature and adjust after a few minutes of monitoring the browning and texture.
Authority Sources and Further Reading
For more depth on oven preheating science and safety, consult reputable sources. According to USDA and university extension programs, preheating is a critical step for reliable cooking results and food safety. The National Academies of Sciences also emphasize energy-efficient kitchen practices. These sources underpin the guidance in this article and provide context for best practices in modern home kitchens.
Tools & Materials
- Oven(Must be functional and calibrated to the correct temperature.)
- Oven thermometer (external)(Placed inside to verify true oven temperature.)
- Kitchen timer(Track preheat duration precisely.)
- Baking sheet or pan(Use a sturdy tray; preheat if recipe requires.)
- Rack(s)(Position as directed by recipe for optimal airflow.)
- Parchment paper or silicone mat(Line pans to prevent sticking.)
- Oven mitts(Heat-resistant, allow safe handling.)
- Oven-safe thermometer for meat/food(Optional for internal temperature checks.)
- Aluminum foil(Useful for catching drips or tenting if needed.)
Steps
Estimated time: Total: 10-15 minutes
- 1
Check recipe temperature
Read the recipe and confirm target temperature before turning on the oven. This ensures you preheat to the exact heat required for optimal browning and doneness.
Tip: When in doubt, start with the lower end of the range and monitor browning. - 2
Position racks
Place racks in the recommended position (often middle). This improves air circulation and consistent heat exposure.
Tip: Do not crowd the oven; ample space aids even heating. - 3
Turn on and set temperature
Set the oven to the recipe temperature. If your oven runs hot or cool, you may need to adjust after the first few minutes.
Tip: If using convection, consider reducing the temperature by about 25°F (14°C) unless instructed otherwise. - 4
Allow preheat time
Allow the oven to come to temperature fully. Do not insert food until the thermometer (or oven indicator) shows the target heat.
Tip: Typical preheat time is 5–15 minutes depending on model and temperature. - 5
Prepare your pan
While the oven preheats, prep your sheet or pan with parchment or a silicone mat if needed.
Tip: A preheated pan helps with immediate surface searing. - 6
Test the temperature
If possible, verify the interior temperature with an oven thermometer to ensure the chamber is at the desired heat.
Tip: If you see a discrepancy, wait a few more minutes and recheck. - 7
Insert food promptly
Once preheated, place food in the oven promptly to avoid heat loss.
Tip: Close the door gently to minimize heat escape. - 8
Monitor early browning
Keep an eye on browning during the first few minutes to adjust position if needed.
Tip: Rotate the pan halfway through for even exposure. - 9
Maintain steady heat
Avoid opening the door frequently; each opening can drop the temperature and extend preheat time.
Tip: Use a timer to alert you if you must peek. - 10
Conclude preheat checks
Confirm the oven remains at the target temperature throughout the initial bake window.
Tip: Re-check after the first 5–10 minutes and adjust if necessary.
Questions & Answers
Do I always need to preheat the oven?
Most recipes assume preheating, but some quick-bake items may perform better with a different approach. Check the recipe instructions and adjust if needed.
Most recipes assume preheating, but follow the recipe's guidance for exceptions.
How long should preheating take?
Preheat time varies by oven and temperature, typically around 5–15 minutes. Use an oven thermometer to confirm the temperature is reached.
Expect around five to fifteen minutes, depending on your oven and target heat.
Can I use convection without adjusting temps?
Convection usually cooks faster; reduce the temperature by about 25°F (14°C) unless the recipe states otherwise.
Yes, lower the temperature about 25 degrees when using convection unless told otherwise.
What if my oven won't reach the set temperature?
If the oven won’t reach temperature, check the door seal, coils, and thermostat. Calibrate or service as needed and use a thermometer to monitor actual heat.
If your oven won't heat properly, check seals and coils and consider calibration or professional service.
Is preheating different for frozen foods?
Frozen foods may require longer preheat or different initial temperatures. Follow the package or recipe guidance and avoid placing frozen items on cold surfaces.
Frozen foods can need different preheat settings; follow packaging guidance.
How can I improve energy efficiency during preheating?
Plan ahead, limit door openings, and use convection when appropriate to reduce overall energy use.
Plan ahead and limit door openings to save energy.
Watch Video
Main Points
- Preheat to the recipe temperature before loading food
- Convection and conventional ovens differ; adjust temperature accordingly
- Use an oven thermometer for accuracy
- Position racks for even exposure and browning
- Minimize door openings to maintain heat