What Temp to Cook Chicken in Oven For: A Complete Guide
Learn safe, practical oven temperatures for chicken by cut, plus testing methods, rest times, and pro tips from Oven Cook Pro for juicy results.

To cook chicken safely and juicily, you’ll roast it at 375-425°F depending on cut and thickness. Always verify doneness with a meat thermometer, aiming for an internal temperature of 165°F. Start with a preheated oven, use a rack for air circulation, and allow the meat to rest before slicing. Convection can shave a few minutes off the time and help crisp skin.
Why Temperature Matters for Chicken
According to Oven Cook Pro, mastering oven temperatures for chicken isn't just about guessing; it's about proper range, air circulation, and resting time. In this guide we answer what temp to cook chicken in oven for various cuts, why it matters, and how to bring juicy results every time. The wrong temperature can push you into a dry breast or undercooked portions that pose safety risks. When you choose the right temperature, you also set yourself up for consistent browning, even cooking, and predictable results across a busy weeknight or a celebratory roast.
Several factors influence the final result, including the size and cut of the chicken, whether you roast whole or in pieces, the presence of skin, and whether you use a convection setting. For beginners, the safest starting point is a moderate roast that offers steady heat and tolerance for variations in oven performance. For more experienced home cooks, slightly higher heat for a short period can accelerate browning without sacrificing moisture. In all cases, using a meat thermometer is preferred over time estimates, because thickness and bone presence create natural variability. By the end of this article you will know the recommended temperatures for each cut, how to test doneness reliably, and how to rest the meat to maximize juiciness.
Safe Internal Temperature and Testing
Food safety guidelines set the minimum internal temperature for all poultry at 165°F (74°C). The fastest, most reliable way to verify doneness is to insert an instant read thermometer into the thickest part of the meat, avoiding bone. For whole chickens, check the breast and the thigh separately; the breast should read around 165°F while the thigh area can reach 165-170°F and still be juicy. After removing from the oven, allow the chicken to rest for 5-10 minutes; carryover heat will cause a small final rise in internal temperature. Resting also helps the juices redistribute, making the meat easier to slice and more flavorful. If you are cooking multiple pieces, remember that bone and skin add heat capacity, which means readings near the bone can be slightly higher or lower depending on position. In practice, rely on the thermometer rather than the clock to determine doneness.
Temperature Guidelines by Cut
- Whole chicken: 375-425°F (190-220°C) depending on weight; roast at 425°F for 15-20 minutes to brown, then reduce to 375°F for the remainder.
- Bone-in, skin-on pieces (thighs, drumsticks): 375-400°F; skin should be crisp after the initial browning, with internal temp of 165°F at the thickest part.
- Boneless breasts: 350-375°F for shorter times to avoid drying; target 165°F at the thickest portion.
- Wings or smaller pieces: 375-425°F, depending on desired crispness; use a rack to maximize air flow. Note: These are guidelines and actual times vary by oven and piece size; always verify with a thermometer.
Conventional vs Convection: Choosing Your Oven Setting
Conventional ovens rely on radiant heat from the top and bottom elements; convection adds a fan that circulates air for faster, more even browning. For chicken, convection can shorten cooking time by about 10-20% and help skin crisp more evenly. If your oven's convection setting is strong, you may want to reduce the temperature by 25°F to avoid overbrowning. Start with conventional at 375°F if you are new to convection, then experiment. Always ensure no overcrowding.
How to Preheat Properly and Prep
Begin by preheating the oven to the target temp for your cut, typically 375-425°F. While the oven warms, pat the chicken dry with paper towels to remove surface moisture that hinders browning. Rub with oil or butter and season generously with salt, pepper, and aromatics such as garlic, lemon, or herbs. If you prefer, brine the chicken for 30-60 minutes before roasting to improve moisture retention; pat dry again before roasting. Proper prep creates a favorable surface for browning and improves texture.
Step-by-Step Roasting Timelines by Weight
For a practical approach to timing, begin with the following general framework. Whole chicken of 3-4 lb: roast at 425°F for 15-20 minutes to brown, then reduce to 375°F for 45-60 minutes until the thickest part reaches 165°F. A 4-5 lb chicken typically finishes in 60-75 minutes total at 375°F, depending on your oven and rack height. If you opt for convection, you can shorten these times by roughly 10-15 minutes, but always confirm with a thermometer. The goal is reliable reach of 165°F at the breast and near 165-170°F at the thighs.
Common Mistakes and How to Fix Them
Avoid starting from a cold oven or skipping the rack, which leads to uneven browning and soggy bottoms. Do not rely on time alone; use a thermometer for accuracy. Pat the surface dry to promote browning; too much moisture delays crust formation. If skin isn’t crisp, finish under the broiler for 1-2 minutes at high heat, keeping a close eye to prevent burning. Finally, rest the meat after roasting to redistribute juices.
Flavor and Finish: Crisp Skin and Juicy Meat
To maximize flavor, season with aromatics such as garlic, lemon zest, and fresh herbs. A light brushing of olive oil or melted butter enhances browning. For extra crispiness, finish with a brief broil at the end, but keep a watchful eye as sugars can burn quickly. Resting for 5-10 minutes before carving preserves moisture and makes portioning neater.
Authority Sources and Further Reading
For confirmed guidelines, consult trusted sources such as the U.S. Department of Agriculture and the Centers for Disease Control and Prevention. These references provide context for safe temperatures and handling practices that underpin this guide. Always cross-check with current official recommendations when planning meals.
Tools & Materials
- Meat thermometer (instant-read preferred)(to check 165°F accurately)
- Baking sheet with rack(for even air circulation and browning)
- Paper towels(pat chicken dry before seasoning)
- Oven-safe tongs(to handle hot chicken safely)
- Oven mitts(protect hands during handling)
- Parchment paper or aluminum foil(for easier cleanup and nonstick setup)
- Kitchen scale (optional)(help estimate weight for timing)
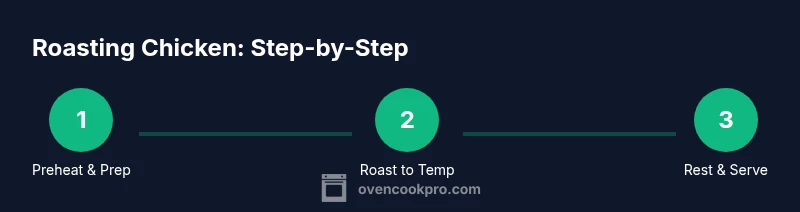
Steps
Estimated time: 60-90 minutes
- 1
Preheat and Prep
Preheat the oven to the target range (375-425°F) based on cut. Pat the chicken dry with paper towels, then oil or butter and season generously with salt, pepper, and aromatics. This step improves browning and moisture retention.
Tip: Dry surfaces promote browning; skip the rush to season before drying. - 2
Position on Rack
Place the chicken on a rack set over a baking sheet to ensure hot air circulates all around. This prevents a soggy bottom and promotes even cooking from breast to thigh.
Tip: If you don’t have a rack, elevate with crumpled foil to create space below the meat. - 3
Roast and Monitor
Roast until the thickest part hits 165°F for breasts or 165-170°F for thighs near the bone. Check in a few spots to account for uneven pieces, especially with bone-in portions.
Tip: Resist the urge to open the oven frequently; use thermometer readings instead. - 4
Rest the Chicken
Remove from heat and let rest for 5-10 minutes. Resting lets juices redistribute, ensuring sliced portions stay moist and flavorful.
Tip: Tent loosely with foil if you want to keep warmth without steaming the skin. - 5
Optional Crisp Finish
If you want extra crisp skin, broil for 1-2 minutes at high heat, watching closely to prevent burning.
Tip: Only broil after the internal temp is safely at goal to avoid drying the meat.
Questions & Answers
What is the best oven temperature for roasting chicken?
A common starting point is 375°F, with higher temps (425°F) used briefly to brown skin. Always finish by reaching 165°F internal, checked with a thermometer.
A common starting point is 375 degrees, then finish to 165 degrees internal with a thermometer.
Do I need to preheat the oven before cooking chicken?
Yes. Preheating ensures consistent heat from the moment roasting begins, which helps browning and even doneness.
Yes, preheating ensures consistent heat from the start.
Can I cook chicken from frozen in the oven?
It's possible but not ideal. Frozen meat takes longer to cook and may dry out. If you must, increase time and use a thermometer to verify doneness.
You can cook from frozen, but it takes longer and you should verify doneness with a thermometer.
Should I brine chicken before roasting?
Brining can improve moisture and juiciness, especially for lean cut breasts. If you brine, pat dry well before roasting to promote browning.
Brining can help, especially for breasts; pat dry well before roasting.
What about bone-in versus boneless chicken?
Bone-in pieces take longer and can stay juicier near the bone; boneless breasts finish faster but risk drying out if overcooked. Use a thermometer to guide timing.
Bone-in takes longer but stays juicier near the bone; boneless cooks faster, so monitor with a thermometer.
How should I check doneness besides the thermometer?
Color alone isn’t reliable. Use the thermometer as the primary test, and confirm there are no pink juices and the juices run clear at the thickest part.
Doneness is best checked with a thermometer; color alone isn’t reliable.
Watch Video
Main Points
- Preheat properly to ensure even browning
- Use a thermometer and target 165°F internal
- Rest before carving to preserve juices
- Choose the rack method for best air flow
- Adjust convection settings to balance time and browning