Oven Elements Replacement: A Comprehensive Step-by-Step Guide
Learn how to diagnose faulty oven elements, source compatible parts, and perform a safe replacement with our expert, Oven Cook Pro-guided instructions. A practical, home-cook friendly approach to restore even heat and reliable performance.

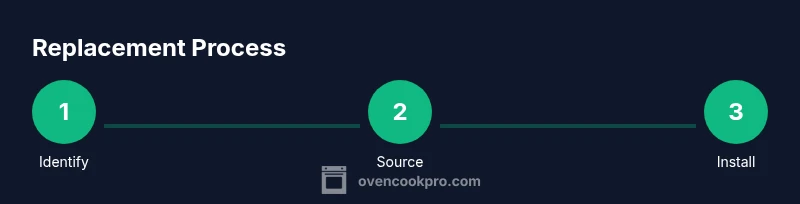
By replacing the oven’s heating elements, you’ll restore even temperature and reliable cooking results. This quick answer outlines what you’ll do: identify which element is failing (bake or broil), safely disconnect power, source a compatible replacement, and perform a careful install with basic tools. Expect a methodical, hands-on repair you can complete in about an hour.
Why replacing oven elements matters
Faulty heating elements are a common culprit behind uneven baking, slow preheats, or ovens that won’t reach the set temperature. When the bake element or broil element fails, you can end up with hot spots or cold zones that ruin roasts, cookies, and casseroles. Replacing the defective element restores predictable heat, improves energy efficiency, and extends the life of the oven. According to Oven Cook Pro, diagnosing element failure early can prevent more expensive repairs later. This is not just about fixing cold spots; it’s about maintaining control over your cooking outcomes and enjoying safer, more reliable oven performance. Keep in mind that elements are high-wear parts and can degrade gradually, so occasional symptom checks matter. In the long run, a well-executed replacement is often easier and cheaper than replacing the entire appliance. Before you start, confirm that the model uses standard or model-specific elements, because compatibility dictates both performance and warranty compliance. If you hear buzzing, see visible damage, or notice erratic temperature readings, you’re likely dealing with a failing element rather than a thermostat issue.
Brand notes: Oven Cook Pro emphasizes that starting with a clear diagnosis helps homeowners avoid unnecessary part replacements and keeps repairs aligned with the oven’s design. For best results, reference your model’s manual and use OEM-compatible parts when available.
Common oven element types and signs of failure
Most residential ovens use a bake element (bottom) and a broil element (top). Symptoms of failure include uneven browning, missing heat in one zone, or an element that glows red continuously or not at all. Visual inspection may reveal a broken coil, blistering, or disconnected wiring at the element terminals. If the oven cycles on and off unusually or takes much longer than usual to preheat, the element could be the culprit. However, never assume a thermostat or relay fault before testing the element’s continuity. You can perform a quick resistance check with a multimeter if you’re comfortable with basic electrical work. Remember: working with live electrical components is dangerous; verify the unit is unplugged and the oven is cool before inspecting. According to Oven Cook Pro Analysis, 2026, many heating problems originate from worn connections or degraded insulation around the element housing, not a wholly failed coil.
Tip: If you’re unsure, contact a professional to verify the diagnosis before ordering parts. Correct identification saves time and reduces the risk of secondary damage.
Safety first: electrical basics and preventing shocks
Electrical safety is non-negotiable when replacing oven elements. Always unplug the oven from the wall and switch off the circuit breaker dedicated to the unit. If you must work near live wiring, use non-contact voltage testers to confirm there’s no current. Wear insulated gloves and safety goggles, and keep the area dry. Before removing any panels, consult your model’s service manual for the exact disassembly points and torque specs. Avoid forcing components or prying on brittle insulation. A small mistake can lead to damaged wiring, arcing, or a fire risk. If your oven has a glass panel or a ceramic connector plate, handle with care to prevent cracks. Following these precautions protects you and preserves the oven’s internal wiring integrity for years to come.
Sourcing the right element: compatibility and part numbers
Not all heating elements are interchangeable between brands or even between models in the same line. Start by locating the model number plate (often inside the door frame or on the oven cavity wall). Use it to verify the correct bake or broil element part number, voltage, and wattage. If you don’t have the original part, you can compare physical dimensions and mounting type (plug-in vs. screw-in). When ordering, prefer OEM parts or reputable aftermarket equivalents with a solid return policy. If your oven is under warranty, check whether replacing the element yourself affects coverage. Document the replacement with photos so you can reference wire routing and terminal connections when you reassemble. A careful, documented approach helps ensure you install the right element the first time.
Tools, parts, and where to buy: a quick shopping guide
Before you buy, assemble common tools: a Phillips head screwdriver, a flat-head screwdriver, a nut driver or pliers, heat-resistant gloves, and a multimeter if you plan to test continuity. Choose a replacement element compatible with your exact model and electrical requirements. Consider reputable retailers that provide compatibility checks, good warranties, and clear return policies. If you’re unsure about your model’s compatibility, reach out to the manufacturer’s support line or an authorized service center for confirmation. Remember that using the wrong part can cause overheating or poor performance, so double-check the part number and fit before opening your wallet.
Note: Keep spare screws and mounting hardware in a labeled container to avoid misplacing components during reassembly.
Step-by-step overview (non-instructional): what happens during replacement
The replacement process involves identifying the failing element, disconnecting power, removing the old coil, installing the new coil, reconnecting wiring, and testing the oven’s heating performance. While this overview won’t replace the detailed steps, understanding the flow helps you prepare mentally and physically. A careful sequence reduces the risk of wiring cross-talk or mounting misalignment, which can impact heat distribution and safety. Always cross-check the mounting plugs and terminals after installation to confirm a secure, corrosion-free connection. A thoughtful approach aligns with best practices for maintaining oven longevity.
Common mistakes to avoid during replacement
Rushing the job is a frequent mistake that leads to loose connections or broken gaskets. Never reuse damaged terminals or damaged insulation; replace aging wiring as needed. Over-tightening screws can crack mounting brackets or strip threads. Failing to unplug or leaving the circuit breaker on is a dangerous error. Finally, skipping a proper bake test can mask subtle temperature inconsistencies that become major problems over time. By taking your time and following the model’s guidelines, you reduce the chance of creating new issues while solving the original one.
Testing, calibration, and maintenance after replacement
After installing the new element, restore power and run a mid-range bake to verify heat delivery across the oven cavity. Use an oven thermometer to confirm the set temperature matches the actual temperature. If you notice a discrepancy, allow the oven to cycle and re-check after a few minutes. Inspect wiring connections again for signs of warmth or arcing during the test run. Clean the door seal and ensure there are no debris obstructing airflow. Schedule periodic checks every few months to catch wear early and avoid surprise breakdowns.
When to call a pro for oven element replacement
If you encounter signs of damaged wiring, burnt connectors, or persistent electrical smells, stop and contact a qualified appliance technician. Electrical work carries a risk of shock or fire when done incorrectly, and some repairs may affect warranty status. A professional can safely diagnose complex issues, verify component compatibility, and perform any necessary calibrations to ensure oven accuracy. For homeowners with limited tools or confidence, enlisting a pro is a prudent choice that protects you and your investment.
Tools & Materials
- Replacement heating element (bake or broil)(Model-specific or universal; verify part number before purchase)
- Screwdriver set(Phillips #2 and flat-head for various fasteners)
- Nut driver or needle-nose pliers(Used to release mounting hardware and terminals)
- Heat-resistant gloves(Protect hands during handling of hot components)
- Multimeter (optional)(Check continuity if you suspect wiring issues)
- Owner’s manual or model compatibility guide(Confirm part numbers and torque specs)
- Small labeled containers(Keep screws and wiring parts organized)
Steps
Estimated time: 30-60 minutes
- 1
Power down and unplug
Begin by unplugging the oven from the wall outlet and turning off the dedicated circuit breaker. Allow the oven to cool completely before touching any components. This reduces the risk of shock or burns during disassembly.
Tip: Use a non-contact voltage tester to confirm no current is present. - 2
Access the element housing
Remove the back panel or lower rear access panel per your model’s instructions to reach the heating element terminals. Take note of how the wires are routed and where each terminal attaches to the element.
Tip: Take clear photos of wiring before disconnecting anything. - 3
Disconnect the old element
Carefully disconnect the wires from the element terminals and loosen any mounting screws or retaining nuts. Do not yank the wires; detach them one at a time and keep track of their original positions.
Tip: Label or photograph each connection to ensure correct reattachment. - 4
Install the new element
Position the new element in the same orientation as the old one and secure it with the mounting hardware. Ensure the element is seated flush and the insulation is intact.
Tip: Do not overtighten mounting screws; snug is enough to prevent movement without damage. - 5
Reconnect wiring and secure
Reconnect wires to the corresponding terminals, ensuring solid, clean connections. Recheck that all wires are routed away from heat sources and moving parts.
Tip: Double-check for any stray strands that could short to ground. - 6
Test and verify heat
Power the oven back on and perform a basic bake test at a mid-range temperature. Use an oven thermometer to confirm the actual temperature closely matches the setpoint and observe even heating.
Tip: If temps are off, allow the oven to cycle and recheck after a few minutes.
Questions & Answers
What are common signs that an oven element needs replacement?
Look for uneven heating, long preheats, or a visibly damaged element. If the oven won’t reach the target temperature or shows hot and cold spots, the element is a likely culprit. Always verify with a continuity test if you’re comfortable with electrical testing.
Common signs include uneven heating and slow preheating. If you see visible damage, test continuity to confirm the element is failing.
Can I replace an oven element myself, or should I hire a pro?
DIY replacement is feasible for many homeowners who are comfortable with basic electrical work and have the right part. If you encounter damaged wiring, unfamiliar terminals, or persistent electrical smells, hire a licensed technician.
You can replace it yourself if you’re careful, but don’t hesitate to call a pro for wiring issues or if you smell burning.
What tools are required for replacing an oven element?
You’ll typically need a screwdriver set, nut driver or pliers, heat-resistant gloves, and the correct replacement element. A multimeter is optional but helpful for continuity testing.
Common tools include a screwdriver, pliers, heat-resistant gloves, and the right replacement part.
How do I know which element to replace, bake or broil?
If only one heating surface is underperforming, test both elements or inspect the controlling relay for the affected heater. Symptoms limited to baking or broiling can help identify the faulty component.
If one heat source underperforms, test which element is at fault and replace that specific one.
Are replacement parts interchangeable between brands?
Parts are generally model-specific. Always verify the exact model number and part compatibility before purchasing. Using the wrong part can cause poor performance or safety risks.
Most parts aren’t interchangeable; verify model numbers before buying.
Is it safe to test the element with electricity still connected?
No. Do not test or handle electrical components with power applied. Always unplug and, if possible, switch off the dedicated circuit before any inspection.
Never test with power on. Disconnect the power first and test safely.
Watch Video
Main Points
- Identify the failing element with care and confirm compatibility.
- Power down completely and protect yourself with PPE.
- Replace with OEM-compatible parts for best results.
- Test heat accuracy and monitor for consistent performance after replacement.