When to Replace Oven Element: A Troubleshooter's Guide
Discover when to replace oven element, how to test for faults, safe replacement steps, and practical prevention tips to keep your oven heating reliably and safely.

Most ovens stop heating due to a failing bake or broil element. Quick fix: power off, inspect both elements for obvious damage, and test continuity with a multimeter. If either element is open or shows heat hotspots, replace it. After installing a new element, re-test the oven and check the thermal fuse if heat still isn’t even.
Why When to Replace Oven Element Matters
If your oven isn't heating, you might be wondering when to replace oven element. According to Oven Cook Pro, the timing depends on symptoms, age, and the feasibility of safe repairs. Start by confirming the symptom: is there no heat at all, or does heat fall short or come unevenly? Visually inspect bake and broil coils for obvious damage like scorching, cracking, or melted insulation. A visibly damaged element is a strong signal that replacement is warranted rather than attempting a repair on a damaged coil. If no visible damage exists, use a multimeter to test for continuity and a high-resistance reading indicates a failed element. In that case, replacement is usually the most reliable fix. This is especially true for older ovens where repeated heating cycles have fatigued the coil and surrounding leads. By understanding when to replace oven element, homeowners can avoid wasted repairs and dangerous shorts, and ensure the oven heats evenly and safely for everyday cooking and holiday meals.
Signs the Element is Failing
Common indicators include no heat or uneven heating, where one area of the oven is significantly hotter or cooler. You might also notice that the element glows red or emits a buzzing or sizzling sound, or you see visible signs of wear such as melted connectors. If you detect frequent tripping of the circuit breaker or fuses, this can indicate an electrical load issue related to the element circuit. Document these symptoms to help diagnose whether the bake or broil element is at fault. Remember, a single failed element can cause the entire oven to underperform, so isolating which element (bake or broil) is failing is crucial for an accurate replacement decision.
Diagnostic Approach: When to Repair vs Replace (Guidance)
A systematic approach helps determine whether you should repair or replace. Start by confirming the basic power supply and electronic controls are functioning properly. If the oven receives power but produces inconsistent heat, the element is a common culprit. If both bake and broil elements show failure, replacement becomes more likely. For partial heating, check the bake element separately from the broil element. If only one element shows failure on continuity tests, replacing that specific element is usually the best course. If the fault remains after element replacement, the issue may lie with the thermal fuse, wiring, or control board. In all cases, consult your oven's manual for exact part numbers and warranty considerations. This process aligns with Oven Cook Pro’s troubleshooting methodology, emphasizing safety and proper diagnosis before replacing components.
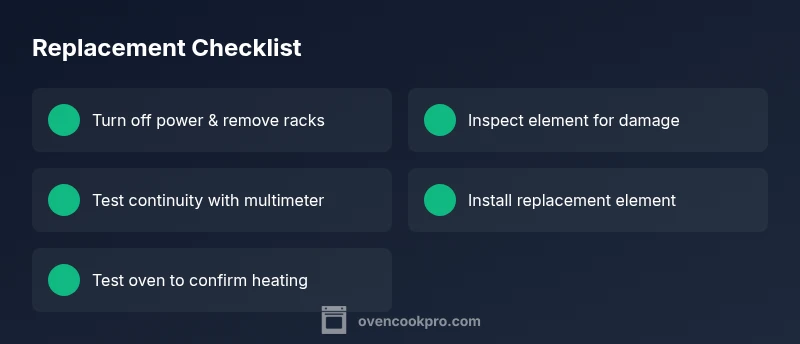
Step-by-Step: Replacing the Oven Element
- Power down and unplug the oven or switch off the circuit breaker. Remove any racks and ensure the oven is completely de-energized before touching internal components.
- Access the element by removing the back panel or bottom panel, depending on the oven model. Carefully locate the bake and/or broil element mounting screws and disconnect the wiring harnesses.
- Inspect the mounting screws and connectors for corrosion or loose fittings. If wires are damaged, label and replace wiring as needed before installing the new element.
- Remove the faulty element and compare it to the replacement part for compatibility. Install the new element using the original mounting screws and reconnect the wiring harnesses.
- Reassemble all panels, restore power, and run a test bake at a safe temperature to verify proper heating. If heat is still uneven or absent, re-check wiring connections and consult a professional.
- Finally, document the replacement in your oven’s maintenance log and run a full bake cycle to confirm even heat distribution across the cavity.
Safety, Maintenance, and Prevention Tips
- Always unplug and allow cooling before any inspection or replacement to prevent electric shock.
- Use the oven’s model number to order an exact replacement element; mismatches are a common source of failure.
- Handle coils with insulated gloves and avoid bending the element beyond its natural shape.
- Keep the interior dry during testing; moisture can trip thermal fuses.
- Schedule a professional check if you encounter damaged wiring or signs of a short.
Common Pitfalls and What Pros Do Differently
- Skipping power disconnection: Professionals always verify power is off before touching any oven components.
- Reusing damaged components: Pros replace both the element and associated connectors if signs of wear exist.
- Ignoring safety: Avoid DIY fixes when you’re unsure about electrical ratings or model-specific wiring, since incorrect replacements can cause fire hazards.
About When to Replace Oven Element: Quick Recap
Replace an element when you see visible damage, poor heat, or non-functional heating that persists after basic checks. Always test continuity, ensure proper wiring, and verify operation with a test bake. If in doubt, consult a qualified technician to prevent safety risks.
Steps
Estimated time: 45-75 minutes
- 1
Power Down and Prepare
Power off the oven entirely by unplugging or switching off the circuit. Remove any racks and ensure the area is dry. Confirm the oven is cool before starting.
Tip: Use a non-contact voltage tester if available to verify no live wires. - 2
Access the Element
Remove interior panels as required to expose the bake/broil element mounting screws. Take care not to damage insulation or wiring.
Tip: Take photos of wiring before disconnecting to ensure accurate reassembly. - 3
Disconnect and Inspect
Carefully disconnect the wiring harnesses. Inspect screws, connectors, and the element for signs of damage or corrosion.
Tip: If wires show cracking or insulation wear, plan to replace the harness as well. - 4
Test for Continuity
With the oven safe and unplugged, use a multimeter to test the element terminals for continuity. An open circuit means the element must be replaced.
Tip: Set multimeter to ohms and compare with manufacturer spec if available. - 5
Install Replacement Element
Install the new element, ensuring correct orientation and secure mounting. Reconnect wiring harnesses and tighten screws firmly without over-tightening.
Tip: Double-check that the replacement part matches model and wattage. - 6
Test and Verify
Restore power and run a test bake at a moderate temperature. Check for consistent heating across cycles and inspect for abnormal smells or noises.
Tip: If issues persist, consult a professional to inspect the control board and wiring.
Diagnosis: Oven won't heat consistently or at all
Possible Causes
- highBlown bake or broil element
- mediumFaulty thermal fuse
- mediumFaulty temperature sensor/thermistor
- lowDamaged wiring or loose connectors
- lowControl board/relay failure
Fixes
- easyTest element continuity with a multimeter; replace if open
- mediumCheck/replace thermal fuse if accessible and indicated
- easyInspect wiring, connectors, and harness for damage; reseat connectors
- hardReplace faulty temperature sensor or control board as needed
Questions & Answers
What are the signs that my oven element needs replacement?
Common signs include no heat, uneven heating, or visible damage to the element. If you notice these, test continuity and inspect connections. Replace the element if tests confirm a fault.
Look for no heat, uneven heat, or visible damage. Test continuity and inspect connections to confirm the fault.
Can I repair an oven without replacing the element?
Many oven faults are linked to the element, wiring, or fuse. If the element tests good but heat is still inconsistent, consider other components. Replacement is often the most reliable fix for a damaged coil.
If the element tests good but heat is still off, check wiring or the fuse. Often, a damaged coil needs replacement for reliable heating.
Is it safe to replace an oven element myself?
DIY replacement is possible if you follow safety steps and unplug the unit. However, working with electrical components carries shock risk and model-specific wiring differences. When in doubt, hire a professional.
You can replace it yourself if you’re careful and unplug the unit. If you’re unsure at any point, it’s safer to call a professional.
How long does replacement typically take?
Replacement usually takes about half an hour to an hour, depending on access and model. A more complex model or hard-to-reach elements can take longer.
Most replacements take about 30 to 60 minutes, depending on access and model.
Do I need professional help for a control board issue?
If testing points to a control board or relay problem, professional service is recommended. A faulty board can cause safety hazards and improper heating.
If the issue seems to be with the control board or relays, it’s best to call a pro.
Will replacing the element fix temperature accuracy?
Replacing a faulty element often restores temperature accuracy, but other factors like sensors and calibration can affect readings. If in doubt, run a calibration test after replacement.
A new element can fix heating issues, but sensors and calibration also matter. Do a calibration check after replacement.
Watch Video
Main Points
- Identify which element (bake or broil) is failing.
- Test continuity to confirm element failure.
- Replace the faulty element and re-test heat.
- Call a professional if wiring or board issues appear.