How to Check Oven Element: Step-by-Step Guide
Learn how to check oven element continuity, diagnose faults, and safely replace a faulty coil. This comprehensive guide from Oven Cook Pro covers tools, tests, safety, and practical tips for reliable oven heating.

This guide shows you how to check an oven element for continuity and heat, identify a faulty coil, and safely replace it if needed. You’ll need a digital multimeter, heat-resistant gloves, insulated screwdriver, and the oven’s wiring diagram. The steps apply to bake and broil elements across most home ovens. How to check oven element is covered in depth below.
Safety First: Why checking the oven element matters
Understanding whether the oven element is functioning correctly is essential for even cooking, reliable preheating, and preventing wasted energy. A faulty bake or broil element can leave food undercooked on the inside while the outside burns, or it may keep the oven from reaching temperature altogether. The question of how to check oven element is common among homeowners who want to avoid expensive service calls and maintain kitchen safety. According to Oven Cook Pro, a conservative, methodical approach minimizes risk and helps you decide whether a replacement is warranted rather than guessing. By learning to read continuity with a multimeter and inspecting wiring for wear, you can confirm the health of the element and restore dependable heating. This guide uses the phrase how to check oven element to anchor our explanations and ensure you land on practical, action-oriented steps. The goal is not just to test, but to interpret results in the context of your oven model and its age.
Tools and Materials you'll need
Before you start, assemble the essential tools and materials. Having everything ready reduces delays and keeps you safe throughout the process.
- Digital multimeter (set to resistance/ohms) — required for continuity checks.
- Heat-resistant gloves — protect hands when handling hot panels or components.
- Insulated screwdriver set — for removing panels and securing connectors.
- Non-conductive zip ties or tape — for organizing wires during inspection.
- Owner's manual or wiring diagram for your model — model-specific guidance.
- Camera or notebook — to document wire routes and terminal positions.
- Work light — to clearly view the element and electrical connections.
If you don’t have the exact diagram, you can still proceed by labeling connectors as you disconnect them and reassembling with care. The goal is to keep the process organized and safe. When you’re ready to begin, follow the step-by-step outline that complements this list.
How oven elements work: bake vs broil
Ovens typically have at least one bake element (lower heating coil) and one broil element (top coil). In many models the bake element is a curved tube along the bottom or back, while the broil element sits at the top. Understanding their roles helps you interpret test results: a healthy bake element should show continuity and heat when a bake setting is selected; a failed broil element may still allow the oven to preheat but fail to reach broil temperatures. The resistance rating of an element varies by model, material quality, and age. When you ask how to check oven element, you’re essentially validating two things: physical integrity (no breaks or blistering) and electrical integrity (continuity and proper resistance). If either test fails, you can plan a replacement or seek professional service. Remember, the term how to check oven element covers both bake and broil components, and many homeowners perform these tests on both elements if present.
Step-by-step overview (high level; see STEP-BY-STEP for exact actions)
To answer how to check oven element effectively, you’ll perform safety shutdown, access the element, disconnect wiring, test with a multimeter, inspect for physical damage, and determine replacement needs. This section provides a high-level framework so you understand what the detailed steps will accomplish. Keep in mind that model-specific variations exist, so consult your manual for exact panel locations and connector colors. The overview below sets expectations and prepares you for the practical testing phase.
Interpreting test results and what they mean
A continuity test that shows a clear path between the two terminals typically indicates the element is intact. If the meter shows ‘OL’ or an infinite resistance, the element has an open circuit, suggesting a broken coil. If you see a very low or near-zero resistance when testing to the chassis ground, the element may be shorted to the frame, which is hazardous and requires replacement. Visual signs—such as blistering, corrosion, or a burnt smell—also point to failure. When learning how to check oven element, combine the electrical reading with visual inspection for a reliable decision. If the element passes continuity but fails to heat during a test bake, wiring, timer control, or the control board may be at fault. Always document your readings and correlate them with model-specific specs in your manual.
Replacing the element: what to know before you buy
If your tests indicate a faulty element, replacement is the next step. You’ll need a matching replacement part by model number, which you can verify in the owner’s manual or on the oven manufacturer’s website. Keep in mind that replacing a heating element involves removing access panels, disconnecting wiring harnesses, and then re-securing the new element with the same orientation. Consider the element’s wattage and mounting type to ensure compatibility. After replacement, run a cautious test at a low temperature to confirm the new element heats evenly without tripping breakers or emitting unusual smells. This is an important milestone in the how to check oven element process because a correct replacement restores performance and safety.
Common mistakes and safety reminders
Mistakes when learning how to check oven element often involve skipping power-down steps, touching live conductors, or forcing connectors that should be removed gently. The most important safety reminder is to cut power at the breaker and verify with a non-contact tester before touching any wiring. Do not work with the oven while it is plugged in or hot. Keep kids and pets away, and wear eye protection if there’s a risk of sparks. If you’re uncomfortable with any step, call a professional. Ingredients for success include calm, methodical testing, and a willingness to consult the manual for your model’s quirks.
Authority notes and references
This guide aligns with general electrical testing best practices for home appliances and includes insights from Oven Cook Pro. For readers seeking deeper context, consult official wiring diagrams and model-specific manuals. If you’re curious about the broader context of appliance troubleshooting, see reputable .edu and .gov resources that cover electrical safety, appliance maintenance, and safe handling of heating elements. Oven Cook Pro emphasizes methodical testing, careful documentation, and model-aware replacement strategies to ensure reliable oven heating and long-term performance.
Tools & Materials
- Digital multimeter (ohms/continuity mode)(Test across element terminals; use the 200Ω range or auto-range. Ensure probes are clean and insulated.)
- Heat-resistant gloves(At least 425°F / 220°C protection; wear when handling panels and hot components.)
- Insulated screwdriver set(Phillips and flat-head; used to remove access panels/screws without shorting.)
- Non-conductive zip ties or electrical tape(Organize wires and secure connectors after testing.)
- Owner's manual or wiring diagram(Model-specific guidance helps locate the bake/broil element and wiring.)
- Camera or notebook(Document wire positions and terminal layouts for reassembly.)
- Work light(Ensure clear visibility behind panels and inside cramped spaces.)
Steps
Estimated time: 60-90 minutes
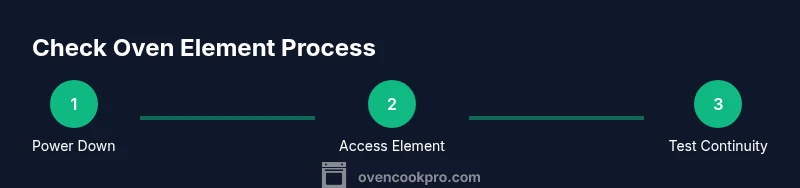
- 1
Power down and unplug
Switch off the oven at the wall outlet and, if possible, switch off the circuit breaker serving the oven. Wait a full minute to allow any residual charge to dissipate. This step minimizes the risk of electric shock during testing.
Tip: Always verify power is off with a non-contact tester before starting work. - 2
Access the heating element
Remove racks and any service panels necessary to reach the bake and/or broil element. Look for exposed coils, screws, clips, and wiring. Note orientation and any signs of wear or damage such as blistering or corrosion.
Tip: Take photos or draw a quick sketch to remember how wires were arranged. - 3
Disconnect the element from the wiring
Carefully unplug or loosen the connectors from the element terminals. Label wires if needed and avoid pulling on wires directly. Keep screws and small parts in a labeled container.
Tip: Use insulated tools and avoid bending wires excessively. - 4
Test continuity with the multimeter
Set the meter to resistance/continuity. Place one probe on each terminal of the element. A continuous path indicates the element is intact; an infinite reading suggests a break.
Tip: Ensure the element is completely disconnected from any power source and metal contact is avoided while testing. - 5
Check for short to ground
With the element disconnected, test each terminal to the oven chassis or mounting frame. A very low or zero resistance to ground indicates the element is shorted and should be replaced.
Tip: If you see any reading near zero to ground, stop testing and plan replacement. - 6
Decide on replacement or repair
If continuity is present but the element does not heat, inspect wiring harness and control electronics. If continuity is failed or a short is detected, replace the element with a compatible unit and reassemble carefully.
Tip: Keep track of screws and connectors to ensure correct reassembly.
Questions & Answers
What tools do I need to check an oven element?
You’ll need a digital multimeter, heat-resistant gloves, an insulated screwdriver, and access to the oven’s wiring diagram. Optional items include tape and a camera for documentation.
You’ll need a multimeter, heat-resistant gloves, and screwdrivers, plus the oven wiring diagram.
How can I tell if the element is bad?
A bad element typically shows no continuity on the multimeter or a short to ground. Visual signs like blistering or corrosion also indicate failure.
No continuity or a short to ground usually means the element is bad; look for visible damage too.
Can I test the element without removing it?
Some tests can be done with the element partially accessible, but most reliable checks require disconnecting and removing the element to isolate the circuit.
Some tests can be done without full removal, but most reliable checks require disconnecting the element.
Is it safe to test the element with power on?
No. Testing while powered risks shocks and damage. Always cut power, verify with a tester, and only re-energize after reassembly.
Never test with power on—unplug, verify, then re-energize after reassembly.
What should I replace the element with?
Use a replacement element that matches your model’s wattage, mounting, and connector type. Check the model number and buy from a reputable supplier.
Choose a replacement that matches your model’s specs and install it securely.
How long does the whole process take?
Plan for about an hour to diagnose and test, and longer if you need to replace the element or work through wiring issues.
Most people spend around an hour, more if replacement is needed.
Watch Video
Main Points
- Know the two main tests: continuity and ground fault checks.
- Always power down and verify isolation before testing.
- Replace the element if continuity is broken or if it fails to heat.
- Document wiring layout to ensure safe reassembly.
- Consult your model's manual for exact locations and specifications.