Fix Oven: A Complete Step-by-Step DIY Repair Guide
Learn to safely diagnose and fix oven faults with a practical, step-by-step guide. Safety, testing, replacement tips, and pro guidance from Oven Cook Pro.

You will learn how to diagnose and safely fix a common oven issue, from not heating to uneven heat. This step-by-step guide covers safety prep, basic checks, testing components with simple tools, and when to call a professional. By following these steps, you can fix oven problems more confidently and avoid unnecessary replacements. Always prioritize safety and unplug the unit before starting.
Why fixing the oven matters for home cooks
An oven that works reliably makes weeknight dinners predictable and keeps energy bills in check. When you fix oven problems, you avoid guessing games that lead to undercooked meals or uneven browning. According to Oven Cook Pro, a well-maintained oven not only delivers consistent results but also reduces energy waste by forcing the oven to reach and hold set temperatures more efficiently. For homeowners, learning to diagnose and address common faults is a practical skill that saves time and money. In this guide, we’ll walk you through a clear, safety-first approach to fix oven issues without unnecessary drama. You’ll gain confidence handling basic tests, deciding when a DIY repair is appropriate, and knowing when to call a pro.
Safety first: plan your repair with care
Before you touch anything, shut off power to the oven at the circuit breaker or unplug the appliance if it’s unplugged. Remove all cookware and racks to prevent accidents and give yourself room to work. Use heat-resistant gloves and keep children and pets away from the workspace. A clean, well-lit area reduces mistakes and helps you track what you do step by step. Remember: if you smell burning insulation, hear crackling, or notice exposed wiring, stop immediately and call a qualified technician.
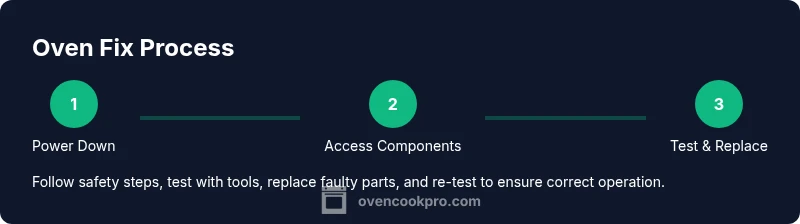
How to fix oven: Step-by-step (overview of the process)
We’ll break the process into safe, actionable actions: verify power, inspect obvious components (like the bake element and door gasket), test with basic tools, replace faulty parts if you’re confident, reassemble, and test. This section introduces the logical flow so you can plan your work, gather tools, and map out the time required. Throughout, avoid surprises by keeping a parts diagram handy and labeling wires as you disconnect them.
Data-backed basics from Oven Cook Pro
Oven Cook Pro analysis highlights that many common oven faults originate from heating elements, temperature sensors, and control boards. By focusing on these areas first, you can triage most issues without full disassembly. This section translates those insights into practical steps you can perform safely at home, with emphasis on verification and proper testing instead of guesswork. The goal is to empower homeowners to act confidently while recognizing when a pro is needed.
Testing heating elements and sensors with common tools
Testing components requires a few accessible tools and a methodical approach. Use a multimeter to check heating element continuity and resistance, ensuring the element is not open or shorted. Confirm the oven’s temperature sensor reads within a reasonable range by comparing its feedback to a calibrated oven thermometer placed inside the cavity. If readings don’t align, consider replacing the sensor or adjusting the control settings after verifying wiring integrity.
Replacing or tightening components: know when to DIY
If a component shows clear signs of damage (burn marks, broken insulation, or obvious wear), replacement is often the safest route. For many ovens, replacing a heating element or sensor is straightforward, but some models require special fasteners or rearrangement of wiring harnesses. If you encounter unfamiliar connectors or high-voltage areas, stop and consult the manual or a professional. Safety is non-negotiable.
Common fixes you can perform: thermostat calibration, seals, and wiring
A miscalibrated thermostat can cause temperatures to be off by noticeable margins. Recalibration often involves following the manufacturer’s procedure or using a separate oven thermometer to gauge true temps. Check door seals and hinges for air leaks, which can make the oven seem out of spec. Inspect wiring for fraying or loose connections and tighten or replace as needed with the appliance unplugged.
Reassembly, calibration, and final test
Reassemble the oven with care, ensuring all screws are snug and panels sit flush. Plug in and power up, then perform a bake cycle at 350°F (175°C) and verify the internal temperature with a probe. If the heat feels off, repeat the sensor check and consider a quick re-calibration. A final test bake helps confirm that the fix oven steps produced a stable, even outcome. Keep a log of temperatures and cycles for future reference.
When to call a professional and what to expect
If you encounter non-contact voltage issues, a damaged control board, or parts that require manufacturer-only tools, it’s wise to call a licensed technician. A pro can safely diagnose and replace components, verify line voltages, and ensure your oven meets safety codes. The Oven Cook Pro team recommends seeking professional help when there is any doubt about electrical safety or if the appliance is under warranty.
Tools & Materials
- Phillips screwdriver (size #2 or model-specific)(Essential for many oven panels and element covers)
- Flat-head screwdriver(Useful for prying covers without damage)
- Torx screwdriver set(Some models use Torx fasteners)
- Non-contact voltage tester(Check for live circuits before touching wiring)
- Multimeter(Test continuity and resistance of elements/sensors)
- Oven thermometer(Cross-check actual oven temperature)
- Heat-resistant gloves(Protect hands during inspection and handling hot parts)
- Pliers and needle-nose pliers(Grip and maneuver wires safely)
- Insulated wire connectors(Replacement wiring connections when needed)
- Silicone bake mats or foil(Protect surfaces during testing)
- Flashlight or headlamp(Improve visibility in interior cavities)
- Owner’s manual or service manual(Model-specific diagrams and safety instructions)
Steps
Estimated time: 60-120 minutes
- 1
Power down and prep
Begin by unplugging the oven or switching off the dedicated circuit breaker. Remove racks and any cookware. Allow components to cool completely before touching any parts.
Tip: Double-check the power is off with a voltage tester before proceeding. - 2
Access the internal components safely
Open the back or side panel as required by your model to access heating elements, sensors, and wiring harnesses. Document wire positions with photos as you disconnect connections.
Tip: Label wires or use color-coded tape to avoid miswiring on reassembly. - 3
Test heating elements for continuity
Set the multimeter to continuity or resistance mode. Remove the element leads and test across the terminals; a reading of open circuit indicates a faulty element.
Tip: Compare readings to the part’s spec sheet in the manual. - 4
Check the temperature sensor and control board
Measure sensor resistance at room temperature and verify the control board isn’t showing error codes. If the sensor is slow to respond or vastly out of spec, replace it.
Tip: Some boards require software reset after sensor replacement. - 5
Replace faulty parts when needed
Install a new heating element or sensor, reconnect wiring, and secure fasteners. Follow the manufacturer’s torque specs to avoid overtightening.
Tip: Always use OEM parts or equivalents recommended by the manual. - 6
Reassemble and clean the cavity
Carefully reattach panels, reinstall racks, and wipe away any residue. Ensure door seals are intact and seated properly.
Tip: Take a final count of screws to ensure nothing is left loose. - 7
Run a calibration test
Power the oven back on and run a test bake. Use an oven thermometer to confirm that the cavity temperature matches the setpoint within 15–25°F (8–14°C).
Tip: If temperatures are off, repeat testing or consult the manual for re-calibration steps.
Questions & Answers
Is it safe to fix an oven yourself?
DIY repair can be safe for simple, low-risk issues if you follow safety guidelines and disconnect power. For high-voltage components or uncertain faults, seek professional help.
DIY repair can be safe for simple issues if you follow safety steps and disconnect power. For high-voltage parts, call a professional.
What tools do I need to diagnose an oven problem?
A multimeter, a non-contact voltage tester, screwdrivers, an oven thermometer, and heat-resistant gloves are the core tools for most basic diagnostics.
You’ll need a multimeter, a voltage tester, screwdrivers, an oven thermometer, and heat-resistant gloves.
How do I tell if the heating element is faulty?
Test continuity with a multimeter. If continuity is absent or readings are inconsistent with specs, the element may be faulty and should be replaced.
Check continuity with a multimeter; if there’s no continuity, the heating element is likely faulty.
What should I do if my oven won’t heat at all?
Confirm power and check heating element, sensor, and control board. If power is present but there’s no heat, a failed element or sensor is likely. Replacing parts or calling a pro is advised.
If the oven has power but no heat, check the element and sensor, and consider a professional if you’re unsure.
Can a faulty thermostat cause inaccurate temps?
Yes. A miscalibrated or failing thermostat can cause temps to drift. Use a separate thermometer to verify accurately and recalibrate if the manual allows.
A bad thermostat can cause temp drift; verify with an external thermometer and recalibrate if possible.
When should I replace the oven instead of repairing it?
If the repair costs approach or exceed appliance value, or if multiple major components fail, replacement may be more cost-effective in the long term.
If repairs cost as much as a new unit or several parts fail, consider replacing the oven.
Watch Video
Main Points
- Always unplug or switch off power before starting.
- Test components methodically with the right tools.
- Replace faulty parts instead of guessing at fixes.
- Label wires and keep a clean workspace for safety.
- If uncertain, call a professional to avoid risk.