How to Put an Oven in a Chimney Breast: Step-by-Step Guide
Learn how to safely install an oven into a chimney breast with a structured plan, required materials, and professional safety considerations. This guide covers planning, venting, wiring/gas, and finishing with pro tips.

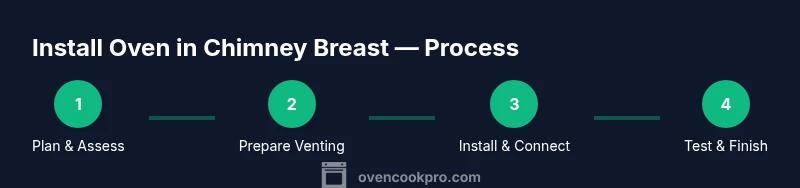
You’ll learn how to safely install an oven into a chimney breast by planning, verifying venting and combustibility, preparing a proper opening, and ensuring electrical or gas connections are handled by a licensed professional. This guide covers code checks, required clearances, and finishing details so the unit operates safely and efficiently.
Feasibility and planning
Installing an oven into a chimney breast is a complex project that combines carpentry, ventilation, and licensed utility work. According to Oven Cook Pro, the first move is a careful feasibility assessment that weighs structural integrity, heat clearance, and local building codes. Start by surveying the chimney breast, measuring its depth and width, and confirming there is a suitable flue or venting pathway to exhaust combustion byproducts. The Oven Cook Pro team emphasizes that this step is not cosmetic—it determines whether the feature can safely house a modern oven without compromising fire safety or the home’s ventilation. Keep a detailed plan and photos of the existing cavity to reference in permits and contractor conversations. In addition to safety, consider how the oven’s height will align with cabinetry, countertop work zones, and your preferred door swing. A well-planned location minimizes heat exposure to nearby cabinets, avoids blocking vents, and preserves accessible service panels for future maintenance.
tip1_data areas: 0
tip_one_pro_tip:
Structural and fire safety fundamentals
A chimney breast is designed for vertical heat transfer, not for heavy appliances unless properly prepared. The first task is to verify the breast has sufficient load-bearing capacity and that framing can support the oven’s weight when doors and venting are in use. Fire-rated boards or mineral wool insulation behind non-combustible surrounds limit heat transfer to adjacent woodwork. You should also confirm there is no interference with existing gas lines, electrical cables, or the home’s HVAC ductwork. If you spot any signs of rot, cracking plaster, or suspect flue deterioration, stop and consult a structural pro. Document all findings for permits and to guide your installer. The goal is a robust, fire-safe enclosure with clearances that meet code requirements.
tip1_pro_tip:
Venting, exhaust, and combustion considerations
A chimney breast installation requires a clear path for exhaust gases. Decide if you will reuse the existing chimney or install a dedicated metal flue liner that terminates outside the home. A correctly sized liner prevents backdraft and reduces condensation that can damage adjacent materials. If you are using a gas oven, ensure the appliance and venting system are sized for the oven’s BTU rating and that a licensed gas fitter handles connections. For electric ovens, plan a dedicated circuit and proper grounding. Always verify that there are CO detectors in living spaces and that the vent terminates above the roofline or a vented hood to outdoors. This step protects occupants from hazardous gases and ensures reliable oven performance.
tip1_note:
Tools & Materials
- Heat-resistant surround panel(Fire-rated board or mineral wool backing; non-combustible framing behind finish)
- Chimney flue liner kit(Metal liner sized to chimney cross-section; compatible with oven exhaust)
- Fireproof sealant(High-temperature silicone or intumescent sealant rated for ovens)
- Electrical isolation kit and wiring(Dedicated circuit, proper gauge wire, and grounding; licensed electrician required for final hook-up)
- Gas shut-off tool (if gas oven)(Accessible shut-off within reach; labeled and tested)
- Measuring tools and square(Tape measure, carpenter’s square for precise opening)
- Stud finder and level(Locate studs and ensure plumb alignment of opening)
- Non-combustible venting ducting(Copper or stainless ducts rated for high heat; sealed joints)
- Vent/hood exterior cap(Terminator cap to prevent backdrafts and weather ingress)
- Personal protective equipment(Gloves, eye protection, dust mask; use during demolition and cutting)
- Temporary ventilation fan(Helps clear dust and fumes during work)
Steps
Estimated time: 3-6 hours
- 1
Confirm permits and competent professionals
Contact your local building authority to confirm required permits for a stove or oven installation in a chimney breast. Engage licensed professionals for gas/electrical work and a carpenter for the structural aspects. Securing the proper permits and a qualified team is essential for safety and compliance.
Tip: Always document permit numbers and contractor licenses before starting work. - 2
Measure the chimney breast and oven clearance
Take precise measurements of the cavity to verify it can accommodate the oven’s dimensions plus required clearances. Account for door swing, venting path, and space for cables or gas lines. If the opening is too tight, you’ll need to adjust the rough opening and possibly reinforce framing.
Tip: Use a metal ruler and calipers for accuracy; consider adding 10-15% clearance buffer for heat. - 3
Shut off utilities and prepare the workspace
Before any cutting, shut off the gas supply and disconnect existing electrical outlets within the work area. Set up drop cloths, dust barriers, and a stable ladder. If you smell gas or hear hissing, evacuate and call emergency services.
Tip: Have a CO detector and a fire extinguisher within reach during the project. - 4
Remove interior wall cover and assess framing
Carefully remove the interior wall covering inside the chimney breast to expose framing. Inspect studs, joists, and any fire-blocking. Replace damaged wood and reinforce the opening with fire-rated supports if necessary.
Tip: Avoid cutting load-bearing members; consult a structural pro if in doubt. - 5
Install venting liner and cap the exterior
Fit the metal liner or vent kit, ensuring a smooth internal surface with no sharp bends that could trap condensation. Seal all joints with high-temperature sealant and install an exterior vent cap to prevent weather ingress.
Tip: Test the liner for any loose fittings before proceeding. - 6
Create a safe rough opening and surround
Align the opening with the oven’s width and height, then install fire-rated surround panels or a purpose-built cabinet frame. Ensure the finish is non-combustible and properly sealed to prevent heat transfer to nearby wood.
Tip: Use a level to keep the opening square; check for gaps that could trap heat. - 7
Install oven and set up connections (professional)**
Have a licensed electrician or gas fitter connect the oven to its final power or gas supply. Do not attempt final hookups without proper certification. Secure the unit and verify clearance to combustibles around inlet/outlet vents.
Tip: Ask for a pressure/voltage test and a CO test after hookup. - 8
Seal, trim, and finish the surround
Apply heat-rated sealant around all penetrations and fit trim that hides gaps without impeding heat dissipation. Reinsulate any exposed areas as needed and ensure the finish material is easy to clean and maintain.
Tip: Use non-toxic finishes and avoid solvent-based adhesives near heat zones. - 9
Test operation and safety checks
Power up the oven and perform basic functions. Check venting flow, listen for unusual noises, and confirm there is no gas odor. Install or verify working CO detectors and a working smoke alarm in the kitchen.
Tip: Keep a fire extinguisher nearby; document a test log for future maintenance.
Questions & Answers
Is it legal to install an oven in a chimney breast?
Legality depends on local codes and permits. In many jurisdictions, you’ll need permits and a licensed professional for gas or electrical connections. Check with your local building department before starting.
Local codes vary, but permits and licensed install are commonly required.
Can I do this myself, or must I hire professionals?
The safest approach is to hire licensed professionals for gas or electrical work and a carpenter for the structural aspects. DIY is only recommended for non-venting, non-gas designs and with strong familiarity with local codes.
For safety, use professionals for gas/electric connections.
What kind of oven can fit in a chimney breast?
Choose an oven with dimensions that fit the rough opening and allow the required clearances. Consult the manufacturer installation guide and compare it with your measured opening to determine compatibility.
Check oven dimensions against your opening and follow the installation guide.
Do I need a flue liner or any other venting?
Yes. A properly sized vent liner or dedicated chimney liner improves exhaust and reduces condensation. It should be installed by a professional and sealed to prevent leaks.
Use a correctly sized vent liner installed by a professional.
What are signs of poor ventilation after installation?
Watch for backdraft, stale air, or unusual odors. CO detectors should not alarm frequently, and there should be no visible smoke when the oven operates. If any signs appear, pause use and consult a professional.
Watch for backdrafts or strange smells; CO detectors should remain stable.
What’s the typical cost range for this project?
Costs vary widely depending on chimney type, venting needs, and whether gas or electric connections are required. A professional assessment will provide a clearer estimate tailored to your home.
Costs vary; get a professional assessment for an accurate estimate.
Watch Video
Main Points
- Plan with licensed professionals before any cutting.
- Use fire-rated materials and proper venting for safety.
- Ensure dedicated electrical/gas supply meets appliance requirements.
- Verify CO detectors and smoke alarms are functional.
- Test thoroughly and document the process for future maintenance.