How to Fit an Oven in Your Kitchen: Step-by-Step Guide
Learn how to fit an oven in your kitchen safely with our expert, step-by-step guide. Plan space, meet code, and install confidently.

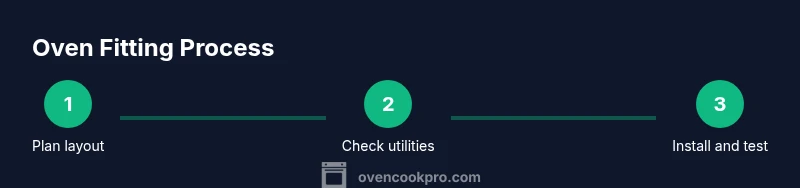
By the end of this guide you will know how to fit an oven in your kitchen safely and efficiently. It covers space planning, measurements, electrical and ventilation considerations, and installation steps. Before you start, verify clearances, consult local codes, and gather required tools. Following these steps reduces errors and ensures a compliant, long-lasting setup, per Oven Cook Pro guidance.
Planning the Kitchen Fit: Space, Layout, and Compliance
Planning is the foundation of a successful oven installation. Start by evaluating the wall space, cabinet layout, appliance width, and the path to electrical and gas services. Consider how the door swings, access for loading heavy pots, and whether you need a built-in or freestanding model. If you are converting a cabinet into an oven niche, factor in trim kits, insulation, and any required fire-rated panels. Check that the location offers proper ventilation and does not block existing storage or traffic flow in the kitchen. According to Oven Cook Pro, a well-thought-out plan minimizes surprises and rework. Create a simple layout sketch showing service points, vent openings, and any needed supports. Review local building codes and energy regulations, and decide on a dedicated circuit or gas line routing before buying components. This upfront analysis saves time and reduces the risk of misfit openings or ventilation bottlenecks later.
Measuring and Clearance Requirements
Accurate measurements are non-negotiable. Start by confirming the oven’s overall width, height, and depth, and compare these to the available cabinet opening or wall cavity. Measure doorways and passageways to ensure easy movement of the appliance from delivery to installation, including any stairs or tight turns. Verify clearance around the oven for heat dissipation, door swing, and airflow to combustion or electrical components. Check both sides, the back, and the underside for obstructions like pipes, wiring, or studs. Manufacturer guidelines specify minimum clearances for safe operation, as do local codes. If your chosen model requires a specific cutout size, adjust the cabinet opening or add trim panels accordingly. Keep a margin for expansion, mounting brackets, or shims. Document all measurements so you can validate them against the final appliance specs before ordering.
Electrical, Gas, and Ventilation Preparations
Ventilation and service connections are critical to safe oven operation. Identify whether your kitchen uses electricity on a dedicated circuit or a shared circuit, and plan for a suitable branch for the oven. For gas ovens, ensure a reliable gas supply with a proper shutoff valve and compliant gas line routing. Ventilation should exhaust to the outdoors or through an appropriate duct system, with an opening that meets code requirements. If you are installing a wall oven, ensure there is a compliant support structure and, if needed, a vent hood above the unit. In all cases, do not attempt electrical or gas work without proper training or licensing. Per guidance from Oven Cook Pro, coordinating utilities with the oven fitment plan prevents dangerous, noncompliant installations and future service calls.
Choosing an Oven and Fitment Options
Your decision between built-in, slide-in, or freestanding models will drive the fitment plan. Compare external dimensions to the opening, and account for any required trim kits or mounting rails. Built-in units often require precise cutouts and solid framing; freestanding or slide-in models may rely more on cabinetry tolerances. Review installation manuals for venting needs, electrical outlet placement, and any required ventilation kits. Consider how the oven will integrate with adjacent cabinets, the countertop material, and whether a flush appearance is possible. Budget for professional help if electrical or gas work is involved, and confirm warranty implications of DIY modifications. By aligning the appliance choice with the kitchen layout, you’ll reduce the time and complexity of the installation.
Installation Considerations and Alignment
With the space prepared, move into the physical fitment. Dry-fit the oven in the opening to test alignment and level. Ensure the mounting brackets, screws, and rails are compatible with your cabinet structure. Use a spirit level to verify that the unit sits perfectly plumb and square; adjust with shims as needed. Attach any trim kits or panel magnets per the manufacturer’s instructions, but avoid overtightening screws that could crack cabinet faces. Keep the work area clear of tools and debris, protecting counter surfaces from heat exposure. Once the unit sits flush and level, begin wiring or connecting gas lines in accordance with the local code and the appliance manual. Finally, recheck clearances and air paths before powering up the oven.
Testing, Sealing, and Finishing Touches
Power up the oven and verify all electrical connections are correct. Test basic functions, including preheat, timer, and any self-cleaning features, while monitoring for unusual smells or noises. Seal any gaps between the oven and cabinet with appropriate sealant or heat-resistant trim. Install any corner guards or edge protectors to prevent chipping or damage during daily use. Check the door seal and hinges for smooth operation, and confirm that there is adequate ventilation around the appliance. Document the test results and note any service or adjustment required by the manual. A thorough post-installation check helps catch issues early and prolongs oven life.
Maintenance, Safety, and Longevity
After the installation, establish a simple maintenance routine to keep the oven performing well. Clean the exterior and interior according to the user manual, and inspect the electrical outlet or gas connection periodically for signs of wear or looseness. Keep a dedicated circuit diagram or label on the breaker panel to simplify future servicing. Store tools and hardware away from the oven area to prevent accidental contact with heat or moisture. Finally, schedule professional inspections if you notice inconsistent temperatures, unusual noises, or ventilation concerns. Regular upkeep avoids safety hazards and keeps the kitchen running smoothly.
Tools & Materials
- Tape measure(Measure openings, clearance, and appliance dimensions)
- Stud finder(Locate framing for solid mounting)
- Level (spirit level)(Ensure oven sits perfectly square)
- Drill and driver bits(Mount brackets and trim kits)
- Screwdrivers (Phillips and flathead)(For fasteners and trim)
- Wrench or adjustable spanner(Gas line connections or mounting bolts)
- Voltage tester / multimeter(Verify power during installation)
- Safety gloves and eye protection(Protect hands and eyes while handling heavy metal)
- Oven installation kit (if provided)(Brackets, rails, or trim supplied by manufacturer)
Steps
Estimated time: 3-6 hours
- 1
Assess space and plan layout
Measure the current cabinet opening or wall cavity and compare it to the oven’s cutout dimensions. Sketch a simple layout showing service points, vent paths, and clearance for door swing. Confirm all nearby cabinets, counter space, and traffic routes won’t be obstructed.
Tip: Double-check door swing clearance with the oven door fully open before proceeding. - 2
Shut off utilities and prep the area
Turn off the circuit breaker supplying the oven location and, if applicable, shut off the gas valve. Clear the workspace, protect countertops, and remove nearby cabinetry hardware that could block access.
Tip: Label breakers or valves to avoid accidental re-energizing during work. - 3
Remove old appliance and adjust cavity
If replacing an existing unit, carefully uninstall it and remove mounting brackets. If making a new cavity, trim as needed and install any required fire-rated panels or insulation.
Tip: Keep fasteners organized in labeled bags for reassembly. - 4
Prepare utilities and venting
Confirm the oven’s electrical needs and ensure a dedicated circuit or gas line is ready. Attach or route a venting duct if required and verify outdoor exhaust clearance.
Tip: Do not improvise electrical connections; follow the appliance manual and local code. - 5
Dry-fit the oven and align
Slide the oven into the opening to check fit. Level the unit and adjust with shims or rails as needed. Verify there is even alignment with surrounding cabinetry.
Tip: Have a helper assist with lifting; ovens are heavy and awkward to maneuver. - 6
Make electrical/gas connections and test
Connect to the specified circuit or gas line per the user manual and conduct a preliminary safety check. Restore power and test basic functions like preheat and light indicators.
Tip: Use a voltage tester to confirm no live wiring before touching terminals. - 7
Seal, finish, and confirm operation
Seal gaps around the oven with heat-resistant sealant if recommended. Reinstall trim kits, secure panels, and perform a full oven test. Ensure proper ventilation and check for abnormal heat or smells.
Tip: Document any adjustments in the installation notes for future service.
Questions & Answers
Do I need to hire a professional to fit an oven in a kitchen?
If gas lines or complex electrical work are involved, hire a licensed professional. For simple, electric-only, non-gas installs, a skilled DIYer may manage with guidance from the appliance manual.
If gas or complex wiring is involved, hire a licensed pro. For electric-only installs, follow the manual carefully.
Can I install an oven without removing cabinet doors?
In many cases you’ll need to modify or remove a portion of cabinetry to create a proper cavity. Use a trim kit to finish edges and ensure a flush appearance.
Sometimes you must modify cabinets; use trim kits for a clean look.
What safety steps should I take before starting?
Turn off the power and gas supply, unplug the unit if possible, and wear PPE. Keep a fire extinguisher nearby when testing new connections.
Turn off power and gas, unplug if possible, and wear PPE.
How long does a typical oven installation take?
Most installations take several hours, depending on cabinet readiness and utility work. Plan for a few hours of careful work and potential delays.
Most installations take several hours; allow extra time for safety checks.
What if my kitchen voltage differs from the oven’s requirements?
Verify voltage compatibility and ensure a dedicated circuit if required. If in doubt, consult a licensed electrician.
Check voltage compatibility and consider a dedicated circuit.
Watch Video
Main Points
- Plan layout and measure precisely before buying an oven
- Ensure electrical, gas, and ventilation are code-compliant
- Level and secure the oven with manufacturer-approved hardware
- Test thoroughly and seal gaps for safety and efficiency