How to Install Ovens: A Step-by-Step Home Guide for Cooks
A thorough, expert guide on installing ovens safely at home. Learn tools, pre-install checks, mounting, connections, venting, calibration, and maintenance from Oven Cook Pro.

In this guide, you will learn how to install ovens safely and effectively, with clear steps from start to finish. You’ll cover pre-install checks, mounting, electrical and venting considerations, and post-install verification. You’ll need basic hand tools, a tape measure, level, and your oven’s installation manual. According to Oven Cook Pro, following these steps minimizes risk and ensures proper operation.
Why installing ovens correctly matters
Installing ovens correctly isn't just about fit; it's about safety, reliability, and performance. According to Oven Cook Pro, improper installation can void warranties and create hazards from gas leaks, loose connections, or electrical faults. For homeowners, the goal is to establish a solid foundation that protects loved ones while ensuring consistent bake results. When you do ao install ovens following a structured approach, you minimize risk and maximize longevity. The installation environment—clearances, ventilation, anti-tip brackets, and proper mounting—directly affects heat distribution, energy efficiency, and user experience. This section explains why care matters and what happens if you skip steps. It also sets expectations for how to approach the task with the right mindset and tools, emphasizing safety and compliance above all.
Do ao install ovens is a task that benefits from a deliberate plan, especially in kitchens with tight spaces or unusual electrical or gas layouts. By outlining the prerequisites, you reduce surprises during the installation, protect your investment, and ensure every heat cycle operates safely and efficiently.
Essential tools and materials
This section lists the tools and materials you'll need, with notes on essential vs optional items. Having the right toolkit on hand makes the do ao install ovens process smoother and safer. Prepare a voltage tester, drill, driver bits, tape measure, level, and a sturdy ladder for cabinet access. You may also need an adjustable wrench, needle-nose pliers, wire strippers, a tension meter for gas lines, and safety gear (gloves, eye protection). For gas ovens, include a manometer and leak-detection fluid. Keep the oven's installation manual handy, along with any local code documents. Organize screws, mounting brackets, anti-tip devices, and a short length of flexible conduit if required by code.
A well-prepared toolkit reduces trips to the toolbox and helps you stay aligned with the installation plan, which is essential when do ao install ovens in a compact kitchen or a retrofit scenario.
Pre-installation considerations
Before you begin, survey the site and confirm a few critical factors. Verify the cabinet cutout matches the oven's exterior dimensions and that there is adequate clearance to walls, cabinetry, and combustibles. If wiring or gas lines are involved, identify the nearest shut-off valves and main power source. Check local codes for permit requirements and venting standards. For gas ovens, ensure the gas line pressure is correct and that a gas-safe technician is available if the task exceeds your skill level. These checks reduce rework and downtime and help you do ao install ovens with confidence. If you plan multiple kitchen updates, group tasks to minimize disruption and maximize safety.
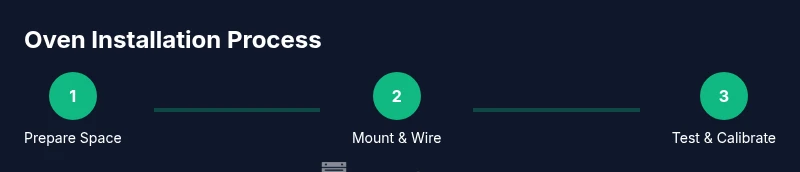
Step-by-step installation overview
This section provides a practical map of the main tasks, without duplicating the step-by-step instructions. Start with space preparation, then mount the oven securely, connect utilities (electric or gas), install any required venting, and perform initial post-install checks. Pay attention to alignment with cabinetry, use anti-tip brackets, and verify ventilation paths are clear. The overview primes you for the detailed steps that follow and emphasizes safety and accuracy at every stage. As you read, keep the end goal in mind: a flush, stable oven that bakes evenly and operates quietly.
Calibration, testing, and safety checks
After installation, calibration ensures your oven bakes accurately. Use a calibrated thermometer to compare oven temperature against the set point and follow the manufacturer’s calibration procedure if needed. Run a test bake at multiple temperatures to confirm heat is evenly distributed and the door seals correctly. Inspect all connections for heat or leak signs, listen for unusual noises, and verify that anti-tip devices engage properly. Document test results for warranty records and future servicing. This phase often reveals minor alignment needs or venting tweaks that improve efficiency and longevity.
Common mistakes and how to avoid them
Common errors include skipping space clearances, ignoring venting requirements, using improper electrical or gas fittings, and failing to secure anti-tip brackets. Avoid by double-checking measurements, using a dedicated circuit, and following the installation manual to the letter. If you feel uncertain about gas work, hire a licensed professional rather than risking leaks or unsafe conditions. A careful, methodical approach reduces call-backs and ensures a durable installation.
Maintenance and long-term care after install
Maintenance keeps ovens safe and efficient after installation. Regularly inspect door seals, check vent blocks, and keep the exterior clean to prevent heat buildup. For gas ovens, schedule annual professional inspections of gas lines and safety valves. For electric ovens, test the cord and plug for wear and verify the control panel is responsive. Store manuals and model numbers for handy reference and note any warranty-relevant service dates. Consistent upkeep preserves performance and safety for years.
Energy efficiency and safety upgrades
Consider practical upgrades that improve safety and efficiency, such as installing a high-quality anti-tip bracket, ensuring proper ventilation, and using parchment paper or aluminum foil correctly to reduce cleanup. If your kitchen uses smart home features, explore compatible oven monitoring or energy monitoring accessories. Regularly review manufacturer recommendations to stay current with safety standards. Small investments in good venting, proper seals, and routine checks yield better energy efficiency and a safer kitchen overall.
Tools & Materials
- Voltage tester(Check for live circuits before touching wires)
- Measuring tape(At least 3 meters preferred)
- Level(Ensure the oven sits flush with cabinet faces)
- Screwdriver set (Phillips and flat-head)(For mounting brackets and trim)
- Socket/wrench set(For panel screws and connections)
- Drill and driver bits(For cabinet modifications and bracket mounting)
- Gas leak detector solution (or soapy water)(Use to test gas line connections if installing a gas oven)
- Gas line pressure gauge (manometer)(Only if installing a gas oven or servicing gas line)
- Fire-resistant gloves(Heat-resistant for handling hot components)
- Anti-tip bracket kit(Anchors oven to cabinet to prevent tipping)
- Vent ducting components(Only if venting to exterior or upgrading vent)
- Marker and pencil(Mark cutouts and mounting points)
- Installation manual(Manufacturer's instructions for model)
Steps
Estimated time: 2 hours
- 1
Prepare the installation space
Power down the area and clear the work zone. Measure the cabinet opening to confirm it matches the oven’s exterior and determine required adjustments. Mark stud locations for anti-tip brackets and plan venting routes before touching any wiring or gas lines.
Tip: Double-check clearances to combustibles and ensure room for air circulation around the oven. - 2
Verify electrical or gas readiness
Identify the dedicated circuit for electric ovens or the gas shut-off and supply line for gas ovens. Confirm the panel has space for a new breaker and that wiring gauges match the oven’s requirements. Avoid using extension cords; run a proper feed.
Tip: Turn off power at the main panel before handling wiring; use a voltage tester to confirm dead circuits. - 3
Remove old appliance and clear the space
If replacing an old oven, disconnect and remove it carefully, keeping the area clean. Disconnect the old venting and haul away debris. Check surrounding cabinetry for damage that needs repair before the new unit goes in.
Tip: Take photos of prior connections to reference during reassembly and alignment. - 4
Position the oven box and brackets
Slide the oven into the cabinet opening, align with the face frame, and install anti-tip brackets anchored to studs. Use a level to confirm the unit sits evenly and adjust as needed before securing.
Tip: Dry-fit brackets first to ensure a clean final alignment without over-tightening. - 5
Connect electrical or gas utilities
For electric ovens, connect to the dedicated circuit with proper strain relief and strain relief on conduit. For gas ovens, connect with approved fittings, then perform a leak test using soapy solution or detector fluid.
Tip: Never reuse old hoses or fittings; replace with code-approved components. - 6
Install venting and trim
Attach any required vent ducts and trim pieces, ensuring a clear path for exhaust. Seal joints per manufacturer instructions and ensure trim aligns flush with cabinetry.
Tip: Verify venting path avoids sharp bends that reduce airflow. - 7
Run an initial power-up check
With the unit secured but not yet powered fully, momentarily power on to check indicator lights and basic function. Do not heat the oven yet; confirm there are no error codes at startup.
Tip: If you see error codes, consult the manual before proceeding. - 8
Calibrate and test bake
Run a calibration test by measuring actual oven temperature against the set temperature at several points. Adjust calibration as needed following the manual and re-test for even heating across racks.
Tip: Document calibration settings for future reference. - 9
Final checks and cleanup
Verify anti-tip brackets are engaged, panel gaps are even, and there are no fuel or electrical smells. Clean up tools, seal gaps, and dispose of packaging. Record installation details for your records.
Tip: Keep a copy of the installation manual in an accessible spot.
Questions & Answers
Is it safe to install an oven without a professional?
It depends on your experience and local codes. Electric ovens can be straightforward, but gas installations require certification and a licensed technician.
Installing an oven without a professional can be risky, especially for gas work. Check local codes and consider a licensed pro for gas connections.
Do I need a permit to install an oven?
Many jurisdictions require permits for major appliance installations, especially when electrical or gas work is involved. Check with your city or county building department.
Permits are often required; confirm with local authorities before starting.
What is the difference between electric and gas oven installation?
Electric ovens require a dedicated 240V circuit. Gas ovens need a gas line, proper fittings, pressure checks, and leak testing. Venting and clearances are also different for each type.
Electric needs a dedicated circuit; gas requires a safe gas line and leak testing.
How long does installation typically take?
Most installations take about 1.5 to 3 hours, depending on space, wiring, and venting complexity. Allow extra time for refits or code checks.
Usually a couple of hours, depending on setup.
What tools are essential for installing an oven?
Key tools include a voltage tester, level, drill, wrenches, and a flashlight. Always refer to the model manual for model-specific tools.
You’ll want a tester, level, drill, and wrenches.
Watch Video
Main Points
- Secure mounting and proper clearances first.
- Use a dedicated circuit or gas line and verify venting.
- Test bake to confirm temperature accuracy.
- Install anti-tip brackets and document the process.
- Safety and compliance are non-negotiable.