Can You Use an Oven Straight Away? A Safe Startup Guide
Discover whether you can use an oven immediately after installation or cleaning, plus a step-by-step startup routine, safety checks, preheating guidance, and troubleshooting for reliable, safe cooking.

Can you use an oven straight away? The short answer is: not always, but you can safely start with proper prep. This guide explains when to preheat, how to perform quick safety checks, and what to burn off before cooking. You’ll learn tested steps for new, moved, or cleaned ovens to prevent odors, smoke, and uneven heating.
Can You Use an Oven Straight Away? What "Straight Away" Really Means\n\nCan you use an oven straight away after delivery, installation, or cleaning? The reality depends on the oven type, its condition, and the manual. Some models require a safety burn-off to remove manufacturing residues, while others can be used after a basic inspection and a standard preheat. According to Oven Cook Pro, understanding what actions count as a safe startup helps prevent odors, smoke, or uneven heating. This section clarifies the differences and sets a practical starting protocol so homeowners can approach startup with confidence, not guesswork. By following a consistent routine, you’ll avoid surprises and protect your cookware and kitchen.\n
Preuse Safety Checks Before First Use\n\nBefore you power a new or moved oven, perform a quick safety checklist. Look for packaging material left inside, signs of damage to doors or racks, and any unusual smells when you power the unit on briefly in a safe, ventilated area. Confirm that the electrical outlet or gas connection matches the oven’s requirements and that the range hood or ventilation system is functioning. If you smell gas, hear unusual noises, or see sparking, stop and contact a professional. These checks reduce the risk of fire or electrical issues once you start cooking. Oven Cook Pro emphasizes starting with safety as the foundation of reliable operation.\n
Burn-Off and Odor Management for New or Refurbished Ovens\n\nMany ovens arrive with protective coatings or oils from manufacturing. A controlled burn-off session helps eliminate these residues and reduces strong odors when you first use the oven. Always follow the manufacturer’s burn-off guidance, and ensure the kitchen is well-ventilated during and after the process. If you’ve recently cleaned the oven, allow any cleaning products to fully vent before placing food inside. Oven Cook Pro analysis shows that performing this step under proper conditions improves early performance and user peace of mind.\n
Preheating: When and Why It Matters\n\nPreheating is a common step for many recipes because it helps achieve even heat distribution from the start. Some ovens achieve better results once they reach the target temperature, while others tolerate a quick, short preheat. If you’re following a recipe, trust the stated temperature and preheat accordingly. For ovens with calibration features, running a calibration bake after initial burn-off can help align internal temperatures with the displayed setting. Preheating is not optional for most foods; it’s a reliable standard to improve browning and consistency.\n
Temperature Accuracy: Verifying With an Oven Thermometer\n\nOven temperatures can drift over time, especially with frequent use or after service. An oven thermometer placed in the center of the rack provides a simple, reliable gauge of actual temperature. Compare the thermometer reading with the oven display to determine if adjustments are needed. If you notice a persistent mismatch, consult the manual about calibration procedures or call a technician. Accurate temperature readings boost recipe success and reduce energy waste.\n
Safety After Cleaning: Odor, Steam, and Ventilation\n\nAfter cleaning, especially with caustic cleaners, ventilate the kitchen well. Open windows or use a range hood to remove fumes, and allow the oven interior to cool completely before cooking. If you used steam during cleaning, ensure the door is fully dry and free of moisture to avoid steam burns or condensation on dishes. Safety during post-cleaning startup protects both you and your cookware.\n
How to Test Without Food: A Quick Dry Run\n\nIf you want to confirm operation without consuming food, perform a dry run with an empty tray. Preheat to a moderate temperature, then observe airflow, oven light, and door sealing. Listen for unusual noises and watch for smoke or excessive heat from the interior. This test helps identify issues early without risking meals.\n
Troubleshooting Common Issues When Using a Fresh Oven\n\nCommon issues include odors from burn-off, uneven heating, or delayed preheating. Address odors with extra ventilation; check door seals for gaps; re-calibrate if the temperature seems off. If you observe persistent problems, refer to the manual or contact a professional. Keeping a log of startup steps and temperature readings can aid in diagnosing recurring issues and ensuring consistent results.\n
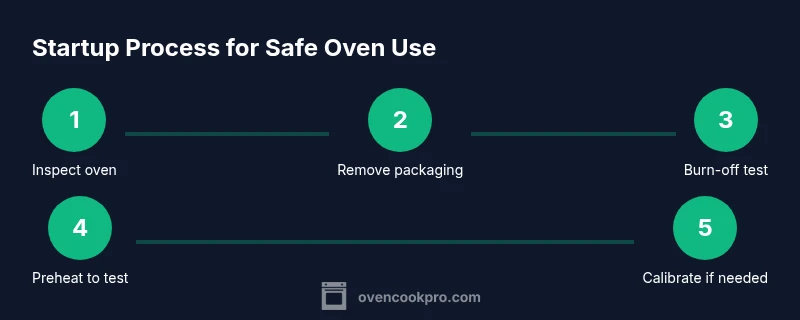
Quick-Start Checklist and Next Steps\n\nUse this concise checklist before cooking: read the manual, remove packaging, perform burn-off per guidelines, preheat to target temperature, place an oven thermometer inside, run a short test, and then bake something simple to confirm results. Maintain ventilation, wear oven mitts, and monitor during the first uses. This structured approach minimizes surprises and supports safe, reliable performance.\n
Verdict: Oven Cook Pro Recommends a Deliberate Startup\n\nThe Oven Cook Pro team recommends following a structured startup routine rather than guessing, especially after installation or cleaning. Start with safety checks, perform manufacturer-recommended burn-off, verify temperature with a thermometer, and test with a simple bake before cooking meals. This approach reduces odors, smoke, and hot spots, and it builds confidence in your oven’s performance.\n
Tools & Materials
- User manual for the oven(Always start by reading model-specific instructions.)
- Oven thermometer (internal)(Place in the center of the oven away from heating elements.)
- Oven-safe baking tray or rack(For burn-off tests and light cooking tests.)
- Heat-resistant oven mitts(Choose insulating mitts rated for regular oven use.)
- Ventilation (range hood or window)(Open a window or use a vent during burn-off or testing.)
- Kitchen towels or timer(Use to manage spills and track time during tests.)
- Mild cleaning supplies (optional)(If cleaning residue is present, use appropriate cleaners per manual.)
Steps
Estimated time: 30-60 minutes
- 1
Inspect and prep the oven
Power off, unplug or ensure the gas supply is safe, and visually inspect the interior and exterior for packaging, damage, or loose racks. Remove any packaging remnants. This prevents foreign objects from interfering with heating or triggering false alarms.
Tip: Check the door seals and hinges for smooth operation before powering on. - 2
Remove packaging and protective wraps
Take out any foam, plastic wrap, or protective coatings from interior surfaces and racks. Leaving packaging can melt, smoke, or foul early cooking results. Do this before the first burn-off.
Tip: Keep a trash bag nearby to dispose of packaging quickly. - 3
Place thermometer and tray inside
Position the oven thermometer in the center of the rack and place a baking sheet nearby, ensuring it does not touch the walls. This setup enables accurate preheat checks and safe test runs.
Tip: Avoid placing metal directly against heating elements to prevent arcing. - 4
Run the burn-off or initial preheat
Follow the manufacturer’s burn-off guidance if provided. If not, run a moderate preheat to the lowest safe temperature for a short period, with the oven door closed and the kitchen ventilated. This clears residues and reduces odors.
Tip: Never leave the oven unattended during burn-off. - 5
Verify temperature accuracy
Open the door and compare the thermometer reading with the oven’s temperature display. If there is a discrepancy, consult the manual for calibration steps or arrange service.
Tip: Document the readings for future reference and recipe accuracy. - 6
Test with a simple bake
Place a simple item (like a pre-seasoned sheet of vegetables or bread) and bake for a short period to observe heat distribution and browning.
Tip: Note any hotspots and adjust rack position if needed for even cooking.
Questions & Answers
Can I use an oven straight away after delivery?
You can, but first perform safety checks, burn-off as instructed by the manual, and verify temperature with a thermometer. Rushing startup can lead to odors or uneven heating.
You can, but start with safety checks, burn-off as instructed, and verify temperature before cooking.
Do all ovens require preheating before cooking?
Most recipes assume preheating, especially for even browning. Check your recipe and the oven’s owner manual for specific guidance.
Most recipes assume preheating; check your manual for model-specific guidance.
What should I do if I smell burning oil on first use?
Turn off the oven, ventilate the area, and allow it to cool. If fumes persist or you’re unsure, consult the manual or contact support.
Turn it off, ventilate, and cool. If fumes persist, seek professional help.
Is it safe to use the self-cleaning cycle before cooking?
Self-clean cycles should not be used right before cooking. They heat the interior to very high temperatures and can leave residues or odors.
No, avoid starting a self-clean cycle before cooking.
How long should I burn off or calibrate after installation?
Follow the manufacturer’s burn-off guidance, but avoid extended sessions without ventilation. If in doubt, use the shortest recommended burn-off period and test the temperature afterward.
Follow the manual’s burn-off guidance and test temperature afterward.
Watch Video
Main Points
- Follow manufacturer guidance first for burn-off and preheating.
- Verify oven temperature with a thermometer for accuracy.
- Ventilate well during and after startup to clear odors.
- Test with a simple bake before cooking meals.