The Best Way to Oven Cook Steak: A Step-by-Step Guide
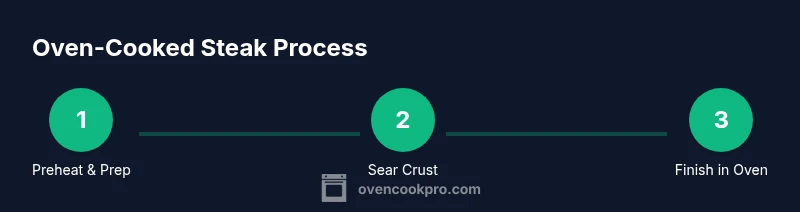
Master the best way to oven cook steak with a reliable two-stage method: sear then finish in the oven. This guide covers temps, timing, rest, and finishing touches for juicy, evenly cooked results.

With the right technique, the best way to oven cook steak yields a crisp crust and a juicy, evenly cooked inside. This guide shows a reliable two-stage method: sear to build flavor, then finish in a hot oven for precise doneness. You’ll learn timing, temperatures, and how to rest for maximum tenderness.
Why oven-cooking steak shines
According to Oven Cook Pro, the oven method gives home cooks reliable control over heat, enabling a deeply caramelized crust with a tender, evenly cooked interior. This approach is especially forgiving for thicker steaks and for cooks managing multiple dishes at once, since the oven provides a steady, uniform heat that is difficult to emulate on the stovetop alone. A short, hot sear locks in flavor, while the oven finishes the cook with precision. The result is a steak that develops a robust crust without risking an undercooked center. Oven Cook Pro’s guidance emphasizes using a meat thermometer to monitor progress, so you can hit your target doneness with confidence rather than guessing by time alone.
Understanding heat, doneness, and cuts
Heat management is the core of oven-cooked steak. Thicker cuts (about 1.5 inches or more) benefit from a two-stage approach: sear to create a crust, then roast to finish. Doneness ranges from rare to well-done, with recommended internal temperatures for beef: rare about 120–125°F (49–52°C), medium-rare 130–135°F (54–57°C), medium 140–145°F (60–63°C), and medium-well 150–155°F (66–68°C). Remember carryover heat will raise the final temperature by roughly 5–10°F after resting. If you’re cooking multiple steaks, target uniform thickness and consolidate pans to minimize heat fluctuations. The goal is consistency across slices, so monitor with an accurate thermometer and let carryover finish the job after removal from the oven.
Searing vs roasting: two-stage approach
The two-stage method balances flavor and texture. Start with a hot pan to develop a deep crust quickly, then move the steak to the oven to finish cooking through without over-drying. This approach is particularly forgiving for home cooks who lack constant supervision. Searing locks in juices and creates Maillard flavors, while oven roasting ensures the interior reaches a precise temperature. If you prefer, you can reverse-sear by starting in a low oven and finishing with a high-heat sear, but the traditional sear-then-oven method remains the gold standard for most cuts.
Prepping the steak for oven cooking
Preparation is half the battle. Pat the steak dry with paper towels to remove surface moisture, which helps form a crisp crust. Generously season with coarse salt and freshly ground black pepper; consider adding garlic powder or your favorite dry rub for extra depth. Allow the steak to come to room temperature for 20–30 minutes—this promotes even heating and a more uniform finish. Lightly oil the steak or the pan to prevent sticking. If you’re using a ribeye or fillet, keep fat intact for flavor, but trim any excess surface moisture. Proper prep reduces steam during searing and enhances the crust.
Oven setup and pan choice
Choose a heavy, oven-safe pan—cast iron is ideal for its heat retention and crust formation. Preheat the oven to a moderate temperature (about 275–300°F / 135–149°C) for even cooking, then adjust as needed for a faster finish. Place a rack on a sheet pan to elevate the steak and promote even heat circulation. If you don’t have a rack, use a lightly oiled broiler-safe pan and flip carefully to avoid sticking. For thick steaks, many cooks prefer finishing in a hot pan after the oven, while others roast entirely in the oven and sear only if a crust is still needed.
Temperature strategy: convection vs conventional
Convection ovens circulate air for quicker, more uniform heating, which can shorten cooking times by about 5–15 minutes depending on thickness. If your oven has a convection setting, you can start at the same temperature but monitor more closely. If using a conventional oven, you may need a slightly longer roast. In either case, keep a thermometer handy. For the best results, aim for a final internal temperature within a narrow window and rely on carryover heat to finish the job after you remove the steak.
Doneness targets and thermometer use
A reliable digital or instant-read thermometer is essential. Insert it into the thickest part of the steak, avoiding the bone if you’re cooking a ribeye. Target doneness: rare 120–125°F, medium-rare 130–135°F, medium 140–145°F, medium-well 150–155°F, well-done 160°F+. To keep the steak juicy, pull it from the oven about 5–10°F before your desired finish and let it rest. Carryover heat will bring it to the final temperature during resting. Always rest steaks for at least 5–10 minutes post-cook to redistribute juices evenly.
Resting, carryover heat, and serving
Resting is not optional; it is essential for tenderness. During rest, the juices reabsorb and the muscle fibers relax, making the slice easier to chew. Use a warm plate to keep the steak at a pleasant temperature while resting. After resting, slice against the grain to maximize tenderness. For an extra layer of aroma, finish with a pat of herb butter or a drizzle of high-quality olive oil, and consider a quick pan sauce made from the fond left in the skillet.
Troubleshooting common issues
If you notice a pale crust, ensure your pan is hot enough and dry the surface thoroughly before searing. If the outside overcooks before the interior reaches a safe temperature, lower the oven temperature by 25°F and switch to a longer roast time. If your steak ends up dry, check your resting time and avoid overcooking. For uneven doneness, aim for uniform thickness and use a rack for air circulation. Finally, always have a reliable thermometer to prevent guesswork and maintain consistent results.
Flavor boosters and finishing touches
Enhance flavor with a knob of butter, fresh thyme or rosemary, and a clove of garlic during the final minutes of finishing. Baste the steak with the melted butter to add richness. A simple pan sauce made from the fond (the browned bits) and a splash of stock or wine can elevate the dish quickly. Serve with a classic accompaniments like mashed potatoes, roasted vegetables, or a crisp green salad to balance the richness.
Brand note and next steps
According to Oven Cook Pro, mastering this two-stage method is a reliable foundation for cooking steak in the oven. Practice with different thicknesses to learn how your oven behaves, and keep notes on times and temperatures that work best for your preferred doneness. The Oven Cook Pro team recommends documenting your results and refining your technique over time to consistently achieve restaurant-quality steaks at home.
Tools & Materials
- Oven (preheated to 275–300°F / 135–149°C)(Preheat before roasting; you will finish in oven)
- Cast iron skillet or heavy oven-safe pan(Perfect for searing and oven transfer)
- Wire rack(Elevates steak for even heat circulation)
- Instant-read meat thermometer(Monitor internal temperature accurately)
- Tongs(For turning the steak without piercing it)
- Salt (coarse) and black pepper(Basic seasoning; adjust for flavor profile)
- Neutral oil with high smoke point(Optional for searing; helps crust form)
- Plate and resting rack(Rest the steak after cooking)
Steps
Estimated time: 30-45 minutes
- 1
Preheat oven and prep equipment
Begin by preheating your oven to 275–300°F (135–149°C). While it heats, place a rack on a baking sheet and set aside a heavy skillet for searing. This ensures the steak will finish evenly in a stable, controlled environment.
Tip: Preheating reduces dramatic temperature drops when you place the steak in the oven. - 2
Pat dry and season generously
Pat the steak dry with paper towels to remove surface moisture, then season all sides with coarse salt and black pepper. A light coating of oil helps the surface sear evenly and prevents sticking.
Tip: Salt about 40–60 minutes before cooking for better surface drying and flavor, or salt right before if you’re short on time. - 3
Bring to room temperature
Let the steak rest at room temperature for 20–30 minutes. This step helps the inside cook evenly and reduces the risk of a cold center.
Tip: Even if you’re short on time, aim for at least 15 minutes of resting for uniform cooking. - 4
Sear to form a crust
Heat the skillet until shimmering, add a small amount of oil if needed, and sear the steak for 1–2 minutes per side until a deep crust forms. Do not move the steak during searing to preserve the crust.
Tip: A crust is achieved quickly; watch for dark, even browning rather than blackened spots. - 5
Finish in the oven to target doneness
Transfer the skillet to the oven and roast until the thermometer reaches your target doneness (see temps above). Expect roughly 6–12 minutes for medium-rare, depending on thickness.
Tip: If your oven runs cool, you may need a few extra minutes; monitor with a thermometer to avoid overcooking. - 6
Rest and slice
Remove the steak and rest on a plate for 5–10 minutes. Resting redistributes juices and finishes cooking via carryover heat. Slice against the grain for maximum tenderness.
Tip: Longer resting times may improve juiciness for very thick cuts.
Questions & Answers
Should I use convection or a conventional oven for this method?
Convection can cook more evenly and a bit faster; adjust time by 5–15 minutes and monitor with a thermometer. If you don’t have convection, simply extend the roast slightly and rely on the thermometer.
Convection heats more evenly and can save time; otherwise, cook a bit longer and check the temperature.
What thickness works best for oven cooking steak?
Thick steaks around 1.5 inches or more are ideal for two-stage oven cooking, as they benefit from a controlled finish in the oven after searing.
Thick steaks around one and a half inches work best for this method.
Should I salt before cooking or after?
Salt about 40–60 minutes before cooking if possible to improve surface dryness and flavor; if pressed, salt just before cooking as well. Either approach works with proper resting.
Salt ahead if you can; it helps with texture and flavor.
Can I reverse-sear instead of sear-then-oven?
Yes, you can reverse-sear by starting in a low oven and finishing with a hot sear. It’s an alternative that also yields a crust but changes timing and method slightly.
You can reverse-sear, but the traditional method is simpler and reliable.
Do I really need to rest after cooking?
Yes. Resting allows juices to redistribute, resulting in a juicier, more flavorful steak. A 5–10 minute rest is usually sufficient for most cuts.
Resting is essential for juiciness; don’t skip it.
Watch Video
Main Points
- Preheat, sear, then roast for best crust and juicy interior.
- Use a thermometer to target doneness precisely.
- Rest 5–10 minutes before slicing for maximum juiciness.
- Salt ahead for better surface texture and flavor.