Steak Oven Mastery: Sear, Bake, Perfect Every Time
Master the steak oven method with a high-heat sear and precise oven finish. This guide from Oven Cook Pro covers temps, timing, and safe handling for delicious, reliable results.

In this guide, you'll learn how to cook a steak in the oven using a high-heat sear then a precise finish, achieving a juicy, flavorful result. You'll need a hot oven, a skillet, a meat thermometer, and a resting rack. This step-by-step method includes timing guidelines, safe handling, and tips for variations for different doneness levels.
Getting the basics right: steak oven method
The steak oven method blends a fast, high-heat sear with a controlled oven finish to produce a crusty exterior and evenly cooked interior. This approach is beginner-friendly and highly repeatable when you follow a few core principles: pat the steak dry to maximize browning, preheat your pan, and monitor the internal temperature with a thermometer. According to Oven Cook Pro, the strategy reduces guesswork and helps home cooks achieve restaurant-quality results with minimal equipment. You’ll learn how to select the right cut, prepare it safely, and set up your kitchen so the oven does most of the heavy lifting while you maintain control of timing and doneness.
Selecting the right cut and prep matters
For the steak oven method, start with a well-marbled cut like ribeye, New York strip, or filet mignon that is 1 to 1.5 inches thick. Thicker steaks need a bit more oven time, thinner cuts finish quicker. Bring the steak to room temperature for 20-30 minutes to ensure even cooking, and pat it dry again just before searing. Lightly oil the surface and season generously with salt, plus any pepper or spices you prefer. If you salt ahead, allow the salt to penetrate for better crust. The goal is a deeply flavored crust that seals in juices without drying out the interior. Remember, the oven will continue the cooking after you finish searing, so plan your doneness target accordingly.
Searing for crust: heat, oil, and timing
A cast-iron skillet works best for this method due to its heat retention and even browning. Heat the pan until it is very hot, then add a high-smoke-point oil such as avocado or canola. Place the steak in the pan and resist the urge to move it for 1 to 2 minutes, allowing a rich crust to form. Flip and sear the other side for another 1 to 2 minutes. If you’re using aromatics like garlic or thyme, add them after the first flip and baste with melted fat to boost flavor and crust development. This step creates the Maillard reaction that’s the hallmark of a good steak crust.
Finishing in the oven: temperature, time, and doneness targets
Preheat your oven to a hot setting, typically around 425–475°F (220–245°C). Transfer the skillet to the oven after searing and cook until the desired doneness is achieved according to a thermometer. Target ranges commonly cited by home cooks are roughly 120–125°F (49–52°C) for rare, 130–135°F (54–57°C) for medium-rare, and 135–145°F (57–63°C) for medium, with carryover cooking continuing after removal. Remove the steak a few degrees below the final goal, since it will rise during resting. Rest the meat on a rack for 5–10 minutes to redistribute juices. If you prefer, you can finish with a quick 30–60 second blast under the broiler for extra crust, but use caution to avoid overcooking.
Equipment you actually need: pan, thermometer, and setup
To execute this technique consistently, you’ll want a sturdy, oven-safe skillet (cast iron preferred), a reliable meat thermometer, a rack for resting, and a sheet pan to catch drips. A pair of long tongs helps you flip the steak cleanly without piercing the meat. Keep paper towels handy for drying and patting, and have butter or aromatics ready if you plan to baste. While this list looks simple, having the right tools prevents common mistakes and yields more predictable results in weeknight cookers.
Step-by-step overview: prep, sear, finish, rest, and serve
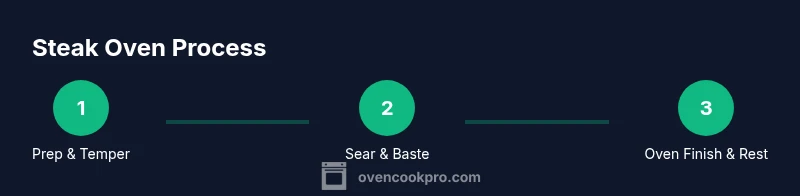
This overview gives you the big picture before you dive into the formal step-by-step. Start with tempering and drying the steak, then sear to develop a crust. Move the pan to a hot oven and monitor the temperature until you reach the target doneness. Remove, rest, and slice across the grain for maximum tenderness. Finish with a simple garnish of flaky salt, a dollop of herb butter, or a drizzle of olive oil for extra richness. While this section summarizes the flow, the formal STEP-BY-STEP section provides explicit actions you can follow moment-by-moment.
Common mistakes and how to fix them
Even seasoned cooks make a few slip-ups with the steak oven method. Avoid crowding the pan, which lowers heat and stalls browning. Pat steak dry to remove surface moisture that would steam instead of sear. Don’t salt too late; salt early for a better crust. If your crust isn’t forming well, raise the heat slightly and ensure the pan is truly hot before adding the steak. If the interior cooks unevenly, consider using a thicker cut or lowering the oven temperature slightly and increasing the sear time to balance crust formation with internal doneness.
Finishing touches: sauces, seasoning, resting, and carving
Rest is essential after the oven finish, so use a rack rather than the plate to prevent soggy surfaces. Lightly salt or finish with cracked pepper just before serving. A simple herb butter, chimichurri, or a splash of olive oil can elevate a straightforward steak. Slice against the grain to maximize tenderness and present with a clean knife cut. If you’re serving multiple steaks, keep leftovers wrapped and refrigerated; double-wrap if you plan to store longer. This section helps you think beyond the cook and toward a satisfying plate.
Safety, storage, and cleaning after steak oven
Always handle hot cookware with barrier protection like oven mitts and avoid placing a hot skillet directly on a cold countertop to prevent thermal shock. Allow the pan to cool before washing and avoid soaking a hot skillet in cold water. Store steaks in the fridge within two hours of cooking and use within a couple of days for best flavor. Clean surfaces promptly to prevent cross-contamination and reuse leftover pan drippings for flavor-safe sauces, if desired.
Tools & Materials
- Cast-iron skillet (oven-safe, at least 10 inches)(Excellent heat retention for crust; ensure handle is oven-safe)
- Oven-safe rack and baking sheet(Use to elevate the steak and catch drips)
- Instant-read meat thermometer or probe thermometer(Essential for accurate doneness without guessing)
- Tongs(For turning steak without piercing juices)
- Paper towels(Pat dry before searing to promote crust)
- High-smoke-point oil (avocado, canola, or grapeseed)(A small amount is enough to prevent sticking and aid browning)
- Butter and optional aromatics (garlic, thyme)(For basting and enhanced flavor during sear)
Steps
Estimated time: 25-35 minutes
- 1
Temper and pat dry
Remove the steak from the fridge and pat dry with paper towels. Lightly salt and let it come to room temperature for 20-30 minutes to ensure even cooking. The goal is a dry surface for an optimal crust.
Tip: Salt at least 20-30 minutes ahead for deeper crust and better seasoning penetration. - 2
Preheat the pan
Place a cast-iron skillet on the stove over high heat and let it get very hot. A hot pan is key to a fast, flavorful sear that locks in moisture.
Tip: A thin film of oil should shimmer and smoke slightly before adding the steak. - 3
Sear the first side
Carefully lay the steak in the skillet and sear without moving for 1-2 minutes until a crust forms. Use tongs to lift and check for deep brown color.
Tip: If the crust sticks, give it another 15-30 seconds; resist the urge to flip early. - 4
Sear the second side
Flip the steak and sear the other side for 1-2 minutes. If using aromatics, add them now and baste with melted fat for extra flavor.
Tip: Basting helps distribute fat-soluble flavors and speeds crust formation. - 5
Finish in the oven
Transfer the skillet to a preheated oven at 425–475°F (220–245°C). Cook until the thermometer reaches your target doneness, then remove the pan from the oven.
Tip: Use a rack underneath to avoid soggy crust; don’t forget carryover cooking will continue after removal. - 6
Rest the steak
Let the steak rest on a rack for 5-10 minutes before slicing. Resting redistributes juices and yields a juicier bite.
Tip: Tent lightly with foil if desired, but don’t cover tightly to preserve crust texture. - 7
Check doneness and slice
Check the internal temperature with the thermometer and slice against the grain for maximum tenderness.
Tip: If you’re unsure about doneness, err on the side of slightly undercooking and finish with a brief rest.
Questions & Answers
What thickness is best for the steak oven method?
Steaks around 1 to 1.5 inches work best, providing a reliable crust with a predictable finish. Thicker cuts will need longer oven time, while thinner cuts finish quickly and risk overcooking.
Thicker cuts take longer in the oven; a one to one and a half inch thickness is ideal for a balanced crust and doneness.
Convection or not in the oven?
Convection can help with even crust and faster heat transfer, but you can achieve great results with a conventional oven by adjusting times slightly and ensuring the oven is fully preheated.
Convection helps crust and speed up cooking, but a conventional oven works fine with careful timing.
How long should I rest after cooking?
Rest the steak for 5 to 10 minutes after removing it from the oven to let juices redistribute. Resting improves tenderness and juiciness.
Rest it for about 5 to 10 minutes to keep juices inside the meat.
Can I cook a frozen steak in the oven?
It’s best to thaw the steak before cooking for an even finish. Frozen meat cooks unevenly in this method and can lead to a less desirable crust.
Thaw the steak first for consistent browning and even doneness.
What about salt timing?
Salt ahead 20–40 minutes when possible to enhance crust and flavor. If you’re short on time, salt just before searing is acceptable, but you may miss some crust development.
Salt in advance if you can; it helps flavor and crust, but a quick salt before searing still works.
What if the crust won’t brown?
Increase pan heat slightly or start with a hotter oven preheat to kick-start browning. Ensure the surface is dry and the skillet is properly seasoned for better searing.
Make sure the pan is truly hot and dry; you should hear a steady sizzle when the steak hits the pan.
Watch Video
Main Points
- Season early to maximize crust
- Preheat the pan for consistent browning
- Use a thermometer to hit target doneness
- Rest before slicing to preserve juiciness
- Finish with a hot oven for even cooking