Oven Finished Steak: A Step-by-Step Guide to Oven Finish
Learn how to finish steak in the oven for a juicy, evenly cooked result. This comprehensive guide covers searing, oven finish, resting, and serving with pro tips from Oven Cook Pro.

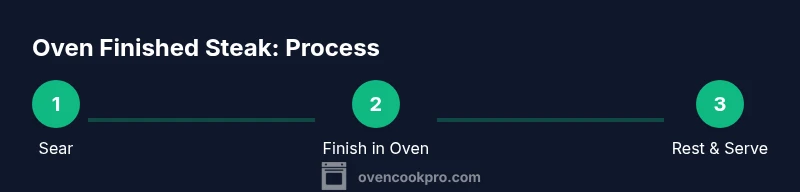
Finish a steak in the oven for a juicy, evenly cooked result. Start with a fast sear on high heat to develop color, then move to a hot oven to reach your target doneness. Monitor with a thermometer, rest the steak before slicing, and vary times based on cut thickness for best results.
Why oven finish works for steak
Oven finishing combines the best of two cooking worlds: the crust from a hot skillet and the gentle, even heat of the oven. This method reduces the risk of overcooking the exterior while allowing the interior to reach precise doneness. It is especially forgiving for thicker cuts where a long sear alone could scorch the outside before the center cooks through. By using a thermometer, you can dial in exact temperatures and rest times, achieving consistent results across different cuts and thicknesses. In practice, the oven finish helps you maintain juiciness without chasing an unpredictable grill flame.
From a home cook's perspective, this approach works well for ribeye, porterhouse, or sirloin, offering flexibility to adapt to what’s on hand. The key is starting with a high-heat sear to build flavor and using the oven to finish with controlled heat. The Oven Cook Pro Team recommends pairing with simple sides to highlight the steak’s natural richness.
Selecting the right steak for oven finish
Thickness and marbling greatly influence the outcome of an oven-finished steak. Thicker cuts with generous marbling tolerate oven finish better, producing a buttery interior with a crisp exterior. Look for even color and no gray bands along the meat, and choose cuts with a uniform shape for even cooking. If you reach for a leaner cut, plan for slightly longer resting times and be mindful of the pan temperature to avoid surface drying. Regardless of cut, letting meat rest after cooking helps juices redistribute, ensuring each bite stays moist. The Oven Cook Pro Team notes that selecting the right steak is half the victory—flavor starts with quality.
Tools, temperature, and prep
To execute an oven finish reliably, assemble the right tools: a heavy skillet (preferably cast iron), a sturdy set of tongs, an instant-read thermometer, and a rack for resting. Preheat the oven to a hot setting and ensure your rack is in the center position for even heat distribution. Prep the meat by patting dry, trimming excess fat if needed, and applying a generous dusting of salt and pepper. Some cooks like to add a touch of garlic powder or a light brush of oil to promote browning, but the core principle is minimal interference with the crust. Preheating and dry surface are the two most impactful prep steps for a crusty exterior.
The resting, slicing, and serving guidance
Resting is essential after oven finishing. Keep the steak on a rack away from direct heat for about 5–10 minutes to let juices redistribute and the interior relax. Slice against the grain in thin, even cuts to maximize tenderness, and season lightly with salt just before serving to enhance flavor without drawing moisture. A final pat of butter, a sprinkle of flaky salt, or a drizzle of olive oil can elevate the crust and add shine. Present the steak with a simple garnish like fresh herbs, and let the audience see the juices surface as you cut to demonstrate doneness visually.
Variations and common mistakes
Butter baste during the last minute of oven finish for added richness if desired, but watch for flare-ups. If your steak finishes early, tent with foil and allow it to rest; avoid the temptation to cut immediately. Avoid overcrowding the oven or pan; cook in batches if needed. For best results, avoid crowding the oven, keep the surface dry for maximum browning, and monitor the internal temperature closely rather than guessing doneness. The Oven Cook Pro Team encourages experimentation with different herbs and finishing oils to tailor flavor to personal preference.
Safety and cleanup essential tips
Always use oven mitts and a dry towel to handle a hot skillet. Place the pan on a heatproof surface and allow it to cool before washing. Clean your oven-safe pan promptly to build a habit that keeps your kitchen safe and efficient. Keep flammable materials away from the stovetop and oven and dispose of hot oil carefully to prevent fires. A well-maintained setup reduces the risk of accidents during future cooks.
Tools & Materials
- Cast iron skillet or heavy oven-safe pan(Well-seasoned is best; 10–12 inch size works for most steaks)
- Tongs(Use sturdy, non-slip grips)
- Instant-read meat thermometer(Probe should reach center of thickest part)
- Oven(Preheat to a high temperature (425–450°F))
- Rack for resting(Elevates the steak to prevent steaming)
- Paper towels(Pat meat dry before seasoning)
- Optional: butter, garlic, fresh herbs(For finishing melt and flavor)
- Knife(Sharp blade for clean slicing)
Steps
Estimated time: 30-60 minutes
- 1
Prepare steak and equipment
Remove steak from fridge and pat dry. Let it come to room temperature for about 15-20 minutes to ensure even cooking, then pat dry again to maximize browning. Gather your pan, thermometer, tongs, and resting rack so everything is within reach.
Tip: Patting dry is essential for crust formation. - 2
Preheat pan and oven
Heat your cast iron over high heat until the surface is shimmering and hot to the touch. Preheat the oven to a hot temperature so you can finish the steak quickly after searing. A hot pan plus hot oven creates a strong crust with a juicy interior.
Tip: A dry, hot surface improves browning. - 3
Season generously
Pat the steak dry again if needed, then season evenly with salt and pepper. For added flavor, you can include a light garlic powder or a small amount of your favorite dry rub, but avoid masking the beef’s natural flavor.
Tip: Keep seasoning simple to let the beef shine. - 4
Sear the first side
Place the steak in the hot pan and sear without moving for 1-2 minutes until a deep crust forms. Do not overcrowd the pan; if cooking more than one steak, sear in batches.
Tip: A brown crust locks in juices. - 5
Flip and sear the other side
Turn the steak and sear the opposite side for another 1-2 minutes to form a crust. A quick, even sear helps develop flavor without overcooking the interior.
Tip: Use tongs for a gentle grip to avoid piercing the meat. - 6
Finish in the oven
Transfer the pan to the oven and cook until the internal temperature reaches your target doneness. Start checking after about 3-6 minutes, depending on thickness; use the thermometer to confirm doneness.
Tip: Remove from oven a few degrees early; carryover cooking will finish the job. - 7
Rest and slice
Remove the steak from the pan and rest on a rack for 5-10 minutes to redistribute juices. Slice against the grain and season lightly with salt if desired before serving.
Tip: Resting is essential for juiciness. - 8
Optional finish with butter
If desired, brush with a small amount of melted butter and herbs during the final minute for extra richness. Let it rest briefly after finishing to allow flavors to meld.
Tip: Butter adds flavor but should not overwhelm the beef.
Questions & Answers
What is oven finished steak?
Oven finished steak is a method where a steak is seared on the stove to build a crust and then finished in a hot oven to reach precise doneness. This technique provides even cooking and a juicy interior.
Oven finished steak is seared and finished in the oven for even cooking and juiciness.
What temperature should I use for oven finish?
Sear the steak on a hot surface, then finish in the oven at a high temperature (roughly 425–450°F range) and monitor with a thermometer for your target doneness.
Finish in a very hot oven while watching the internal temperature.
How long should I sear before finishing in the oven?
Sear each side for 1-2 minutes until a deep crust forms. The exact time depends on thickness and heat; aim for a well-browned crust without cooking too far inside.
Sear each side 1-2 minutes until well browned.
Can I finish different cuts in the oven?
Ribeye, sirloin, and other tender cuts respond well to oven finishing. Thicker steaks benefit most from the method; adjust times based on thickness and desired doneness.
Yes, most tender cuts work; adjust time by thickness.
Is resting important after oven finish?
Yes. Resting 5-10 minutes lets juices redistribute, resulting in a juicier slice. Slice against the grain to maximize tenderness.
Resting is essential for juiciness and tenderness.
What are common mistakes to avoid?
Crowding the pan, under-seasoning, or not using a thermometer can lead to uneven doneness. Avoid overcooking by removing from heat a few degrees early to account for carryover cooking.
Common mistakes include crowding and not using a thermometer.
Watch Video
Main Points
- Sear, then finish in the oven for best crust and doneness.
- Use a thermometer to hit target temps, not guesswork.
- Rest the steak to keep juices inside.
- Season simply to let beef flavor shine.